Outgoing Ads
INTRO TO OUTGOING ADS
In this chapter we will cover Outgoing ads. Outgoing Ads are a collection of advertisements (videos, images and animations) called Ad packages that are created by the advertisers. Advertisers are individuals and businesses who push their Ad packages to their own screens or public screens available through the mediaADNET.
The process includes:
- Build an Outgoing Ad Package
- Find available Screens (private or through the mediaADNET)
- Set the Start and End Date / Time for the Ad Package
- Configure the Ad Package with Advertisements / Resources
In the Setup incoming Ads chapter we introduced the Advertising engine; a set of tools used by a Digital Signage network operator to accept or deny incoming Ad packages. If accepted, the Ad package will run on the designated screen for the duration set on the Ad package. At the end of each month the Digital Signage network operator can provide a detailed proof of play report for the Advertisers.
In this chapter we will cover the Advertising Engine from the point of view of the Advertiser; building Outgoing Ads.
|
|
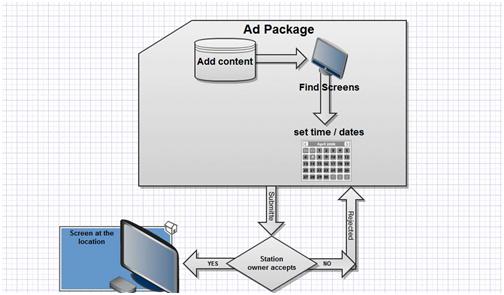
First, an Ad package needs to be created. An Ad package is made of resources including videos, images and animations.
|
|
Next, the Advertiser needs to find available Screens to play the Ads.
|
|
The Ad package will be set to play within certain times; when the advertisement package will start running and when it will end. He will also set a start and an end date to define Ad package playback date ranges.
|
|
Next, the Advertiser will submit the Ad package.
|
|

The Station owner will either accept or reject the incoming Ad package. Keep in mind that in a small Digital Signage network it may very well be that a Digital Signage Network operator will use both the Outgoing Ads (create Ad packages) as well as the Incoming Ads (approve Ad packages), and if that is the case it is possible to set an automated approval process.
|
|
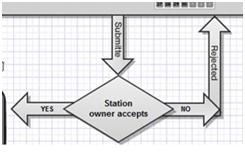
If the Ad package is accepted by the Station owner, it will begin playback on the selected Screens.
If the Ad package is rejected, the creator will receive a notification through the SignageStudio.
|
|
Using our sample scenario from the Incoming Ads chapter, Joe the accountant was looking to advertise at the Coffee shop and it was up to the owner of the Digital Signage network to accept or reject the incoming ad package. Now, we will cover the Advertising engine from Joe's perspective. We'll explain how to prepare and submit an Ad package using the Outgoing Ads.
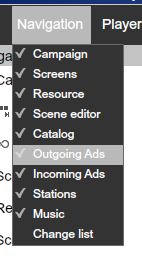
To use the Outgoing Package manager you must enable its functionality from the main file menu of the SignageStudio. Click on the File menu > Navigation button and enable the Outgoing Ads feature.
|
|
|
|

OUTGOING ADS USER INTERFACE
The Outgoing ads include:
- 1. Packages Panel
- 2. Toolbox Panel
- 3. Content Section
- 4. Group Section
- 5. Properties Panel
PACKAGES PANEL
The Packages panel is located by on the left side of the user interface, below the main Navigation menu. You'll use this area to create Ad packages or delete existing ones.
ADDING AD PACKAGE
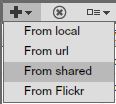
To create a new Advertising package, you click on the Add button.
|
|

|
|
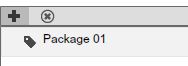
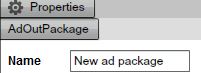
The newly created Package will have a default name.
DELETING AD PACKAGE
To delete an existing Ad package, select it and click on the DELETE button.
|
|

|
|

You have the option to choose YES and DELETE the selected Ad package or you can click on the NO button and CANCEL the operation.
AD PACKAGE TOOLBOX
The toolbox panel is located next to the main Navigation menu:
- 1. Resources Directory
- 2. Station Picker
RESOURCES DIRECTORY
In the Resources directory you'll upload all files included in your Ad packages. We've covered this in the chapter on Resources.
|
|

After you imported the selected Ad files you can include them in your Ad package.
|
|
STATION PICKER
The Station picker allows an advertiser to search for available Stations in the Ad network.
Access the Station Picker by clicking on the tab in the Toolbox panel. An advertiser can search a local / private network, which is often the case if the Digital Signage Network operator is also the one creating the Ad packages on behalf of his Advertising clients. An Advertiser can also search the public network; the mediaADNET.
Note that as an Enterprise user you have the ability to hide the entire mediaADNET from users; thus only exposing them to your own private screens.
|
|

Search properties:
- 1. Search Criteria Fields
- 2. List of Found Stations
- 3. Description of Found Stations
SEARCH CRITERIA FIELDS
Search options:
- 1. Name
- 2. Location
|
|
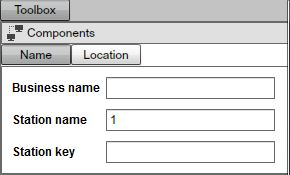
The Name allows the advertiser to search for available advertising Stations using:- 1. Business name
- 2. Station name
- 3. Station key
|
|
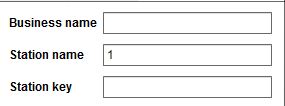
You can search for available advertising stations by entering a business name. A business name corresponds to the name picked by a user when he opened his account on the mediaCLOUD.
|
|

Click on the Search button to start searching for the Stations. The system will list all the Stations found.
|
|

SEARCH BY NAME
You can search for available advertising Stations by entering a Station name as defined by the Screen Owner.
|
|

Click on the Search button the start searching for the Stations. The system will list all the Stations found.
SEARCH BY STATION KEY
In the Incoming Ads chapter we explained that a station owner can set keywords, or searchable keys. The keys are used to increase the chances others will find the screen. When an Advertiser wants to find available Stations using searchable keys, he will enter relevant words that could match the keywords set by the Station owner.
|
|

|
|

LOCATION SEARCH CRITERIA
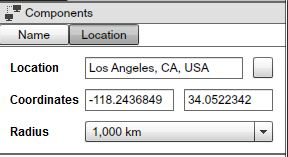
The second option used as search criteria is Location.
- 1. Location
- 2. Coordinates
- 3. Radius
|
|
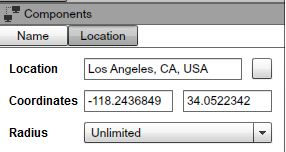
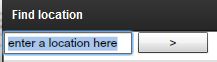
The Location field can be used by typing a location or US ZIP code. To enter a Location, click on the square located to the right of the Location field.
|
|

|
|
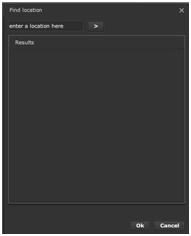
Enter the address location or US ZIP code.
|
|
|
|

The system will search by location and if it finds a match, it will display it using the result map.
|
|
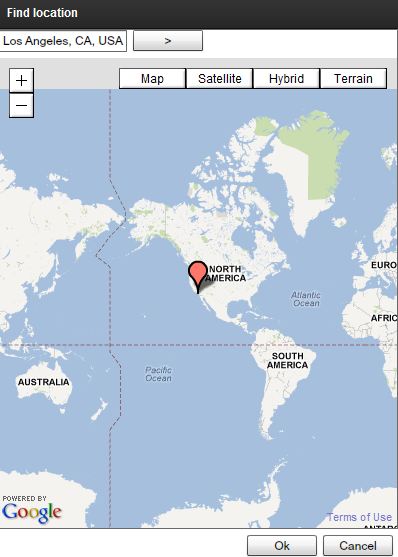
Click OK to accept or Back
RADIUS
Enter a radius to search for Stations within a kilometers range of the set location.
|
|

COORDINATES
The Coordinates field is used to display the GPS Latitude and Longitude of a selected Location.
|
|
Click on the Search button to begin the search.
|
|

FOUND STATIONS
If the system found Stations that match your search criteria, it will display the output in the result list.
|
|

- 1. Domain
- 2. Business
- 3. Station
- 4. Distance
|
|

In the Domain column, the system will display the name of the Domain under which the Station is registered.
In the Business field, the system will display the name of the Business related to the Station owner.
In the Station column, the system will display the name of the Station that was found using the search feature.
In the Distance column, the system will display the distance between the actual location of the Station and the Location you set in the search field.
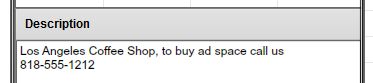
Select any found Stations to view additional information under the Description field.
In the "Incoming Ads" chapter we explained that a Station owner can use the Description field to add comments about the Station like pricing and contact information.
|
|

CONTENT
When creating a new Ad package, the Content of the Ad package will initially be empty.
|
|

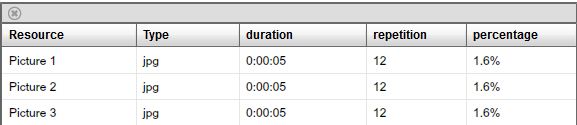
To add content (as in videos, images and animation resources), drag resources into the Content area.
|
|
|
|

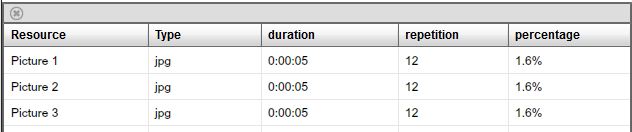
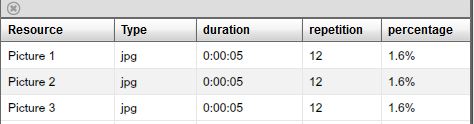
- Resource (name of the resources)- Type (the file type)- Duration (length of resource)- Repetition (how many times to play Resource per hour)- Percentage (how much of an hour should the resource occupy)
An Advertiser can change the values for the Repetition and Percentage fields.
Note that if multiple Stations were added to a single Ad package, any change made to the content properties will affect all stations running the particular Ad package.
GROUPING
After you added the content of the Ad package, you can associate one or more Stations; essentially grouping them.
The Group section of the Outgoing Ads category is where you associate Stations that you want to run the Ad package on.
ADD STATION TO GROUP
After you found one or more Stations using the search feature, you can use your mouse to drag it/them into the Group section.
|
|

The Group section contains several columns:
- Domain (name of Domain used by the Station owner)
- Business (name of Business/user of the Station owner)
- Station (name of the Station)
- Weekdays (days in which the Ad package will play on)
- Hour Start (time when Ad package begin playing)
- Hour End (time when Ad package will stop playing)
- Status (current package status)
The Weekdays, the Start hour and the End hour parameters will be set by the Advertiser before submitting the ad package.
DELETING STATION
You can delete any Station added to the Group using the DELETE button.
|
|

To delete a Station from the Group, select it and click on the Delete button.
|
|
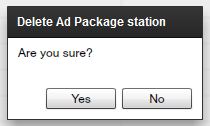
Choose YES to DELETE the Ad package Station or you can click on NO and CANCEL the operation.
Remember, you can add unlimited number of Stations to the Advertising Group; across campaigns and across businesses, making it easy to manage thousands of stations with a click of a button.
AD PROPERTIES PANEL
The properties panel area is located on the right side of the user interface. It can be used for various settings, depending on the selection you make within the sections.
AD OUT PACKAGE PROPERTIES PANEL
Select the Ad package added to access its properties panel.
|
|

|
|
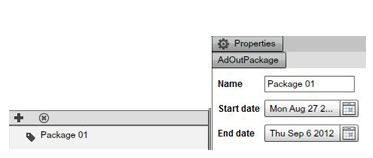
To change the name of an Ad package, select it and then type the new name in the "name" field.
|
|

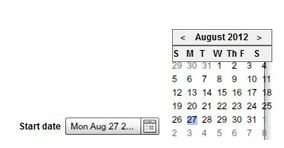
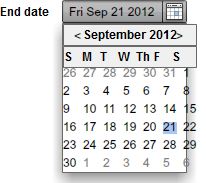
Set the date when the selected Ad package will start playing. Click on the calendar icon to choose a certain date.
|
|
Here you can set the date when the selected Ad package will end playing. Click on the calendar icon to choose a certain date.
|
|
CONTENT PROPERTIES PANEL
After you add a resource to the content section of the Outgoing Ads, you can access its properties panel by selecting it.
|
|
pic12590jpg
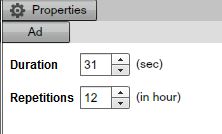
- Duration
- Repetitions
Increase or decrease the duration of a selected resource by entering the desired value in the Duration field. To accomplish this you can also use the up and down arrow keys.
|
|
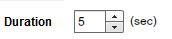
For example, if you have an image with the duration set to 5 seconds, it will play for the specified length of time before moving to the next Ad resource.
REPETITION
The repetition field refers to the times the selected resource will attempt and run within a single hour. In the snapshot below, we have a repeat value set to 12 times within an hour. The value is only "best effort" setting as some stations may be overbooked with Advertisements and so total playback may vary.
|
|

The duration and repetitions values are related as the two will compute the total time requested by the Advertiser to playback the Ads Increase in duration and repetitions will also increase the suggested percentage per hour of possible Ad exposure.
|
|
The Advertiser is not guaranteed each Ad resource is going to playback for the full computed percentage. If an Advertiser sets an Ad resource for a playback 12 times an hour, it may or may not run at that repetition; as it depends on how many other Ad packages were submitted and accepted for a station.
A complex round robin algorithm us used to ensure best case scenario for overbooked Ad stations.
However, an Advertiser is able to push or give higher priority to specific resources. The higher the percentage per hour, the better chance a resource has for maximum impression count.
If an Advertiser is the only one advertising on a selected Station, he may not occupy 100% of the hour at the location. Therefore the SignagePlayer will use the Default resource as time filler (covered in the "Incoming Ads" chapter). If on the other hand Ad packages from other Advertisers were accepted and exceeded 100% of the hour; the Default Resource would never play.
GROUP PROPERTIES PANEL
After you drag a Station into the Group section of the Outgoing Ads, you can select it to access its Properties panel.
|
|
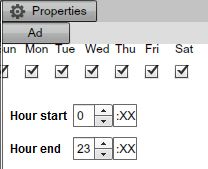
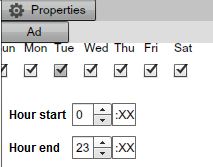
- Weekdays
- Hour start
- Hour end
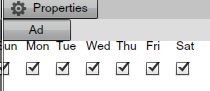
Advertiser can set the days of the week when he wants the selected Ad package to play. Select or deselect any day of the week by clicking on the corresponding check box.
|
|
You can use the same ad package with multiple Stations and you can set different days.
|
|

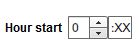
The hour start field is used to set time to start playing the Ad package.
The hour end field is used to set time to stop playing the Ad package.
|
|
OUTGOING EXAMPLE - SUBMITTING AD PACKAGE
When Joe the accountant from our previous example builds his Ad package, it is going to be constructed from tree different ingredients:
- What?
- Where?
- When?
|
|
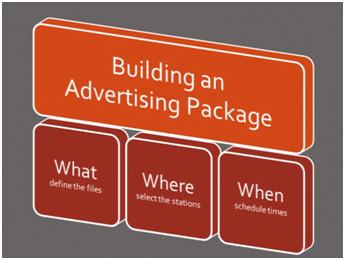
THE "WHAT"
The what will define the different files that he would like: videos, images, SWF animations and other type of resources. All resources are imported using the SignageStudio and added to the Ad package.
THE "WHERE"
The Where would be the Screens he would find using the Search feature. This is where Joe would decide to push his Ad packages to.
THE "WHEN"
The When would be the start and end dates when Joe would like to run his Ad package; setting start and end hours for day selected.
These three ingredients, What, Where and When, will construct the Advertising package by the Advertiser.
BUILDING AND SUBMITTING AD PACKAGE
Step 1 - Create the advertising files
Images, videos, SWF animations, any file that is supported by the system can be used within an ad package. You can create the ads yourself or use a professional design service.
Important!
It is best if all your ads have the same dimensions and the same aspect ratio. If your ad files have different sizes chances are they may get skewed when played on different Screens. This is because the Screen Division used by the Screen owner for the Ad engine has a certain size and ALL ad packages will play within that particular Screen Division.
Step 2 - Import the resources
After you created your Ads, import the files to the Resources directory. These files are your Advertisements.
|
|
Step 3 - Create a new Ad package
Access the Outgoing ads section of the SignageStudio and create a new Ad package using the ADD button.
|
|
Step 4 - Define the Start and End dates
After you created a new Ad package, you define the Start and End dates of that Ad package. You do this using the Properties panel of the Ad Out Package.
|
|
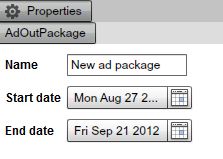
Here you can also change the name of the Ad package.
Step 5 - Add resources to the Ad package
After you created a new Ad package and defined the Start and End dates, you add the resources you imported earlier. Open the Toolbox / Resources panel in the Outgoing ads section, choose the files you want to use and drag them into the Content area.
|
|

Step 6 - Define settings for the ad content
After you added resources to the Ad package and into the content area, you can set settings for Duration and Repetitions of the Ads. Remember Ad packages are built using increments of one hour.
|
|
Step 7 - Search for available Screens
Next step involves using the Search feature to find available advertising Stations. From the Outgoing Ads section of the SignageStudio, open the Station picker.
|
|

Using different search criteria such as Location, Business name, Station name or searchable keywords, find desired screens.
Step 8 - Contact the Screen Owner
After you found a Screen, look at the description field and if contact information is available, contact the Screen owner to discuss any necessary details like prices, schedules, screen popularity and so on.
|
|
Step 9 - Ad Station to Outgoing Ads
Next, after you found a Station you are interested in and agreed to the terms set by the Station owner, you can add it to the Group area of the Outgoing ads. Just drag the Station from the Station picker area and into the Group area.
|
|

You can add multiple Stations if you like but keep in mind the same ad package will be played on all Stations.
Step 10 - Days and hours
After you added a new Station to the Ad package, you can select it and access its Properties panel.
|
|
In the Properties panel you can set the days when you want your ads to run. You can also set the start and end hours.
Next, save your configuration by choosing File -> Save from the file menu.
So we covered everything you need to know about Outgoing Ads; from the perspective of an Advertiser. When you completed all steps you may need to wait for the Screen owner to approve your Ad package. Once approved, it will begin playing at the selected locations on the set times.
Copyrights MediaSignage© Inc