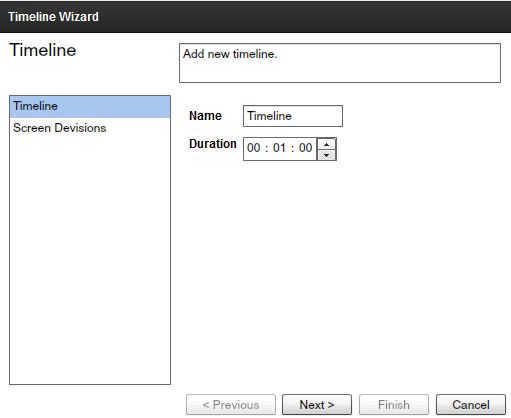
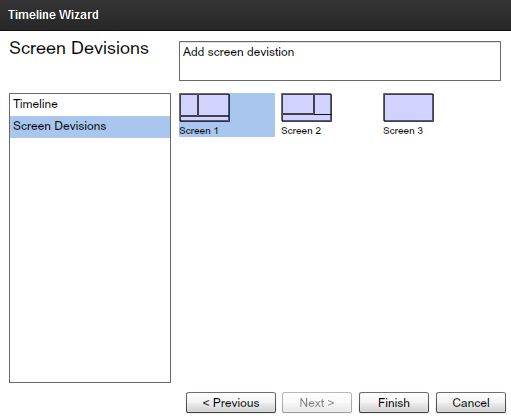
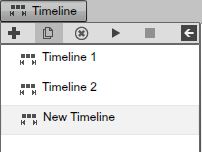
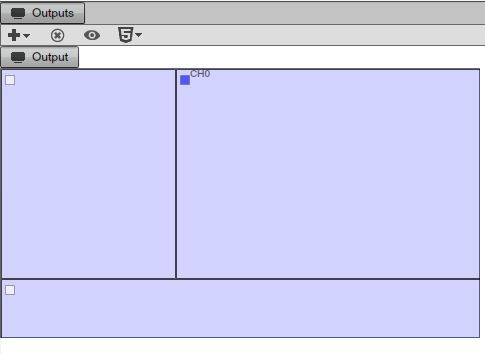
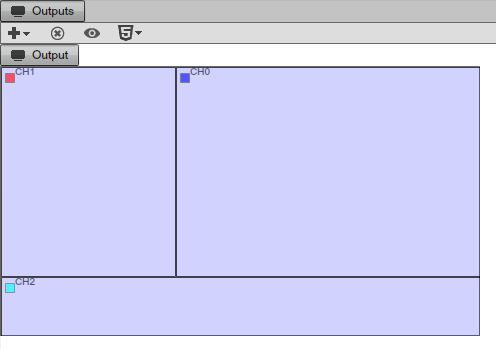
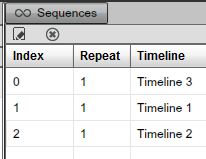
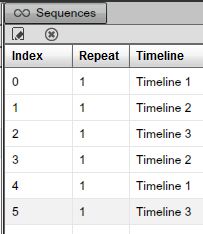
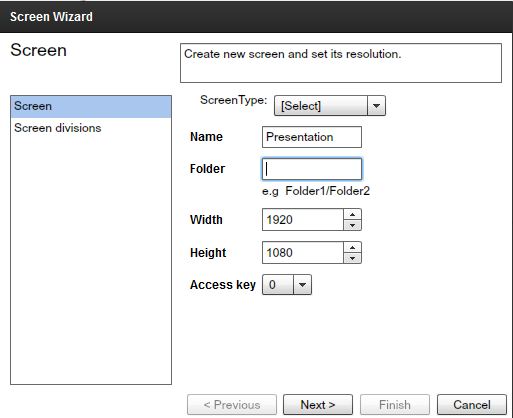
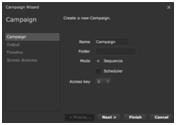
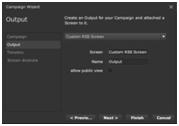
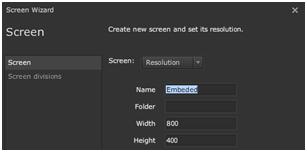
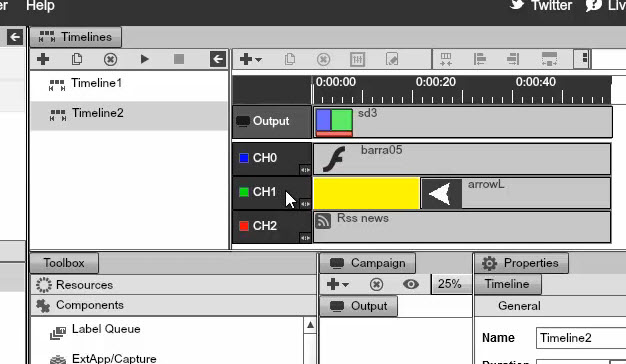
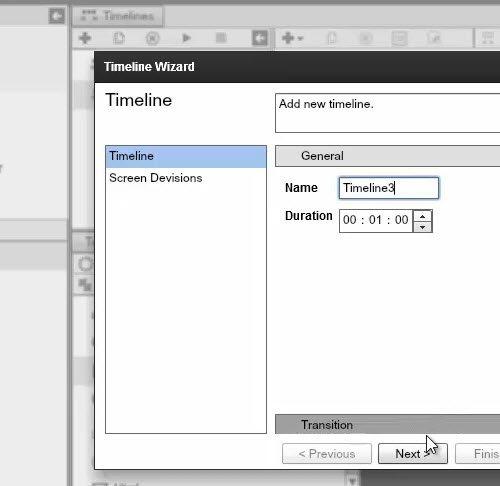
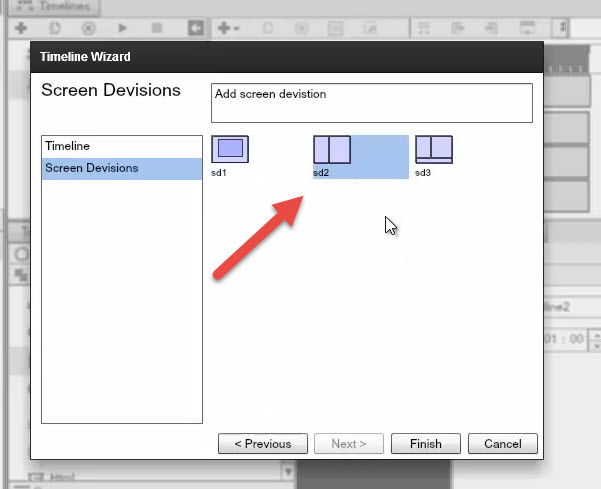
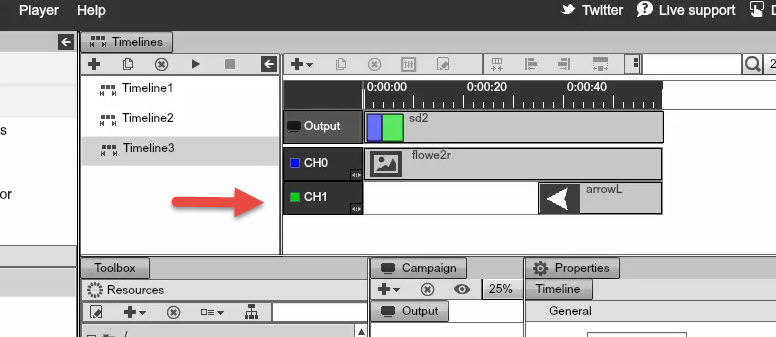
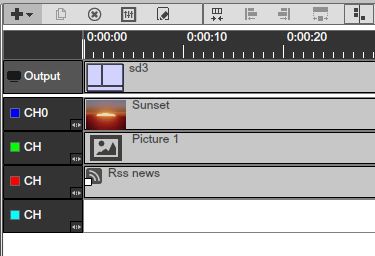
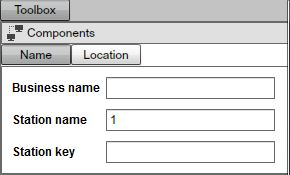
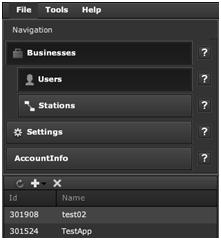
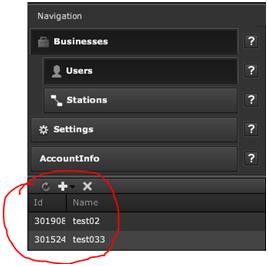
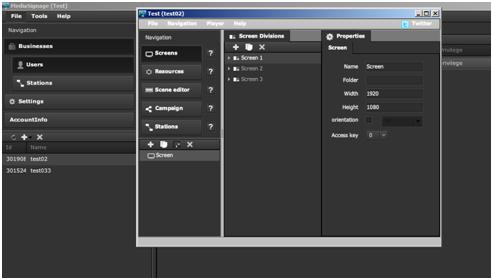
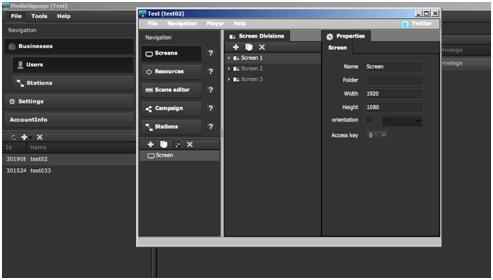
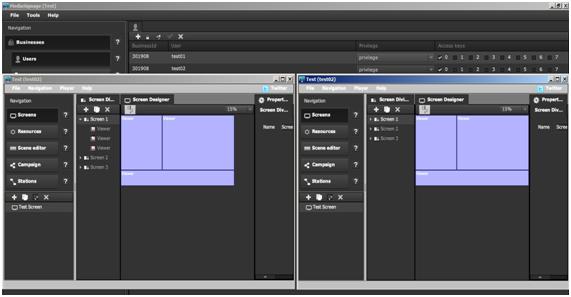
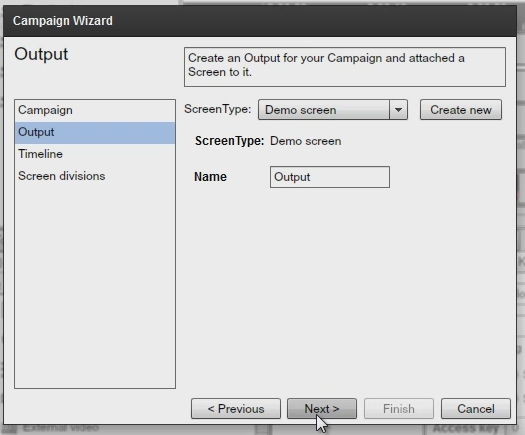
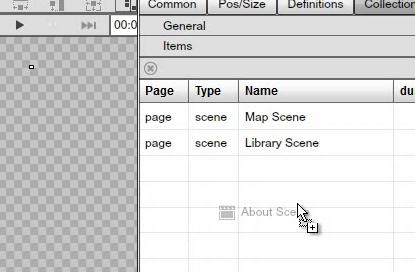
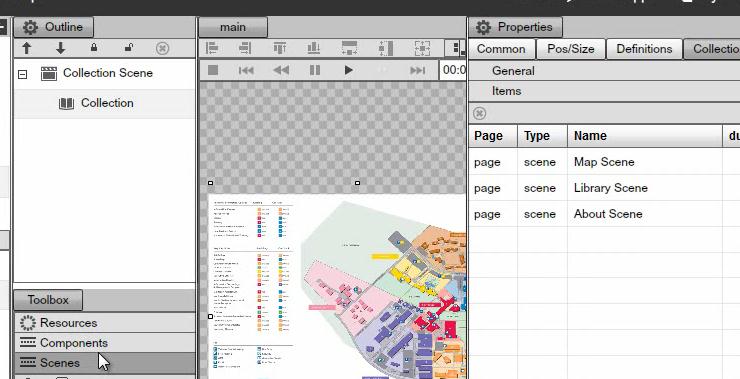
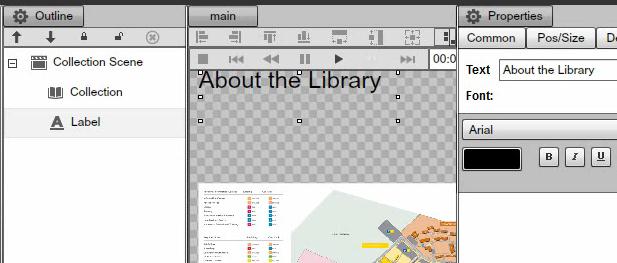
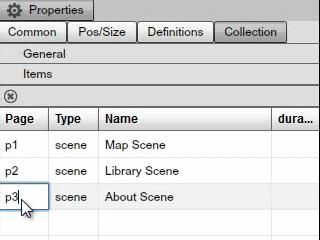
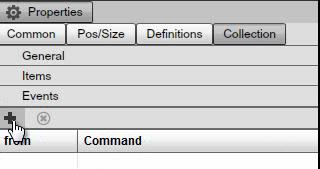
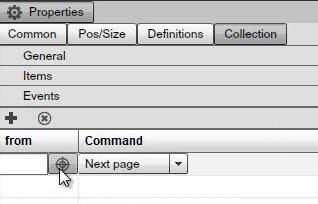
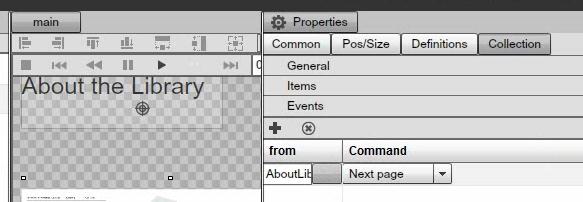
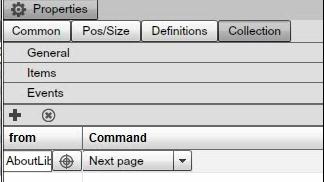
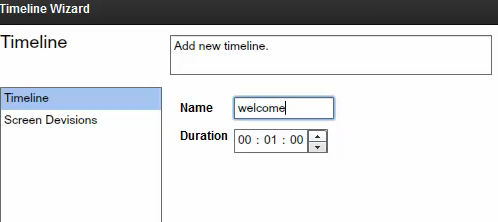
To create a Screen you use the Screen Wizard, click on the plus (+) sign on the left side of the application, a new window will open and you may begin creating your Screen configuration.
Next we will define the Screen Resolution. The Screen Resolution needs to match the same resolution of your final output device. If you want the presentation to be viewed on a screen with a resolution of 1280 x 720 for example, you'll need to set your screen resolution at 1280 x 720. This case applies to all sizes; SignageStudio supports full HD of 1920 x 1080 resolution and higher.
| |||||||||||||||||||||||||||||||||||||||||||||||||||||||||||||||||||||||||||||||||||||||||||||||||||||||||||||||||||||||||||||||||||||||||||||||||||||||||||||||||||||||||||||||||||||||||||||||||||||||||||||||||||||||||||||||||||||||||||||||||||||||||||||||||||||||||||||||||||||||||||||||||||||||||||||||||||||||||||||||||||||||||||||||||||||||||||||||||||||||||||||||||||||||||||||||||||||||||||||||||||||||||||||||||||||||||||||||||||||||||||||||||||||||||||||||||||||||||||||||||||||||||||||||||||||||||||||||||||||||||||||||||||||||||||||||||||||||||||||||||||||||||||||||||||||||||||||||||||||||||||||||||||||||||||||||||||||||||||||||||||||||||||||||||||||||||||||||||||||||||||||||||||||||||||||||||||||||||||||||||||||||||||||||||||||||||||||||||||||||||||||||||||||||||||||||||||||||||||||||||||||||||||||||||||||||||||||||||||||||||||||||||||||||||||||||||||||||||||||||||||||||||||||||||||||||||||||||||||||||||||||||||||||||||||||||||||||||||||||||||||||||||||||||||||||||||||||||||||||||
|
|
SCREENS AND CAMPAIGNS
Screens are used within one or many Campaigns. We'll discuss the Campaigns in another chapter, but essentially, a Campaign is a place where all your presentation components and everything you have built, will come together.
After you create a Screen, it can be used by any number of. And so if you want the same settings in different campaigns, you don't need to rebuild it from the scratch. We will talk more about the correlation between Screens and Campaigns in another chapter.
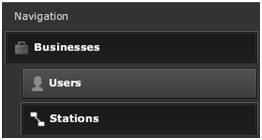
In the left side of the application, just below the Navigation menu, you will find additional settings for Screens. These include:
- Add
- Duplicate
- Resize
- Delete
|
|
DUPLICATING A SCREEN
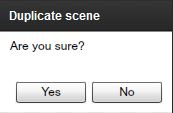
On the left side of the SignageStudio (just below the Navigation menu), you will find the duplicate icon. Select your screen and click the Duplicate icon, a dialog message will appear asking you if you are sure you want to duplicate the Screen. If you click YES, a new Screen will be created with the same properties as the original screen.
DELETING A SCREEN
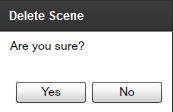
On the left side of the SignageStudio, just below the Navigation menu, if you select the Screen using your mouse (left click), you can click on the DELETE icon to remove the screen. A screen can only be removed if it is not associated with an existing campaign.
SCREEN DIVISIONS
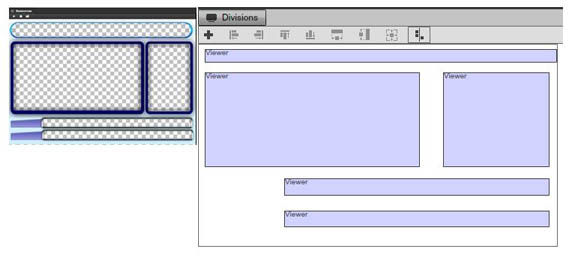
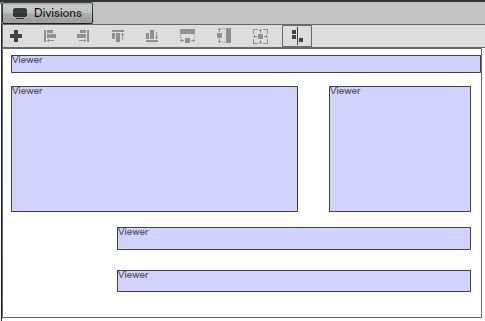
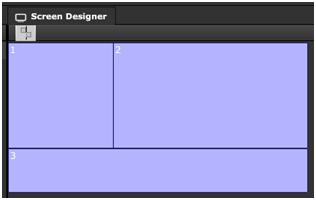
Screens are constructed of individual Screen Divisions. A Screen Division as the name suggests; is a division, or a part of the Screen. To build a presentation, you'll use one or several Screen Divisions.
CREATING A SCREEN DIVISION
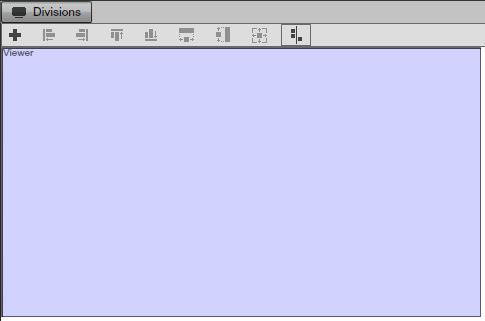
After you've created your Screen, the wizard automatically created Screen Divisions for you if the check box "Generate Screen Divisions" was marked.
You create a Screen Division by left clicking the plus (+) sign located in the Screen Divisions panel. You can also add a new Screen Division by clicking inside the screen editor, holding the mouse button down and dragging the mouse in positive coordinates.
|
|
ARRANGING AND RESIZING
Each rectangular shape you create with your mouse is a part of the Screen Division. You must pay attention to the shape of your Screen Divisions, because it must match the dimensions of your resources and scenes used in the presentation. For example, if you have an image with the width of 300 and the height of 150, you'll need to create a Screen Division of the same width x height.
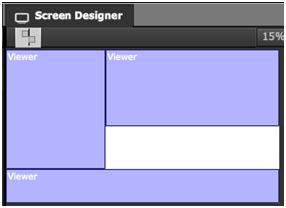
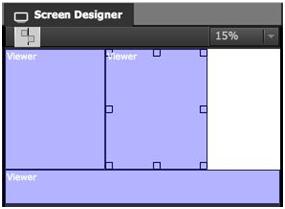
When you draw multiple screen division on your Screen, you'll find a useful small icon located on the upper left side which is called the Magnetic Alignment. If you click on the icon, every shape you draw inside your Screen will intersect with other divisions while showing you colored guides. The guides, which are horizontal and vertical lines, will help you be more precise in creating your Screen Divisions and prevent you from accidentally overlapping one division with another.
|
|
After you draw a division with your mouse, you can edit precise values. You do this by entering the values in the designated fields located on the right side of the Screens module.
|
|
RENAMING SCREEN DIVISIONS
You can rename the Screen Divisions at any time under screen divisions. To rename a Screen Division you first select it and next edit the name under the properties panel.
POSITIONING SCREEN DIVISIONS
Placing screen divisions on your Screen is a key step in building your Signage presentation. The Position of divisions inside the SignageStudio Screen will determine the position of your resources (media, text, RSS news). Choosing the right size and position is vital in order to prevent skewing, stretching and shrinking of resources thus maximizing the definition of the content.
Remember that each screen division is a place holder for the presentation's content.
THE ORDER OF DIVISIONS
Screen divisions can be placed at different levels of the display list. This will determine each division's height in relation to other divisions. If you look at the Screen Divisions panel located at the left side you'll see each division with a tree widget, stacked one on top of the other. The first division on the list is always going to be the lowest on the screen. This means that any other screen division will hide it if the two were to intersect.
You can keep track of the order of your divisions by looking at the right side of the SignageStudio at the Division properties panel. Each number in the Order field represents the stacking position of that particular Region in relation to others. Number 0 is normally the background; or the lowest division that all other screen divisions lay on top of.
You may change the layering order of each division using your mouse. Drag a division and drop it above or below other layered screen divisions to change the order of the display list.
|
|
If you draw two divisions on your Screen, and you want one of the divisions to be the Background and the second one a video, the Screen Division for the Background needs to have number 0 in the stacking order list and the Screen Division for the video region would need to set as 1; therefore 1 will be seen on top of 0. Change the order of the two, and the Background will be on top of the video thus hiding it.
BACKGROUNDS AND MASKS
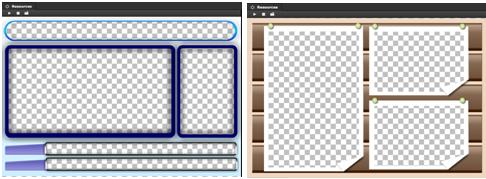
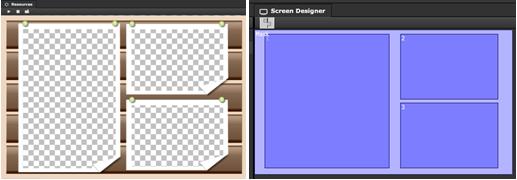
A Background is usually the lowest division of a Screen. It will be viewed when the presentation plays on your output device, behind all the other components of your presentation. But sometimes, a background can be used as a Mask making the other divisions layered below it.
To create a mask follows these steps:
- 1. Create the Background outside the SignageStudio (using Photoshop for example). You'll need to draw some cavities (holes) in your image. These empty spaces will be filled with components and resources that are going to be position in layers (divisions) below the mask. Use transparent png files or Adobe Flash swf files to create transparent cavities
- 2. Save your file/background with transparency enabled. You'll take for example, a simple PNG image and turn it into a mask.
- 3. Upload the file using the Resources > file upload.
|
|
|
|
The mask will be on top of all the other screen divisions, so other components will show through the cavities. Masks can be used to enhance the appearance of the presentation. Remember, the layering / stacking of divisions you created is important, if you have a certain division and create another on top of it, the one beneath will not be visible unless transparent content is used on the above layer.
MULTI SCREEN
A multiscreen is configuration where a single screen is actually made up of multiple physical displays which are arranged one next to the other, or one on top of the other. Together they form one large display area.
The monitors are daisy changed to one another or to a single PC with multiple video cards. When the presentation is played back, the content will span all monitors. When you setup a multiscreen at your location, you need to pay attention to the resolution in the corresponding setting.
Each Screen Division can have a maximum of 4096 x 4096 pixels using the default canvas system. If a combined multiscreen width or height has a total resolution greater than 4096 x 4096 pixels, the application will use the windowing system.
If you know your multiscreen setup has a higher resolution that is greater than 4096 x 4096 pixels, you should design the presentation without transparency and layering as they are not supported in such high resolutions.
SETTING UP A MULTI MONITOR CONFIGURATION
The SignageStudio will work with as many screens as your video card supports. The only requirement is that the size of a single Screen Division does not exceed 4096 x 4096 pixels. You can however connect as many displays as you like.
Right click a Windows desktop and choose to open display properties to view the number of displays connected and current resolution.
|
|
In the above example we connected one screen to a computer with a resolution of 1680 x 1050 pixels and a second screen with a resolution of 1280 x 800 pixels. First, create a large Screen Division. We'll resize the screen division according to the total size of our screens combined.
As we demonstrated earlier, the total width of the output of our screens is 1680 pixels (for the first display) plus 1280 pixels (for the second display), which means a total width of 2960 pixels. Thus, we enter 2960 in the Width property field of the first Screen Division we created.
|
|
For the Height, one screen has 1050 pixels and the other 800 pixels. We need to select the larger value of the two: 1050.
Ideally you'll want to use screens that have the same resolution. We used screens with different sizes to demonstrate that the system can also support this type of configuration. The disadvantage is that you'll lose some of the media on the bottom of smaller 1280 x 800 screens (however this can also be accommodated for, by using multiple screen division instead of just using one large screen division).
Next we are going to set the height of the first display to 1050 pixels. We created a single screen division occupying the space of our two displays. This means any media played in this Screen Division will bleed onto the second display.
|
|
IMPORTANT: When working with a multiscreen configuration, you should always have the Windows taskbar set as the primary display at 0 coordinates on the x / y axes. This means that all the other screens used in a multiscreen configuration must be on the right side to your primary display (the one with your taskbar). If you set two screen divisions, one with the Width of 1680 pixels for the first screen and one with a width of 1280 pixels, you need to have your taskbar on the first screen (the one that corresponds to the left Screen).
|
|
Having the taskbar on the screen located on the right side will return negative values which is an invalid configuration.
The prior section covered using a single screen division that span multiple screens; next, let's add additional screen divisions. We will add one Screen division to the right screen and an additional screen division that will span both screens. The A Screen Division from the image below will play on both screens while the B division will only span the smaller screen.
|
|
SCREEN ORIENTATION
Screen Orientation is the vertical or horizontal positioning of a screen. By default, the screen orientation is set to horizontal but you may change it under the orientation settings.
You must also change the settings related to orientation on the physical SignagePlayer PC. In the control panel > display properties there should be an option called Rotate Display located under the Display category. Set the orientation of the display to Portrait or Landscape.
|
|
Once changed, set the corresponding width and height values in the Screen Properties panel to match.
|
|
ACCESS KEYS
Access keys will determine what a user can and can't do within the SignageStudio. Access Keys are defined by values from 0 to 9 and are assigned by an Enterprise level admin. Review Access Keys chapter for more information.
Files and Resources
WORKING WITH RESOURCES
Resources are files you use to build your SignageStudio presentation. There are two categories of resources:
-Internal Resources
-External Resources
The internal resources are files copied to the MediaSignage servers. These files will stream down from the server and get locally cached at the player side. If the player loses internet connectivity, the resource will still play with no interruption in playback.
The external resources are files residing at external repositories, like a web server. You can link to these external files and use the files to build your SignageStudio presentation.
The main difference between the external and internal files is the internal resources take advantage of our caching system; which means; whenever these resources are played they are downloaded and cached in SignagePlayer. If the connection to the server is interrupted, the internal resources will continue and play.
The external resources are not downloaded onto the MediaSignage server; therefore they are not cached. However, in some circumstances it is easier to work and swap external resources.
MediaSignage officially supports all of the Flash Media formats which include Video Formats:
-Flash video FLV (H.263)
-MPEG-4 (H.264)
-MOV
-M4A
-MP4V
-3GP
-AAC (HE, LC)
-SWF
We HIGHLY recommend you use FLV (Flash Video) with H.264 encoding as it supports hardware acceleration and will run on the GPU (not CPU) and give the best performance.
-Animation: SWF
Flash CS can produce SWFs. SWFs are vector based and are rendered on the CPU, thus they are highly CPU intensive, especially when running high res.
-Images: JPG, PNG, JPEG, GIF
-Sound: MP3
However, you should note, due to the hundreds of different encoders available today, it is possible some of your files may not run properly. For this reason, we recommend you use a Freeware utility like Super to convert your media files to standard format including FLV, PNG or SWF. This eliminates any encoder / decoder issues you may experience. You can read our conversion format document at the link below:
-PowerPoint presentations (ppt)
Microsoft PowerPoint Viewer is also supported, but it does have some limitations as it requires full screen and licensing from Microsoft.PowerPoint does come with some limitations, if you use it in a screen division smaller than full screen, the ppt may get cropped starting at x 0 y 0 to the total width and height of the screen division. So in order to achieve proper PowerPoint playback, you'll need to create a screen division and draw a region to cover the entire screen's width and height.
FILE CONVERSION
We recommend you use a PPT > SWF convertor (PowerPoint to Flash converter).
You can also download a free file conversion utility at:FreeMake file convertor
You can also checkout the PowerPoint video tutorial here:Go to MediaSignage
RESOURCE PANEL AND PROPERTIES
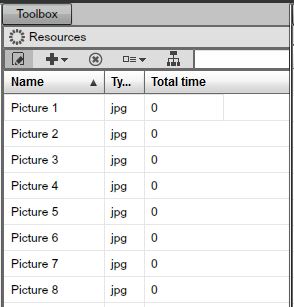
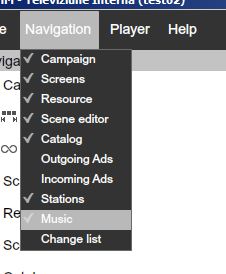
The resource panel is where you upload and organize your files inside. This panel can be viewed by left clicking the "Resources" button from the main Navigation menu.
|
|
After you click on the "Resources" button from the main Navigation menu, you'll see the Resource's panel located by default on the right side. It contains several icons.
|
|
-The first icon is the upload button.
|
|
If you left click on the upload icon, you will be presented with a dropdown menu with four options for uploading your files.
|
|
-The first option to upload files is "From local"
|
|
This option allows you to upload supported file formats from your computer to the server. If you choose this option, a new dialog box opens, and you'll need to select a file from your machine. You can use the "File Type" option so the search window will only display certain types of files (depending on your selection). Also you can choose the "All files" option to show all.
|
|
You can select multiple files by holding down the Control key (or Command on Mac). After you have selected your files, click "Open."
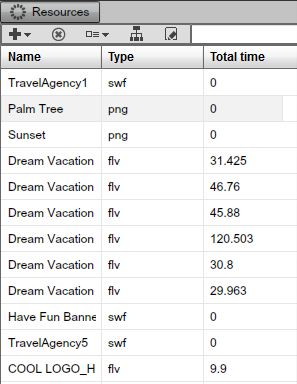
After you've selected the files and clicked "Open" you'll see the selected files in the Resource's panel, along with some of their properties. We will cover the resource properties later in this Chapter.
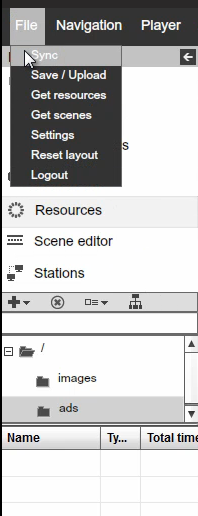
To begin the upload process of your selected files onto the server, you'll need to choose FILE --- > SAVE (upload) from the main Menu, located on the upper left corner of the SignageStudio.
|
|
-The second option to upload files is from URL (i.e.: across the web).
|
|
This option allows you to upload files from a web address. If you choose this option the URL selector dialog box will appear.
|
|
You'll see two fields in the URL selector window. The first field is named "URL". In this field you enter the name of the source of the file you want to upload.
The advantage of using this option is resources are downloaded to the server from the location entered. These files will take advantage of the caching system; that is if the connection between the SignagePlayer and the server is lost.
The second field of the URL selector window is "Name". Use this field to enter a name for the resource you are uploading to the server.
You also have the options to PREVIEW the file before uploading, click OK or CANCEL. If you choose OK, you'll need to SAVE (upload) the file first.
|
|
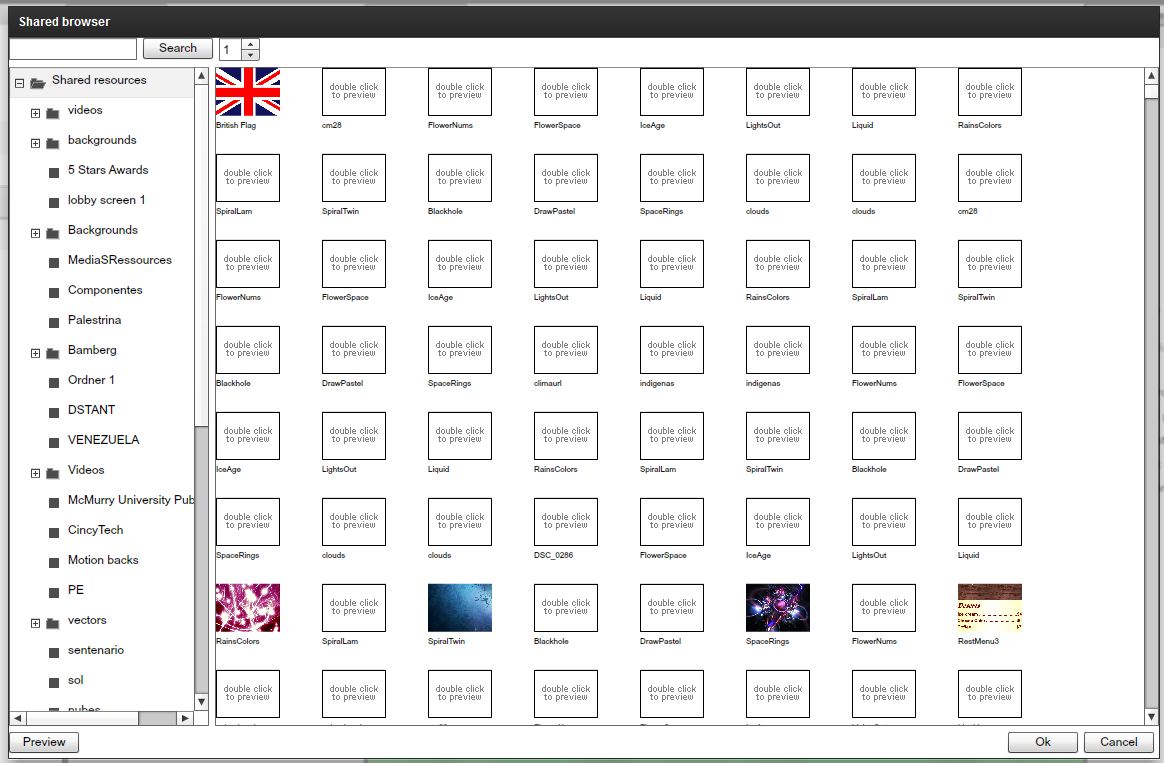
-The third option is for uploading files is "From shared". This option will allow you to choose files from the MediaSignage library; made public by other users. These files include a large repository of pre-loaded resources. After you choose this option a new window will appear.
|
|
|
|
Choose any file and press OK. Next click File > save (upload) to begin the upload process.
|
|
-The third icon in the main menu of the Resource's panel is the "VIEWS" button.
|
|
You also have the option to CANCEL the operation by clicking the Cancel button.
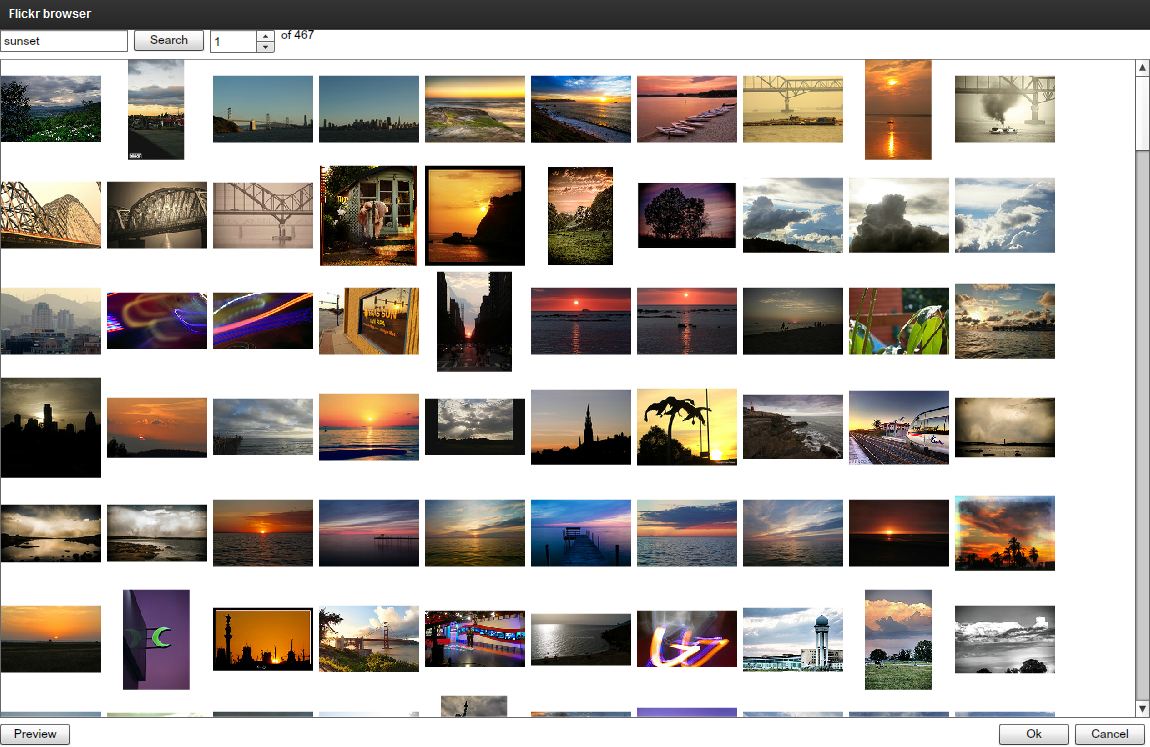
-The fourth upload option is "From flicker".
|
|
This option allows you to use images from Go to Flicker in your presentation.
In the search field located on the upper left corner of the window, enter a description. In this example we entered the word "Sunset" in the search field.
|
|
-The second icon in the main menu of the Resource's panel, next to the "ADD" button is the "DELETE" button.
|
|
If you select a resource from the list and click on the "Delete" button a new dialog box will appear asking for deletion confirmation.
|
|
If you choose YES, that Resource will be permanently deleted from the server.
-The third icon in the main menu of the Resource's panel is the "VIEWS" button.
|
|
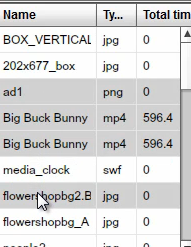
This button allows you to choose between two options for viewing / displaying your uploaded resources. If you click on the "VIEWS" button you have the option to choose either to view your Resources as DETAILS or THUMBNAILS. The Details view shows the name and certain properties for the resources. The Thumbnails view shows the icons or thumbnails of the uploaded resources.
|
|
-The fourth icon in the main menu of the Resource's panel is the "Columns" button.
|
|
This button is located next to the "Views" button and will allow you to show or hide columns of certain file properties. If you click on the "Columns" button you'll see a dropdown menu containing several options.
|
|
NOTE: Every resource property listed with a check mark next to it represents a column. You can check and uncheck the columns.
For example, we have a resource for which the Resource's panel will display two columns: Name and the File Type.
|
|
If we use the "Columns" button we can also add the Width and the Height.
|
|
If you click on any Resource Property the resources list located below will be sorted according to your selection. You'll notice a small arrow that appears on the property name that defines the sorting order.
|
|
You can click again on that property and the sorting order will reverse. For example, if you choose to sort the resources by Name, you can click once on "Name" and the resources will be sorted in an ascending order; click once more for a descending order.
The Resources search box is useful to help search for a file using its name or a partial string. The search box is located on the upper side of the Resource's panel.
|
|
PREVIEW PANEL
After you uploaded the files you can preview them using the Preview panel located at the right side of the Resource's panel. To preview a resource you'll need to left click on its name. The Resources preview panel has three options to allow control over the preview. These options are PLAY, STOP, and CAPTURE.
|
|
The first icon is the Play button.
|
|
The Play button allows playing of your video files or animations content, followed by the Stop button.
|
|
If you click on the Stop button, the video file or animation will stop playing. The third icon is the Capture button.
|
|
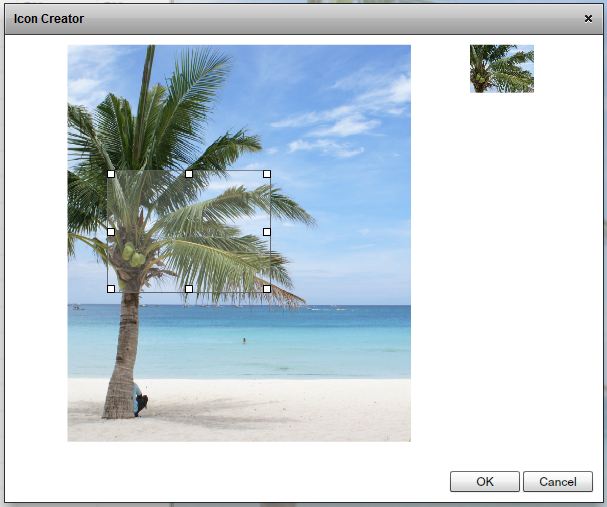
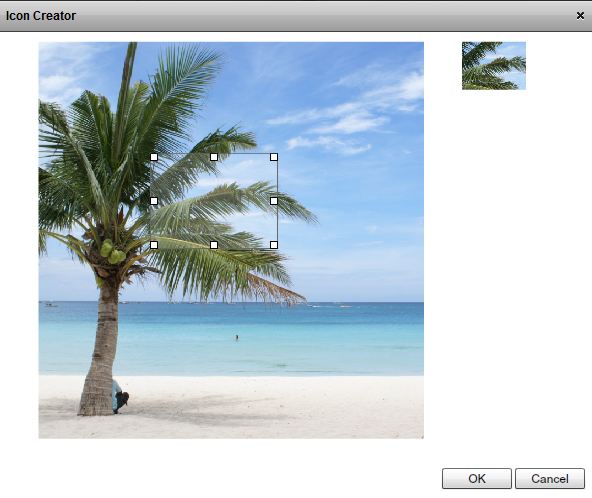
Capture allows you to create thumbnails or small icons of resources; which are useful when working with timelines. Timelines will be covered in the Campaign chapter. When you click on the Capture icon
|
|
a new window called the Icon Creator will appear.
|
|
You will see a blue square with several handles as margins. You can move the square with your mouse and change its size before you click OK. The area inside the square will be CAPTURED and a small thumbnail will be created. You also have the option to CANCEL and EXIT the Item creator window.
Internal resources are the files uploaded to the server which include:
-Local
-URL
-Shared
-Flickr
These Resources take advantage of the SignagePlayer caching system.
External Resources on the other hand are files that reside outside the MediaSignage server farm and are linked to the SignageStudio and SignagePlayer. An external resource can be an external video, external swf's or images, as well as HTML web pages and other types of media.
Internal or external resources can be used in a Scene or directly on a Timeline. We will explain more about Scenes and Timelines later on.
RESOURCES PROPERTIES PANEL
The Resource properties panel is located on the right side of the application, next to the Resource preview window.
|
|
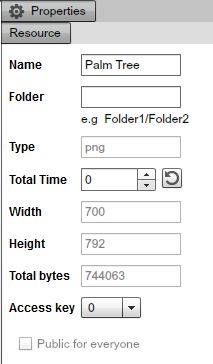
Use the "Name" field to change the name of a resource.
|
|
You do this simply by deleting the old name and entering a new one.
FOLDERS AND FILTERS
-The second field of the Resource properties panel is the "Folder" field.
|
|
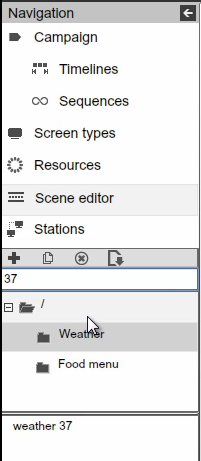
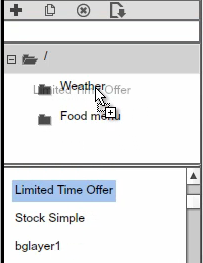
Folders are used to filter a specified list of items. In this field you can enter a new folder name and the system will create a New Folder. Also, it will make a reference of the selected resource in the filter / folder created. Folders are "slash" delimited; just like a file system in a PC.
|
|
You can also assign one or more Resources to a Subfolder. To create a Subfolder, first select the resource in the Resource's panel. Next enter a "forward slash" on the keyboard "/" right after the Folder's name and add a name to the Subfolder. If we wanted to add a Resource to a subfolder named "Pictures," that will reside under the "Backgrounds" folder we've created, we will select the Resource and type in the "Folder" field: Backgrounds/Pictures. A new Subfolder named Pictures will be created below the Backgrounds folder.
|
|
You can delete one or more Resources at anytime from a Folder or Subfolder. To do so, first you SELECT the Resource, DELETE the name of the Folder or Subfolder in the Resource properties panel, and press ENTER.
All Resources assigned to a particular Folder will be listed under the "All" folder, which is the default Folder.
|
|
The filtering system uses folders to keep track of your files and enables the user to be more organized, especially when working with hundreds or even thousands of files.
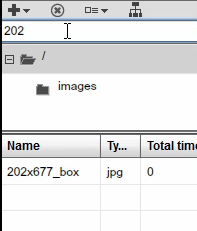
You can use the Search option to search for a file under a certain Folder or Subfolder. To do so, select the Folder or Subfolder where you want to search and enter a string or part of a string in the search box. The system will search for your file only in the folder / subfolder you've selected.
If you want to add more resources to an existing Folder or Subfolder, copy the entire file path from a Resource already in that folder and paste it in the "Folder" field of the new Resource. There is no restriction as to how many Folders or Subfolders you can create.
You can Use folders with:
- Screens
- Campaigns
- Stations
- Scenes
- Incoming and Outgoing Ads
Managing Folders and Filters is an efficient way to keep things organized while working with SignageStudio.
|
|
The fourth and the fifth fields describe the resolution of the selected file with respect to the Width and Height.
|
|
The next field displays the duration of video files. Duration is only recorded for certain video formats including FLV and MP4 formats that are encoded with H.264.
|
|
|
|
Access keys determine what privileges a user has with regards to certain areas of the SignageStudio; we cover it in another chapter.
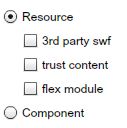
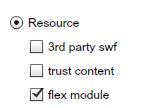
Next we will cover the "Trust content" and "flex module" options.
The "Trust content" option will be visible in the Resource properties panel when you select a swf file.
|
|
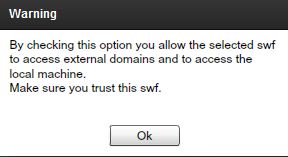
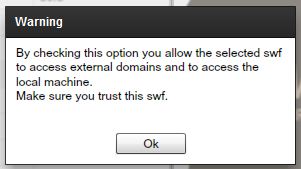
Swf resources are flash based files that can communicate with external web servers to pull live data feeds. If you check the "Trust content" checkbox, a small dialog box appears on the screen, informing you you've allowed the selected swf file to access external domains.
|
|
The "Flex module" refers to swf file created with Adobe Flash builder / Adobe Flex. This will allow for a Flex Module to be uploaded and work as a native resource within both the SignagePlayer and SignageStudio.
PREPARING RESOURCES
In an earlier Chapter we covered Screens and Screen Divisions. We mentioned that Screen divisions are used to define the areas on the screen where a resource or component will play. We learned that a Screen can have more than one Screen Division. Verifying and preparing a file before uploading it to the server will help you build a more precise presentation, avoiding the appearance of skewed images, pixelated videos, and failed transparency. There are several factors to keep in mind when creating content.
-Verify that the dimensions of the file you want to use match exactly the width and the height of the screen division the resource will reside in.
For example, if we want to create an image of 2560 pixels and a Height of 1600 pixels; we need to create a matching W x H screen division.
|
|
Looking at the referenced image, you can see that a screen division was created with a Width of 600 and Height of 800 pixels.
|
|
Because the Width x Height do not match our original image and the proportion of Width to height is not the same either, we will experience distorted and pixilated content. Thus, to prevent any mismatches between our file and the Screen Division, make sure to modify the W x H of the original image to match that of the screen division's W x H.
Occasionally, you'll find that resources look fine even if the resource and screen division do not match in size, especially when the original file and the Screen division have a similar aspect ratio.
You can use an Image or Video editing application to modify a resource's width or height.
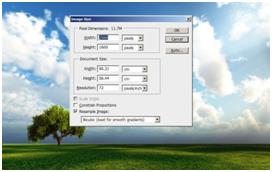
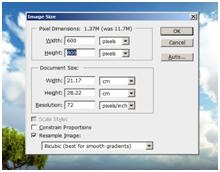
In our example we used Photoshop to modify properties of our image. After we inserted the image in Photoshop, we chose Image --> Image Size from the top menu and we enter the new values in the corresponding fields.
Note: Constrain proportions checkbox must be unchecked to modify the Width and the Height independently.
|
|
As you can see, the image is skewed and doesn't look good with the new size.
|
|
We choose EDIT --> UNDO from the main menu to undo the changes we've made to the image.
Next we will crop the image so it fits the size of the Screen Division. The disadvantage of using the crop tool is that certain parts of the original image will be lost.
To crop an image you use the crop tool located on the Photoshop tools panel, which is by default on the left side of the application.
|
|
After you clicked on the crop tool icon, you may insert the Width and Height values in the corresponding fields above.
|
|
Next mark a region of the image with the crop tool selected. Enter the values of 600 and 800 for width and height respectively.
|
|
Hit ENTER on your keyboard to complete the crop process.
|
|
Now the image size matches the size of the Screen Division. It will be viewed properly when the presentation is played back. Upload the image on the server and use it in your presentation. We'll be covering more on the use of resources to build a presentation in another Chapter.
- You should also be aware of the file size when preparing a resource for uploading to the server.
In Photoshop, use the Rectangular Marquee tool to draw a selection of 400 x 300 pixels. Position the selection as you wish and hit the DELETE key on your keyboard. This will make a hole in the image.
|
|
Save the file using the png extension. Upload the image and use it in your presentation as a Mask. Through the empty area you will be able see the lower Screen Divisions.
Always try to use smaller size files, as the upload process takes less time, and also your files will occupy less space on your media player. If you use Video files, try different encoding options to reduce total file size, but at the same time maintain a good quality video playback.
- Verify the transparency if using transparent png or swf files
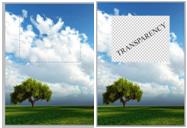
The transparency feature in respect to Resources has an important role in building your presentation. The most common use of these files is in regards to backgrounds and masks. We explained in an earlier chapter, a background is the layer or the Screen Division that resides below all the other Screen Divisions, and it has the "Order" number in the layering or stacking with a value of "0." Masks on the other hand are used to hide certain parts of the Screen, and through the mask other Screen Divisions are viewed, making them visible thanks to the magic of transparency.
You can use many preloaded files with transparency available from the MediaSignage library. You can access these files using the UPLOAD option "From shared" as discussed earlier in this chapter. Be sure to check out the Background and Masks category for more examples.
Scenes
THE SCENE EDITOR
The Scene Editor is a key element of the SignageStudio. It is used to enrich your SignageStudio presentation by allowing you to use multiple components (resources and dynamic data feeds) and combine them into a single scene, so they can be embedded into a single Screen Division.
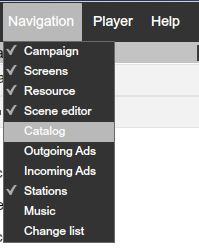
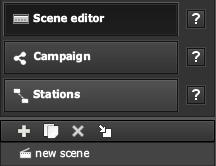
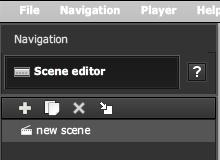
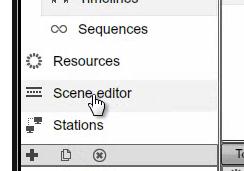
You can access the Scene Editor from the main Navigation menu located on the left side of the SignageStudio.
|
|
Select the Scene Editor tab.
|
|
- Tip: You can always hover with your mouse over an icon for a quick a tooltip
|
|
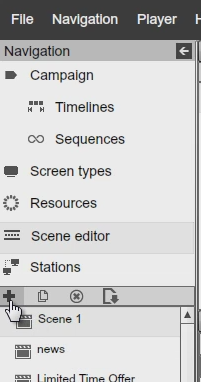
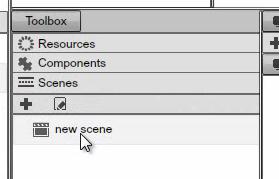
Click on the plus icon to Add / Create a new Scene. The default name is "New Scene" and will appear in the Scene's panel.
|
|
Before the new scene was created, the rest of the icons were disabled because their action depended on the existence of a scene.
|
|
|
|
If you left click on the above icon, you will be able to duplicate or "make a copy of" an existing scene.
|
|
Choose YES, and a duplicate Scene will be created in the panel; a Scene with the same components and settings as the original Scene. Click NO, to CANCEL the operation.
|
|
To delete a scene click on the "x" button.
|
|
If you choose YES, the selected Scene will be DELETED. Click NO, to CANCEL the operation.
Tip: Remember like any other action, the DELETE action cannot be undone. If you think you've made a mistake and you did not SAVE the changes yet, EXIT the application. When you restart the application will be restored to the last save point.
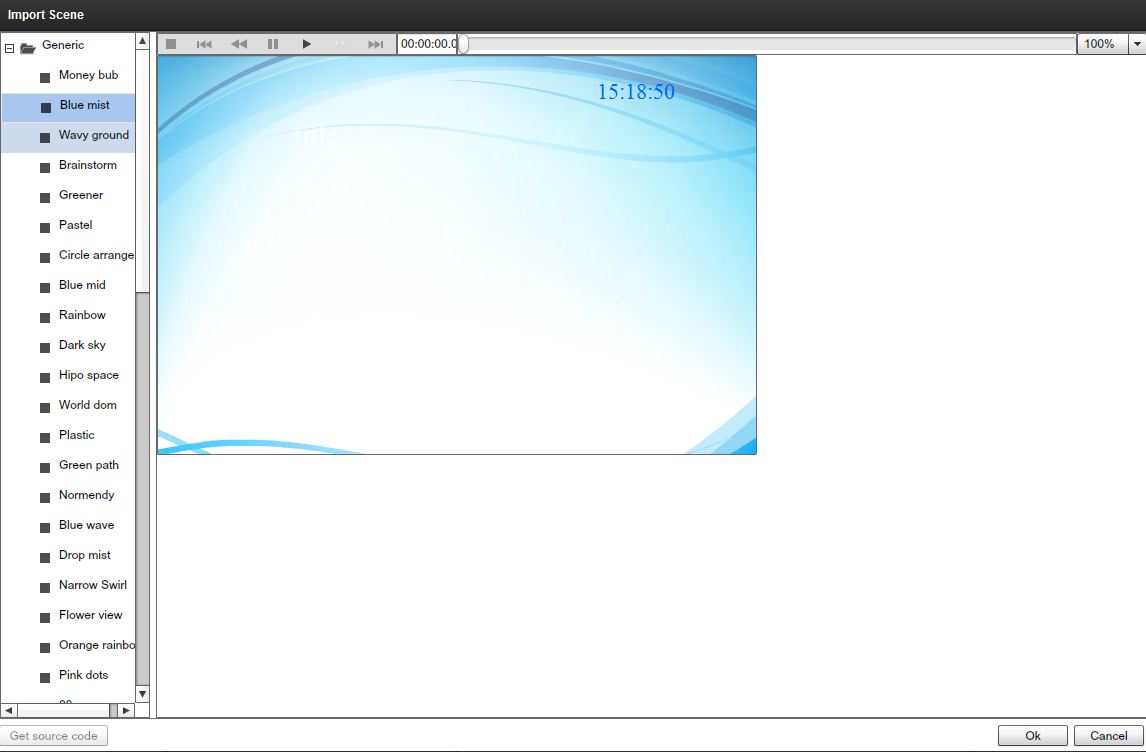
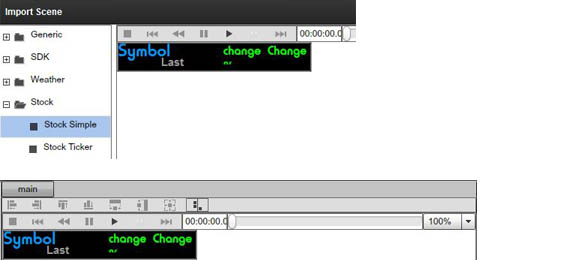
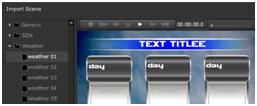
The "Import Scene" allows you to browse pre-made Scenes.
|
|
Select a Scene from a collection of Scenes available through the MediaSignage library.
|
|
|
|
On the left side you'll see different folders containing several types ofScenes you can import into your project.
The Scenes are pre-built, you can use them as they are or you can modify their content. In the middle of the window you will see the Preview area. Select a file from the folder list to preview it's content.
|
|
At the top of the Preview area you'll notice a playback controlMenu.
|
|
- The STOP button will stop a playback scene.
|
|
- The FAST REWIND button will set the playback to jump to the beginning of the file.
|
|
The REWIND button will rewind the playback one frame.
|
|
- The PAUSE button will PAUSE the playback of the selected Scene.
|
|
- The PLAY button will begin playing in the Scene.
|
|
- The FORWARD button will move the playback forward one frame.
|
|
- If you END icon the playback will jump to the last frame.
|
|
- Playback offset time
|
|
- This is the playback slider. Use it to scroll back and forth within the scene's timeline.
|
|
Tip: You'll find these playback controls on every Preview window across multiple areas of the SignageStudio. You can use them in the same manner to control the preview playback.
IMPORTED SCENES
As we stated above, the Imported Scene will allow you to take advantage of prebuilt Scenes which are sorted in different folders. These folders include:
- GENERIC (SWF prebuilt files, usually used for Scene backgrounds) - SDK (Software Development Kit, SWF examples)- WEATHER (Prebuilt Weather Scenes)- STOCK (Prebuilt Stock Scenes)- CATALOG (Catalog component Scenes)- MENU BOARD (Premade Menu Scenes)- DIRECTORY (SWF Listings, Directories) - CLOCKS (Prebuilt SWF Clocks)
RENAMING A SCENE
You can rename a Scene at any time by clicking on its name in the Scene's panel. The default name will become editable and you can enter a new string.
|
|
SCENE PROPERTIES
The properties panel contains different settings you can make to a Scene or to a Component including its width and height. Later in this Chapter, we'll discuss the Scene Components. However, the settings you apply to a scene will also affect all the components added to the scene. Therefore, if you'd like to make custom settings for each component you add, you need to modify the properties in the properties panel of the specific component, instead of choosing to apply the settings to the entire scene.
Each time you select a Scene in the Scene panel, you'll be able to apply certain settings to the Scene. You can do this in the Properties panel, located by default on the right side of the application.
|
|
The Scene properties panel has four categories for its settings:
- LAYOUT- SCENE- CONFIG- COMMON
You can access these by selecting specific tabs.
|
|
LAYOUT PROPERTIES
When you access the layout properties of a Scene, you'll be able to choose the layout for a Scene. These settings can be broken into two categories:
Static vs Dynamic.
This option refers to the behavior of a Scene when it starts playing in a timeline.
|
|
STATIC LAYOUT
When the "Static" layout is enabled,
|
|
It means no animation of any kind is applied to the layout of a Scene when played back. There can be motion inside the Scene (like a video file or a SWF for example), but the Scene itself will not animate.
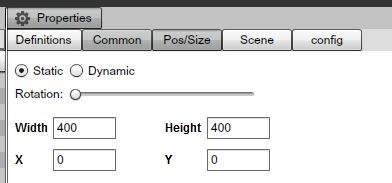
The settings you can apply to the Static layout of a Scene are the Rotation property, the size and the position of a Scene.
|
|
The rotation property has a slider that is used to change the Rotation of the entire scene. Drag the slider with your mouse and the Scene will rotate.
|
|
Under the rotation settings you can change settings for the Width and the Height of a Scene, as well as for the x and y position of a scene in respect to the Screen Division assigned to it.
If you want a Scene to be aligned perfectly to the x and y axes of the Screen Division assigned to it, you should always leave the x and y values at 0. You can modify any default value by entering a new value in the desired field.
Important: remember to use a Width and Height values that will match the size of the Screen Division the scene will be assigned to.
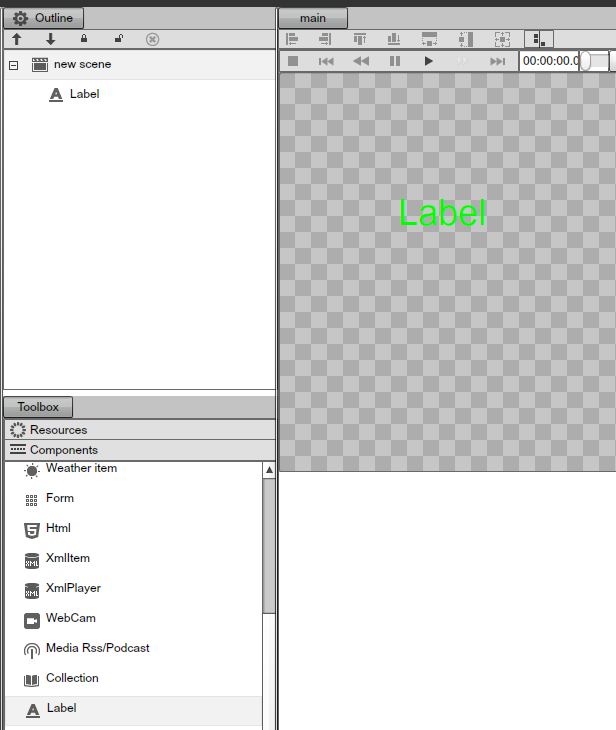
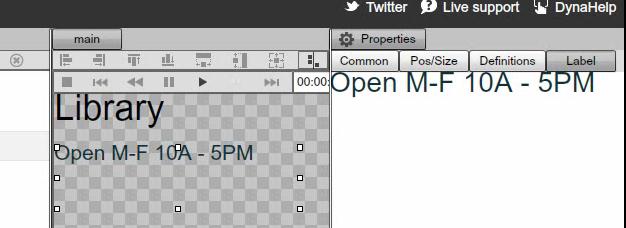
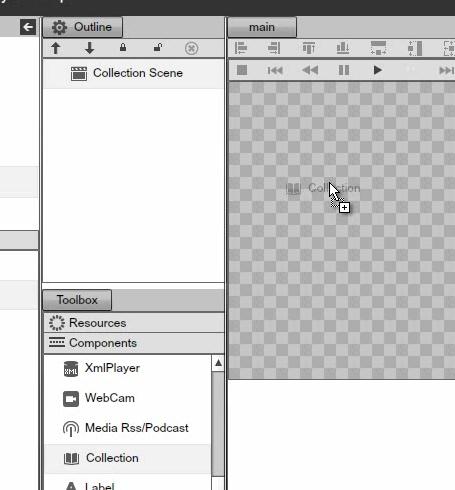
We will elaborate more on Components later on in this Chapter, but as a quick example, to see the rotation property working we will add a "Label" component to a Scene. Using your mouse, drag the Label component and drop it inside the Main preview window.
|
|
The rotation property has the default value of 0 degrees. If we drag the rotation slider to the right you'll notice a tooltip showing you the selected degrees.
|
|
After you release the mouse you'll notice the scene is now rotated with all components in it.
DYNAMIC LAYOUT
When the Dynamic Layout is enabled, you will be able to add animation to the Scene.
|
|
If you choose to enable the dynamic option, additional settings will be exposed in the properties panel. Let's go over these settings.
|
|
POINT NUMBERS
Below the Static and Dynamic options is the "point number" field.
|
|
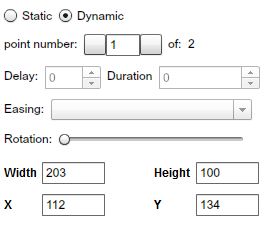
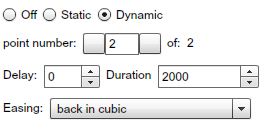
The Point Number is an indicator referring to the position of a scene in regards to the settings applied to its dynamics. Point number "1" indicates the initial position of the Scene, before the Dynamics (animation) kicks in. Point number "2" indicates the final position of a Scene, after the Dynamics (animation) has ended. Between point number 1 (the initial position), and point number 2 (the final position), certain parameters can be controlled. These parameters allow you to add motion to the appearance of a scene when played back. The main settings applied to a Dynamics of a scene are in respect to theRotation, and the Size. You can also add easing effects to the selected animation.
|
|
The Rotation works almost the same as described above as in the Static section. The difference is that in the Dynamic layout, Rotation actual motion, and not Static position. Rotation values can be changed both in point 1 and point 2. This is also the case of the Width and Height values as well as x and y coordinates.
The Easing options are effects applied to the Dynamic layout of a Scene and they define the transition algorithm from point 1 to point 2. You can only use the effects if you navigate to point 2. You can switch between point numbers using the left and right arrows.
|
|
DELAY FIELD
The "Delay" field
|
|
is used if a user needs to delay the timing until the Dynamic settings(Rotation and Size) kick in.
DURATION FIELD
The "Duration" field
|
|
is used to define the duration in milliseconds of the motion.
Tip: if you want a scene to spin around (rotate) for a longer period of time before it comes to a stop; enter a higher value in the "Delay" field .
DYNAMIC LAYOUT EXAMPLE
Step 1: Select a Scene from the Scene panel.
|
|
Step 2: At point number 1, drag the Rotation handle to the right until the tooltip shows 180 degrees,
|
|
and set the values to 200 for the Width and 200 for the Height.
|
|
Step 3: Using the right arrow, switch to point number 2.
|
|
Step 4: Enter the value 5000 in the Duration field.
|
|
Step 5: Enter the value 5 in the Delay field.
|
|
Step 6: Choose the Easing option "out back cubic."
|
|
Step 7: Set the value 500 for the Width and 500 for the Height of the scene.
|
|
Step 8: Click on the PLAY button to see the result and notice the dynamics of the Scene; how it will rotate and change its size over time.
|
|
SCENE TAB
The scene tab allows you to modify the default duration of a Scene when it is inserted onto a Timeline. You can change the default duration of a scene by entering the new time values in the corresponding fields. The first field stands for hours, the next is for minutes and the last field is used to set the timing in seconds.
|
|
Tip: The duration of a scene can be managed directly in the Timeline. It is not mandatory to change the duration from the Scene tab.
CONFIGURATION TAB
When you click the configuration tab
|
|
you will be presented with the scene property panel, you'll be able to assign a folder for the selected scene; enter the name of the folder in the "Folder" field.
|
|
A new folder will be created containing the selected scene.
- Tip: You can read more on folders and subfolders in the chapter of File and Resource management.
Also in the configuration Tab, you are able to see what Access key has been assign to you by the administrator.
COMMON TAB
When you click the Common tab
|
|
in the scene property panel, you will gain access to additional scene specific properties.
APPEARANCE
When you select the "Appearance" Tab under the Common section, you will be able to set transparency (Alpha) of the selected scene and also set a blending mode.
|
|
STATIC APPEARANCE
Under the Static appearance tab you can set the Alpha of a scene; control the Alpha value using the slider.
|
|
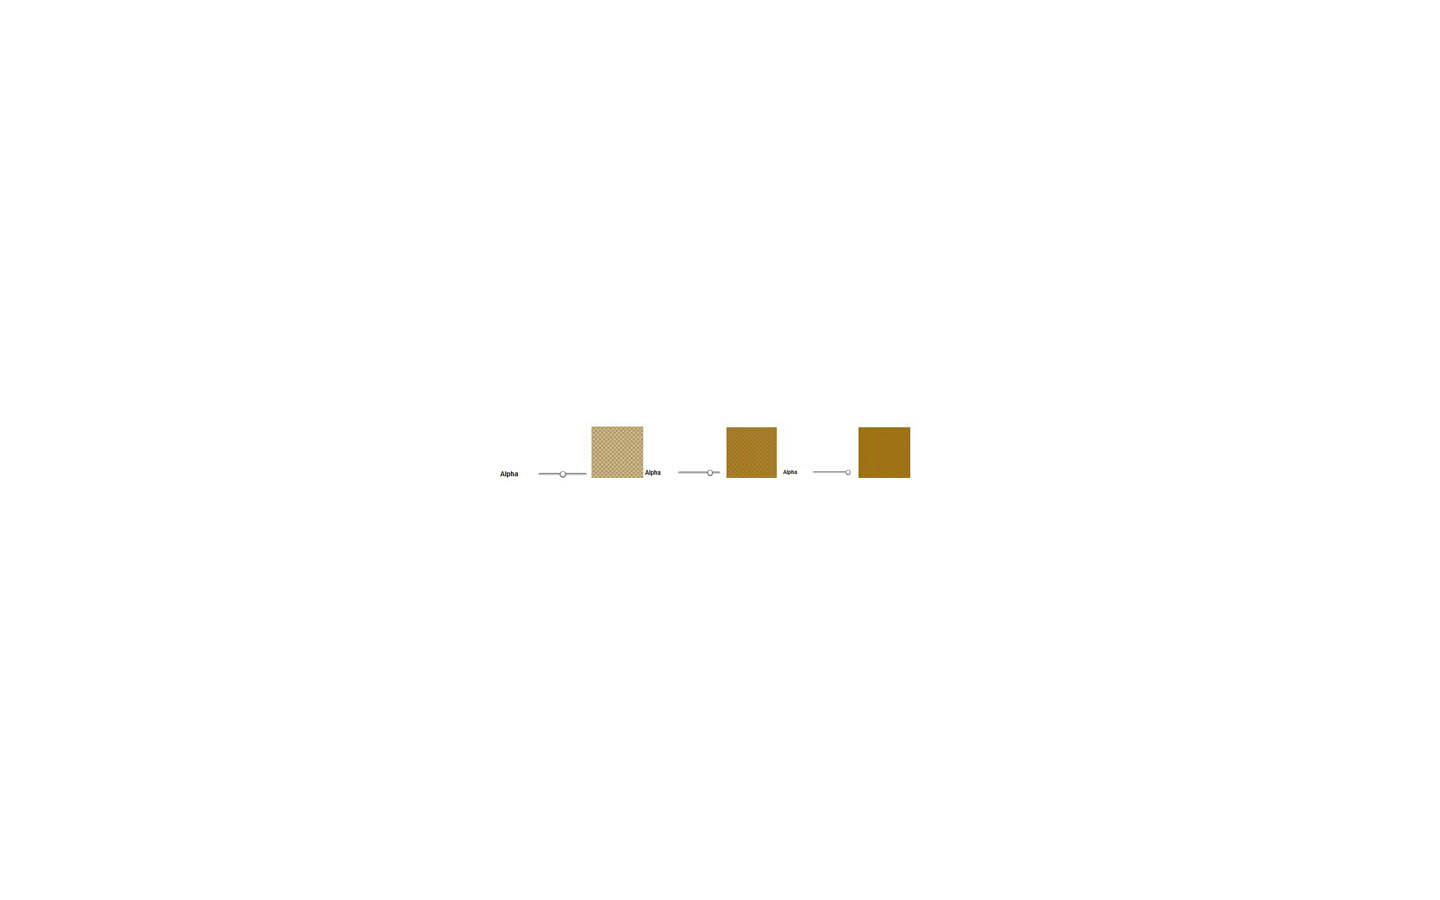
Example of different settings of Alpha applied to a Scene with a brown background.
|
|
BLENDING MODES
Blending modes control how a Scene blends with or interacts with other Scenes or Components beneath it. Blending modes in the SignageStudio work in a similar way as blending modes in other designer applications like Adobe Photoshop. The way layers interact with other layers in the stack is determined by the blending mode of the upper layer. By default the layer's mode is set to Normal, which causes the picture content on the upper layer to obscure the picture parts beneath, but SignageStudio has many other ways to control how these pixels interact. The different options, called blend modes, provide a variety of ways to control the mixing, blending, and general interaction of the layer content.
There are thirteen different blending modes to choose from in the SignageStudio. The default state for blending modes is "Normal" as we mentioned above and selecting it means no blending mode is applied to the selected Scene.
Let's see some examples of using blending modes. To see the effect of a blending mode we need to have at least two layers, positioned one on top of the other.
Tip: Blending modes can also be applied to any component as well as to a scene.
For our example the first layer is a colored background and the second one is an image. The upper layer is the image and beneath it is the background. In the image below we did not use any blending modes.
|
|
Next, let's select the Static appearance for the image and see how different blending modes affect the pixels of the image.
|
|
Difference
|
|
|
|
Subtract
|
|
DYNAMIC APPEARANCE
You can choose a Dynamic appearance and be able to set different blending modes for point number 1 and point number 2, which means as the Scene / Component / Resource starts to play on the timeline, it can gradually pass from one blending mode to another.
In the same time, you can also set different values for the alpha channel of the selected layer, at point number 1 and point number 2.
Let's use the same layers
|
|
and make the following settings for the next example.
Step 1: Select the imageStep 2: Set the appearance to dynamic
|
|
Step 3: At point number 1, drag the slider for the alpha channel to center.
|
|
BORDER
If you click on the "Border Tab"
|
|
you access the area where you can apply different settings to the border of a scene. The Border option is off by default,
|
|
and if you prefer your scene to have a border around its margins, you can choose between a Static border and a Dynamic border.
STATIC BORDERS
When you select the Static border option
|
|
you are able to apply three different settings to the border of your scene.
CHANGING THE COLOR OF BORDERS
The first setting you see when you select the static border option is the COLOR of the border.
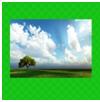
|
|
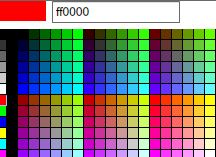
The default color is Red, but if you click your mouse on the color, a color picker will appear and it will allow you to choose a different color.
|
|
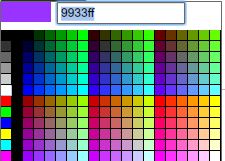
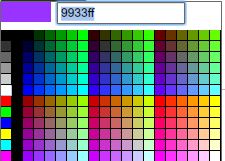
If you move the mouse pointer over the colors you can look at a small color preview in the left corner of the color picker. To choose a color for the border you can either click on the desired color to select it or you can enter a hexadecimal value in the field located next to the color preview area.
|
|
BORDER THICKNESS
The second option you'll see after selecting the Static border option, right below the color picker, is the Thickness settings of a border.
|
|
You can increase or decrease the thickness value either by entering a number on the specified field or choose one pixel at a time by using the small UP and DOWN arrows.
|
|
Example:
|
|
RADIUS BORDERS
The next option is to change the radius of a border, which means you can make its corners more or less rounded. The same principle, as in the case of a scene border, applies also to any Component; therefore we will use a random component to exemplify the Radius of its borders.
|
|
DYNAMIC BORDERS
If you select Dynamic border
|
|
after clicking on the border tab, you have the same options as discussed earlier in this chapter (referencing the Layout of a Scene).
You can add motion to the appearance of a border; make it rotate a few times before it becomes static, you can add an easing effect, set the delay and the duration.
In Addition to the above options, when you choose to apply settings to a dynamic border, you may also select different colors, different thicknesses, and different radius values for the two point numbers.
Tip: As an example, you can set the color to Red at point number 1; enter the value 4 for the thickness and 25 for radius. Navigate to point number 2 using the right arrow, and set the color to blue, enter the value 10 for thickness and 0 for radius. Click PLAY. You'll notice the border color will gradually switch from Red to Blue and the thickness and radius values will change.
BACKGROUND
If you click on the "Background Tab"
|
|
you'll be able to apply certain settings. These settings will affect the background of the selected Scene. By default, the Background is turned off. You can however select the Static Background option,
|
|
and then you have two choices, you can choose either a simple background or you can choose a Gradient background.
|
|
SIMPLE BACKGROUND
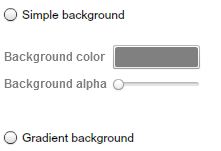
After you select the Simple background option you can apply two settings to the background.
1. Background color.
You can change the Background color by clicking the default color and then use the color picker to choose a different color.
|
|
2. Background alpha
The other setting you may apply when selecting a simple background is theBackground alpha option.
|
|
This option allows you to set a desired level of opacity for the background. Drag the slider to the left to set a different level of opacity.
LEVELS OF BACKGROUND OPACITY
|
|
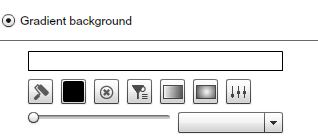
GRADIENT BACKGROUND
The gradient effect is used for backgrounds and has several settings that you may choose from to change or enhance the look and feel of the background.
|
|
GRADIENT MAP
When you click ONCE with your mouse on the gradient map, a smallSquare / handle will appear.
|
|
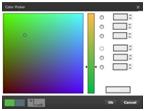
If you double click the handle, you'll see a color picker and you can use it to set a color point.
|
|
The color you choose will affect the area located between the selected handle and other handles from the gradient map. You can add as many handles as you want and try different color variations. As an example, let's click once on the right side of the gradient map and again around the middle. Double click the left side handle and choose a blue color.
|
|
Now, let's add a third handle and choose the yellow color.
|
|
Each color handle you create on a gradient map may be used to control the area the color covers, and also the opacity of the color in the gradient map. To control these options you'll use your mouse to drag the handle to the left or right, UP and DOWN over the gradient map.
Let's use for the next example to create a gradient map with two handles. One handle controls the yellow color on the gradient map and the other the blue color.
|
|
|
|
COLORS IN THE GRADIENT MAP
To control how much a color is spread on a gradient map, drag the handle controlling the color to the left or right. You'll notice the color will bleed with the other color. Drag the blue color handle to the right.
|
|
Compare the previews of the Background before and after
|
|
OPACITY OF A COLOR IN THE GRADIENT MAP
To control the opacity of a color in the gradient map, use your mouse to drag the handle that controls the color either UP or DOWN. If you drag the color handle UP, the opacity level will fall, making the color more transparent. If you drag the handle DOWN, the opacity level will rise until the color has no transparency.
|
|
Tip: We recommend you experiment working with color handles and combine different color gradients.
OTHER GRADIENT OPTIONS
Below the gradient map you'll find additional gradient tools.
|
|
COLOR GRADIENT PRESETS
|
|
The first icon is used to load a gradient map from a set of presets. Each time you click on this icon a new gradient map will load.
|
|
COLOR PICKER
|
|
The color picker is another option you can use to choose a gradient color. The first option we mentioned above is opening the color picker by double-clicking on a color handle with your mouse. In this case you must select a handle by clicking ONCE with your mouse and selecting the color picker icon to OPEN it. The color you choose will apply to the area controlled by the selected handle.
REMOVING A COLOR FROM THE GRADIENT MAP
|
|
This option is used to delete a color from the gradient map. You remove a color from the gradient map by deleting the handle that controls it. To remove a handle / color, first select the handle with your mouse and click on the DELETE icon.
|
|
CLEARING ALL GRADIENT COLORS FROM THE GRADIENT MAP
|
|
Selecting the CLEAR icon will reset all gradient colors and remove all map handles.
RADIAL GRADIENTS
|
|
The Radial icons are used to create different radial types of gradient. The default gradient type has horizontal alignment. The radial options allow you to change to position of gradient colors and align the colors either from left to right, reverse or around the center of the Background.
Examples of using the radial options for creating different types of gradient alignment :
|
|
SPREAD OPTION
Next to the Radial gradient options is the Spread icon.
|
|
If you click on the Spread icon, all the colors form a gradient map will spread equally along the gradient map so every color will cover an equal amount of space.
Example of using the Spread option :
Before using the Spread option:
|
|
After using the spread option:
|
|
Notice the distance between handles is equal after the Spread option was used.
ROTATING THE GRADIENT COLORS
Another option related to the gradient map and the gradient colors is the ability to rotate the gradient by affecting its angle or its x and y offsets values.
In order use the gradient rotation function, first you need to select what properties you want the rotation to affect. You do this by selecting the Angle, the x offset or the y offset from small dropdown menu.
|
|
Next, rotate the gradient using the Rotation Slider.
|
|
Drag the slider to the right, add colors on the gradient, and look at the preview area. These are examples of using the gradient rotation option. We recommend you try out different rotation options and use different color to obtain a nice background gradient.
|
|
GLOW EFFECT
Next in the Common section of the Properties panel is the Glow effect.The Glow effect is used to add a glowing stroke around the margins of a selected scene or component. It has several properties you can change to control how it will modify the selected scene or component.
Before you start customizing the glow effect, choose static or a dynamic appearance.
|
|
STATIC GLOW
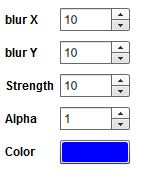
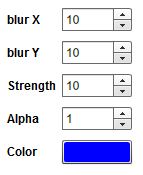
First let's use the Static option. After selecting the Static option you can apply different settings to the Glow effect. These settings are the blur, the strength, the alpha and the color of the glow.
|
|
BLUR
You can increase or decrees the blurriness of the glow effect on the x and y axes either by entering a value in the corresponding fields or by using the small UP and DOWN arrows.
STRENGTH
Increase or decrease the strength of the blur effect applied either by entering a value in the corresponding field or by using the small UP and DOWN arrows.
|
|
ALPHA
The Alpha option is used to increase or decrease the opacity / transparency of the Glow effect. This can be achieved either by entering a value in the corresponding field or by using the small UP and DOWN arrows.
|
|
GLOW COLOR
Choosing a color for the Glow effect can be done in the same manner as with any other color property in the SignageStudio. Select the default color and choose a color from the color picker or enter a hexadecimal value in the corresponding field.
|
|
Example of a glow effect applied to a Label component. The initial text was white and after applying the Glow effect a glowing stroke appeared around the text.
|
|
DYNAMIC GLOW
Another option you have when working with the Glow effect is the Dynamic appearance of the Glow. If you select Dynamic,
|
|
|
|
Besides these options you can also control the properties of the glow effect and make them animate.
You can choose to use the color red as the initial color of theGlow effect and yellow for the second color. The glow will gradually change from Red to yellow as the selected component begins to play. You'll do this by setting the color red at point number 1 and the color to yellow at point number 2. Additionally you can set an easing effect. Click on the PLAY button from the preview area to see the result.
BLUR EFFECT
Use the Blur effect to control the blurriness of a Scene or a component. You can choose to set the blur level on the x and y axes. Set the blur level by entering a value in the corresponding fields or by using the small UP and DOWN arrows.
|
|
The appearance of the blur effect can also be either Static or Dynamic. When choosing the static option, you apply a static blur to the selected scene or component. If you choose the dynamic option you can apply the same settings as described above, related to other properties, but in this case you control the blurriness of a component over time (animated).
Let's use for example an image is a Background and you apply a Dynamic Blur effect to it. For point number 1 we set a blurriness level of 15 pixels on the x and y axes, and at point number 2 we set the blur level at 0 pixels.
|
|
In this case, the blurriness level will decrease gradually over time, from point 1 to point 2. We recommend you experiment with the blur effects and combine the available settings with the easing effects.
SHADOW EFFECT
Below the Blur effects, next to the Common section of the properties panel is the Shadow effect. This effect is used to apply a shadow to a scene or a component. As in other cases of using effects, you can choose to apply a static or a dynamic shadow effect.
STATIC SHADOW
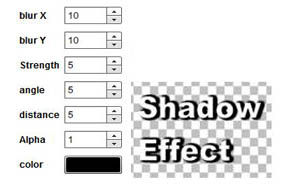
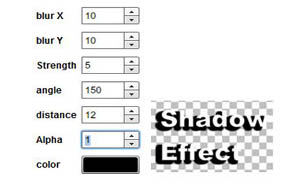
If you choose the static shadow effect, you can change different settings. We discussed earlier in this chapter how to modify most of these settings like the blur, strength, alpha, and the color. Besides these settings, when using the shadow effect, you can also add new values to the angle of the shadow and the distance with regards to the selected scene or component.
|
|
ANGLE AND DISTANCE
The Angle of a shadow can be modified by entering a new value in the corresponding field, or one pixel at a time using the UP and DOWN arrows.
|
|
The distance of a shadow represents how close or far the shadow is to itself in relation to scene or the component it has been applied to.
|
|
If you enter a higher value in the corresponding filed, the shadow will spread further away from the object. In the following example, we used the settings from the left image to apply a shadow effect to a label component.
|
|
Now, let's change the angle and increase the distance of the shadow. See the difference between the two examples.
|
|
DYNAMIC SHADOW EFFECT
As in the case of other effects and properties discussed earlier in this chapter, the dynamic option is also available for the shadow effect. If you select dynamic
|
|
after you clicked on the shadow tab, you have several settings you can apply to create a dynamic shadow instead of a static one.
|
|
The difference is that the settings are controlling the dynamics of certain properties of the shadow effect. You can set different values for all the properties of the shadow effect discussed above in the static shadow section at point number 1 and point number 2; the values will animate.
|
|
MAIN VIEWING AREA
Located by default in the center of the application's interface, theMain viewing area is where you work with different components you'll add to the scene.
|
|
Earlier in this Chapter, we discussed controllers located at the top of the preview window (in the case of an imported Scene). The same buttons you'll see at the top of the main viewing area is also available for scenes. The size of the main viewing area is the same size of the Scene. If you have a larger Scene that exceeds the visibility in the main area, a scrollbar will appear at the bottom of the area and you can drag the slider to the left or right to scroll through the scene's content.
|
|
TOOL BOX
The Toolbox panel is located by default on the left side of the main viewing area of the Scene.
|
|
When you click on the Toolbox tab, you'll have direct access toResources and Components. To access the Components panel, simply click on the Components tab in the Toolbox panel, and you will gain access the resource's panel; click on the resources tab in the Toolbox panel.
To build a Scene you can use any Resource as well as components. To use a resource or a component in your scene, simply drag it from the toolbox main viewing area. First select the resource or component and with your mouse, drag and drop it to the main viewing area.
OUTLINE PANEL
The Outline panel is located by next to the toolbox panel, on the left side of the main viewing area. You'll use the outline panel to set the layering order of the items you use in a Scene as well as to delete items (resources or components).
In the following example we added five resources to a Scene.
To change the layering order, meaning to arrange certain resources above or beneath other resources, we need to use the UP and DOWN arrows of the outline panel.
|
|
Select the name of the resource or component and click on the UP or DOWN arrow to position it above or below other items.
|
|
Remember the layering order of items added in a scene will affect certain aspects like transparency. The first item in the outline panel is the resource placed beneath everything else. It could be used as a background. All other resources lay on top of it.
DELETING AN ITEM
There are several ways to delete items.
1. Select the Item and click the delete icon in the outline panel
|
|
2. Select the Item and press delete on your keyboard
3. Right click on an item in the main viewing area and choose Delete
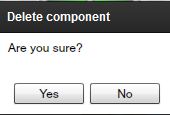
In all cases you'll be presented with a dialog box asking to confirm your action.
|
|
Campaigns
INTRO TO THE CAMPAIGN
The campaign is a global configuration which holds your entire digital signage presentation. Having the ability to configure multiple campaigns allows you to easily switch your SignagePlayers from one presentation to another (i.e.: assigning a single campaign to a single player and easily switching between campaigns).
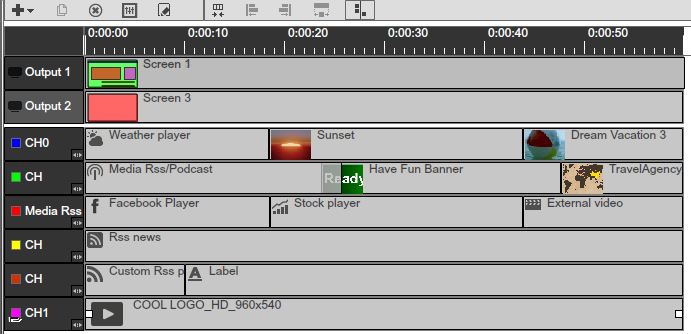
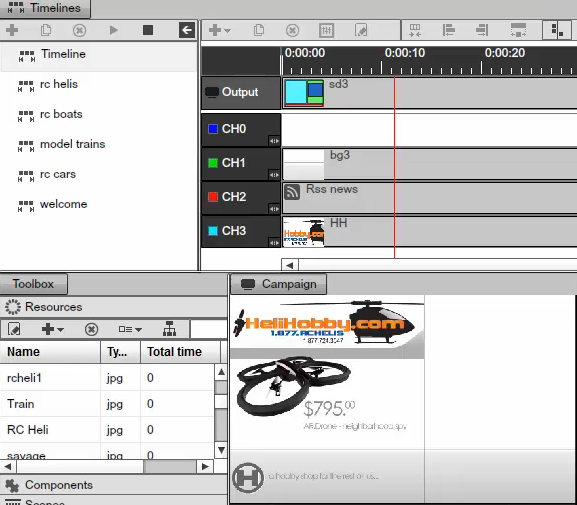
A campaign in its most basic format is a sequential list of timelines. A timeline is comprised a screen template with each screen division holding a single channel. A channel holds a list of resources and components. The resources and components can each be set to its own playback length.
And so a campaign is the place where timelines are sequenced to playback a list of components and resources that are placed inside channels which are bound to specific screen division; your brain smoking yet? Don't worry we will explain it all.
|
|
CAMPAIGNS AND TIMELINES
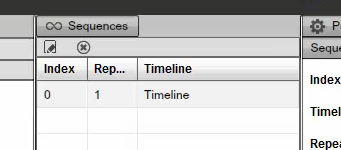
A Campaign can have an unlimited number of Timelines played sequentially; one timeline after the other on your output screen. In a campaign, you can also decide which timeline will play before or after the other ones, and you'll be able to accomplish this using the sequences section of the campaign. In the Campaign area you'll be able to use timelines to manage your presentations.
Each campaign you create can have a different name. It can be assigned to a specific folder, which is useful, especially when you have a large network with hundreds or even thousands of campaigns.
CAMPAIGNS AND STATIONS
A Campaign is what is assigned to a Physical station out in the field. Each Station represents the Computer where you have installed and configured a SignagePlayer. A Station is directly connected to an output Screen.
You can add an unlimited number of campaigns in the SignageStudio. Each campaign will be able to manage an unlimited number of timelines.
You can decide which Campaign will be connected to one or several stations, and you can always switch between the campaigns assigned to a particular Station.
CAMPAIGN SCHEDULER
There are two ways to manage how timelines are played back in campaigns. The first one is the Sequences we discussed earlier. You'll use the sequence mode to set the timelines order list; play sequentially one after the other.
|
|
The second mode is the Scheduler. The scheduler allows you to schedule the date and time when you want a certain timeline to playback within a campaign that is assigned to one or more stations (notice how one campaign can be assigned to any number of remote stations).
The Scheduler option allows you to have complete control over the timing of your presentation.
KIOSK MODE
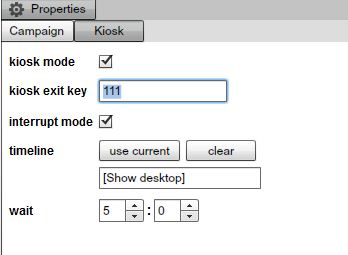
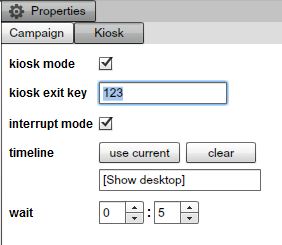
In the Campaign section you can also decide whether your presentation will run in KIOSK mode. Kiosk mode allows you to use touch screen displays and allow users to interact with you Signage Presentations.
We'll discuss more about enabling the Kiosk mode and other Kiosk related topics like the Kiosk builder in another Chapter.
CAMPAIGN - USER INTERFACE
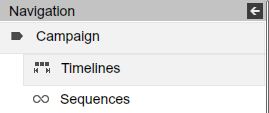
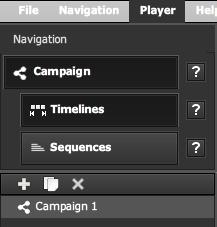
To access the campaign section, you select the campaign tab in the main Navigation menu.
|
|
After you click on the campaign tab, you'll have access to all the panels and directories within the campaign. In the Campaign you can add, delete, and duplicate a campaign. You can also assign a campaign to a different folder and create subfolders if you like. You can change the name of the Campaign and add Timelines to it.
CAMPAIGNS PANEL
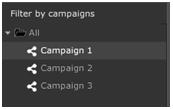
On the left side panel you'll be able to view all your created Campaigns. You'll access the Timelines built in a Campaign by selecting the Campaign with your mouse. If you assign different folders and subfolders to your Campaigns, this is where you'll see the folders and subfolders listed.
|
|
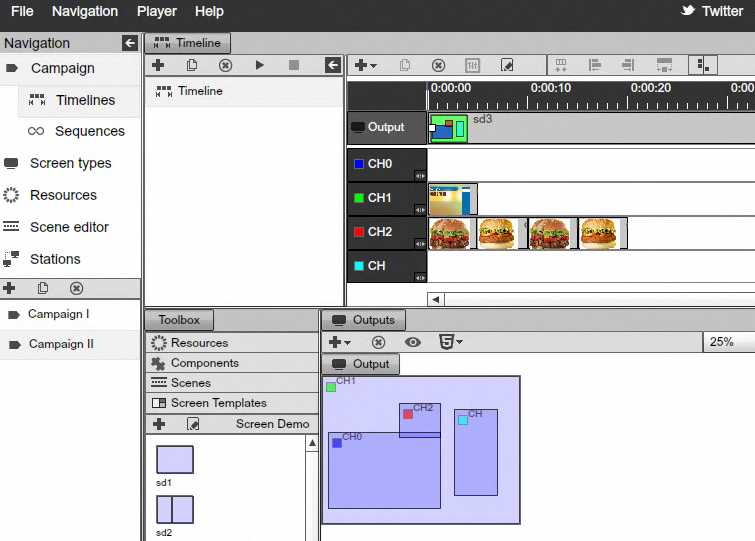
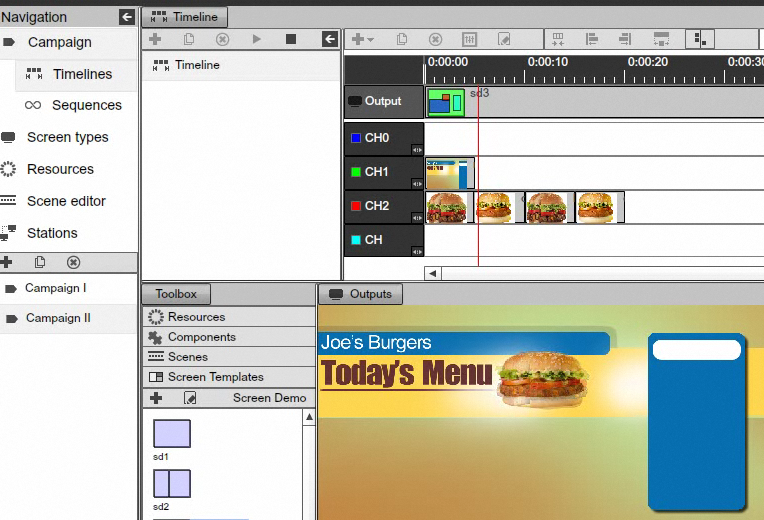
In the Campaign Section, you'll see the Timeline located in the center of the user interface. Here you will drag and edit your Resources, Components, and Scenes and assign them to different Channels to build your presentation.
|
|
TIMELINES PANEL
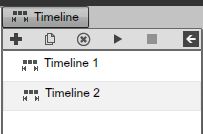
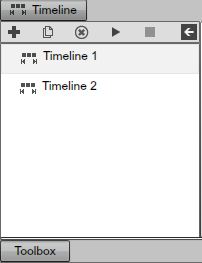
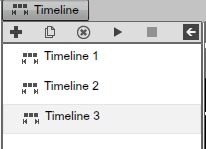
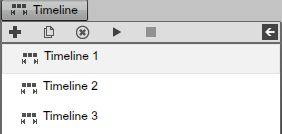
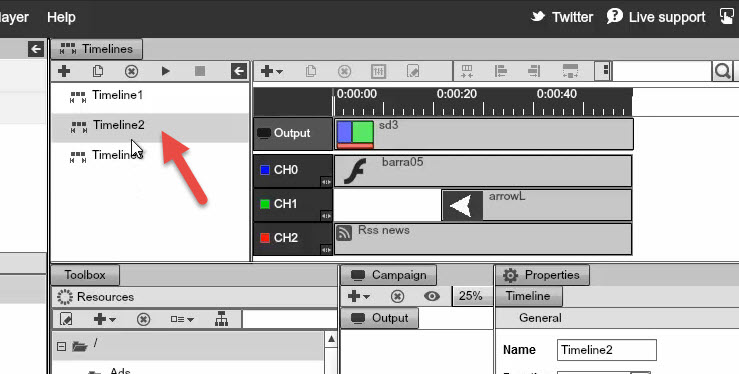
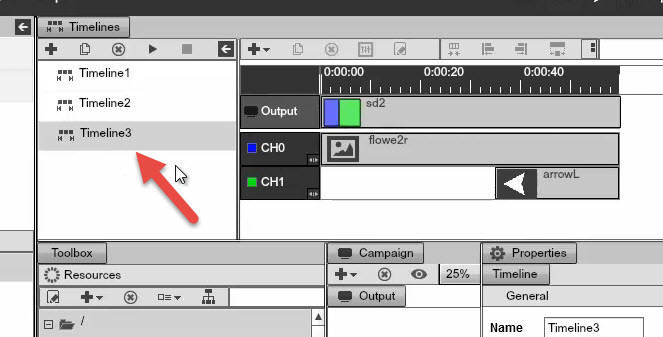
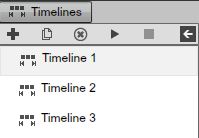
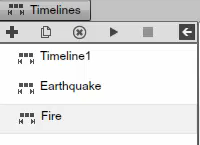
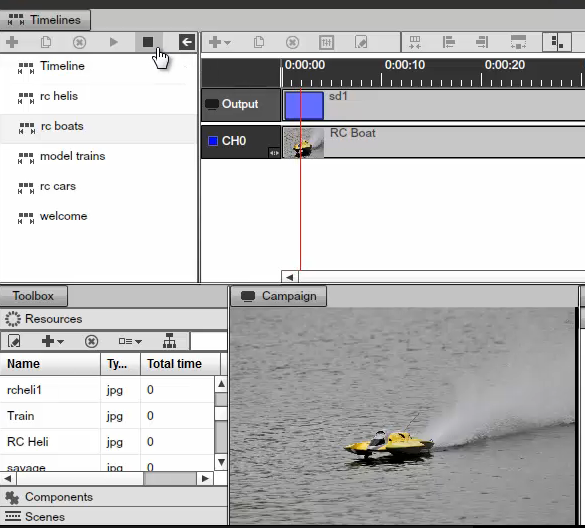
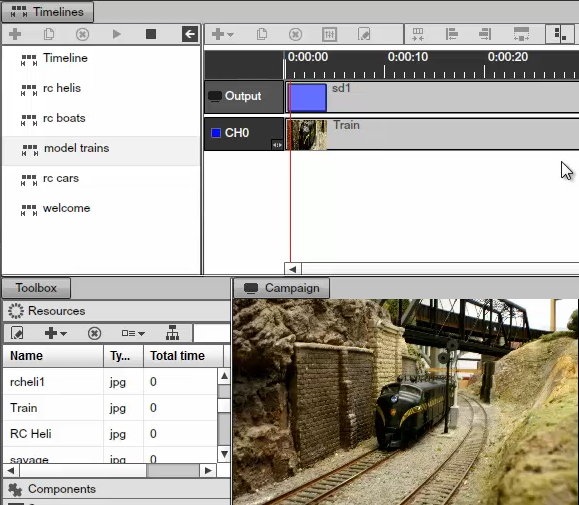
In the Timelines panel, you can add, rename, delete, or duplicate Timelines. In this directory you'll see listed all Timelines created.
|
|
THE TOOLBOX
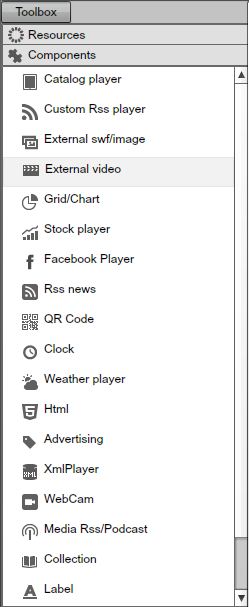
When you access the Campaign Section you'll also be able to use the Toolbox. It contains Resources, Components, and Scenes. You can also access from the Toolbox, the Screen Divisions you created, and you can assign more than one Screen Division to a Timeline.
|
|
THE OUTPUTS AREA
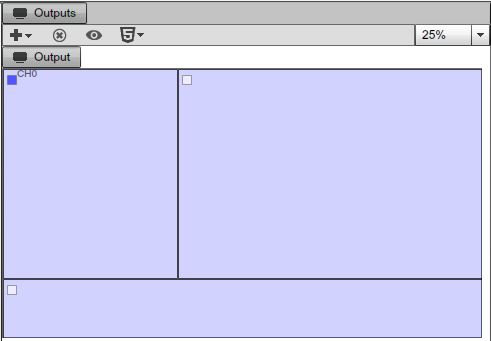
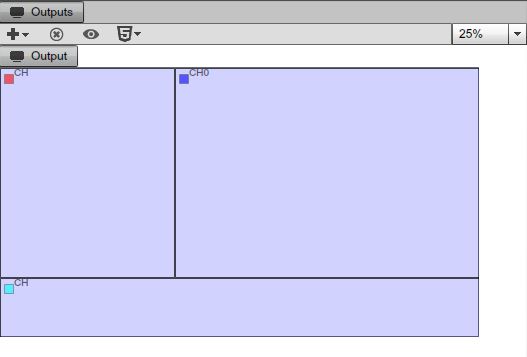
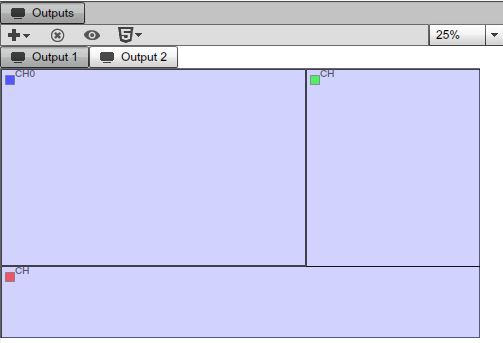
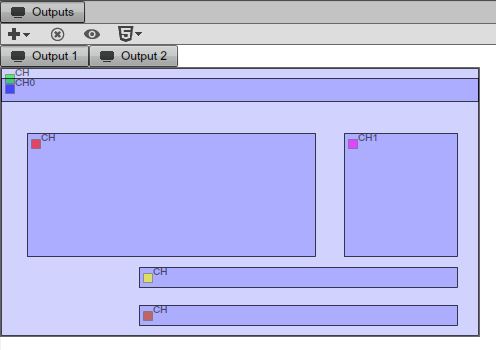
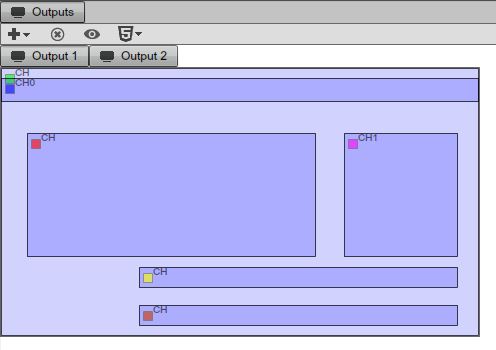
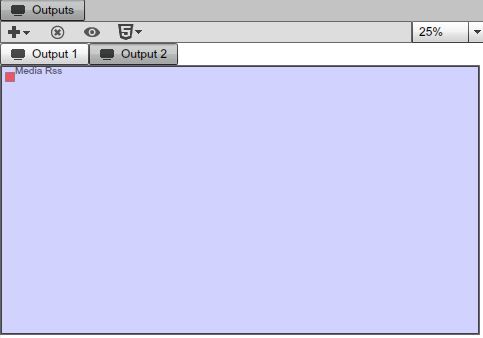
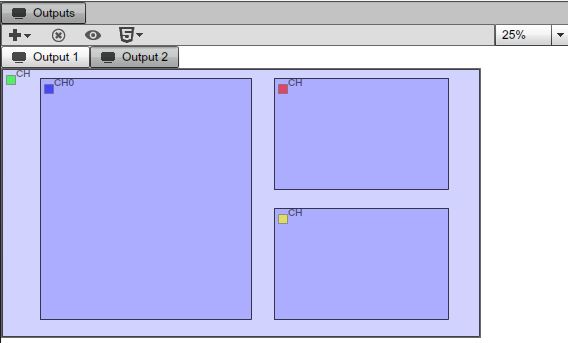
Another work area in the Campaign Section is the Outputs. The output is the Configuration of your Screen. It matches the layout of the Screen Divisions you created in the Screens Section of the SignageStudio.
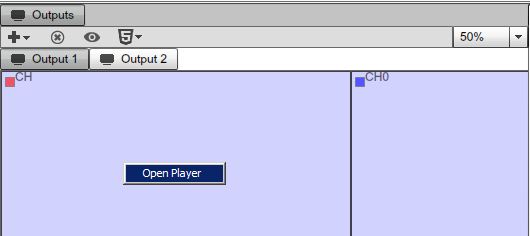
In the Outputs area you'll drop and assign Channels to embed in your Screen Divisions. Here you'll also be able to preview the Presentation; either using the SignagePlayer Web or Desktop version.
The output allows you to create a variation of a timeline for different resolution screens or, if you wanted to run a slightly modified version of a timeline. For example, you have 2 Stations, one in Los Angeles and one in New York. You want both to play the same campaign (thus same timelines). However you wish to have the Weather component be unique for each of the 2 locations. With multi output you can assign all screen divisions and channels to be identical while for both locations, while keeping a single channel (in this case Weather component) unique per location. This will reduce the amount of work needed to create a new presentation per location.
You can add or delete outputs. You can have an unlimited number of outputs in a Campaign, and also more importantly, you can switch between different Outputs inside a campaign when you assign it to particular stations.
|
|
PROPERTIES PANEL
When you select a Campaign or a Timeline, a Resource or a Component, or any other element in the Campaign Section, you can access its properties panel on the right side of the user interface (after selecting the respective component).
|
|
Campaigns are an essential part of any SignageStudio presentation. Managing a Campaign properly helps you build your network and have complete control over your Station (and the content they display for your viewers).
CAMPAIGNS - TIMELINES AND CHANNELS
A Campaign consists of any number of Timelines. A Timeline can have any number of Channels and Outputs. In the previous Chapter we discussed a Campaign representing what is assigned to a Station. A Station is the computer where you have installed the SignagePlayer Desktop version.
You can build any number of Campaigns and assign one campaign to one remote station. You can also choose to Play one Campaign for a certain period of time and switch to another Campaign at any point.
Before you begin building your first Campaign, you should check to make sure you've completed the flowing steps; as it is necessary to prepare your presentation before you start building your Campaigns. We'll explain later in this Chapter all the steps of creating a presentation and define a Campaign for it. For now, make sure you don't skip one of these steps before starting to build a Campaign.
- 1. Check if you imported all the necessary files in the resources directory and assigned folders to them for organization
- 2. You defined one or more Screens, set the desired resolution, and draw the Screen Divisions in the Screens section of the SignageStudio
- 3. Check the position and size of your Screen Divisions
- 4. Check the layering order of your Screen Divisions
- 5. Check the Orientation of your Screens
- 6. Check if you properly set the width and height for any scene you may want to include in your presentation ;
To access the Campaign section of the SignageStudio you select the Campaign tab from the main Navigation menu.
|
|
BUILDING A CAMPAIGN
Start building your first Campaign by following the Campaign wizard.
THE CAMPAIGN WIZARD
Click on the ADD icon located in the Campaign's panel.
|
|
a new dialog window appears on your Screen.
|
|
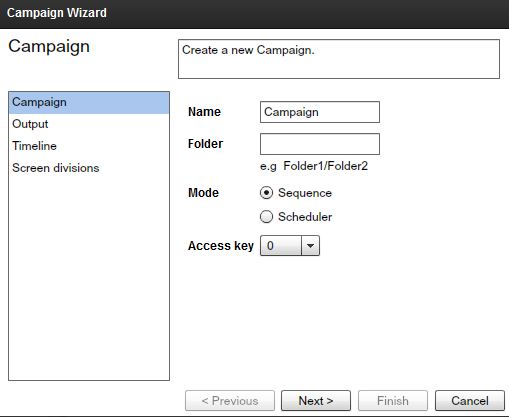
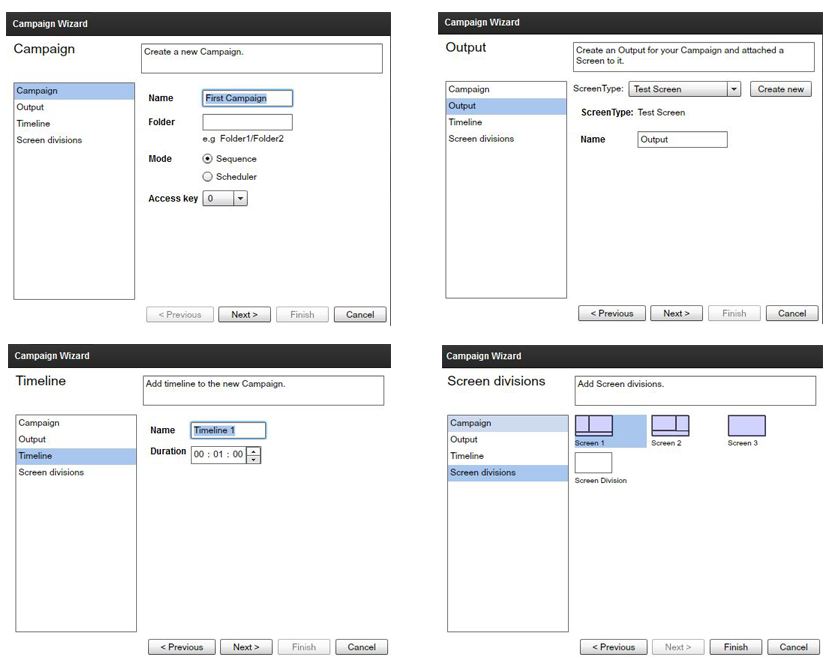
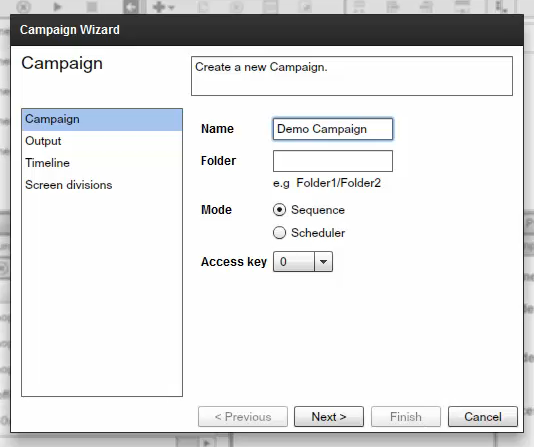
The Campaign wizard will allow you to build a Campaign by going through several steps. As you can see in the left side of the wizard, there are four sections:
- 1. Campaign
- 2. Output
- 3. Timeline
- 4. Screen Divisions
|
|
You can navigate to a different sections of the wizard directly by clicking on its name, or you can use the Next and Previous buttons.
|
|
Step 1: Set a name for your Campaign.
|
|
Step 2: Assign a new or existing folder or subfolder for the Campaign. You can assign a folder by entering the name/path of the folder in the "Folder" field. You can leave this field empty and decide later if you want to assign a folder / subfolder.
|
|
Step 3: Next you can choose to set the Campaign mode. You can set the mode either to Sequence or Scheduler.
The default mode is the Sequence mode. It will set the Timelines to play one after the other in a sequential order; while the Scheduler mode will allow you to set the Timelines to Play at certain periods of time (days, hours, minutes).
|
|
Step 4: Check the access key provided by the network administrator.
|
|
Step 5: Click the Next button
|
|
to access the settings from the Output section.
|
|
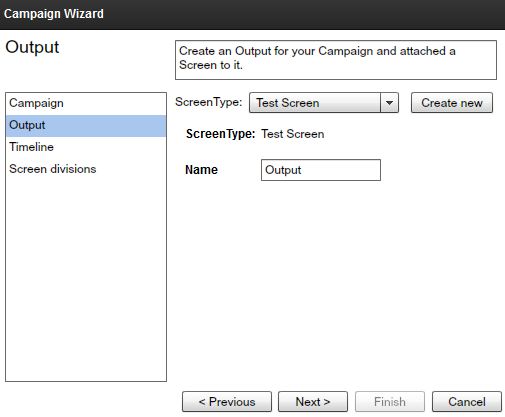
Step 6: Choose a Screen from the Screens dropdown list.
|
|
In this dropdown list you can select a Screen you've created in the Screens section of the SignageStudio.
In the next illustration, we created two Screens: My new Screen 1 and my new Screen 2.
|
|
We will choose the Screen named "My new Screen 1" from the Screen's dropdown list.
|
|
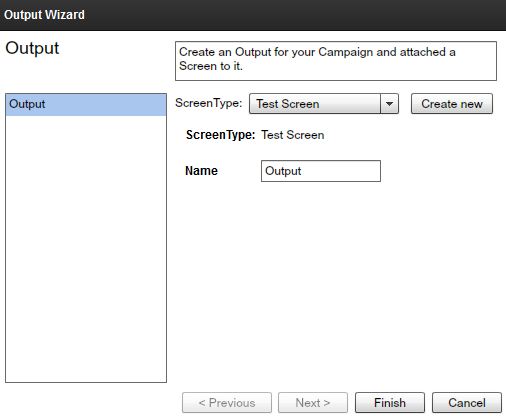
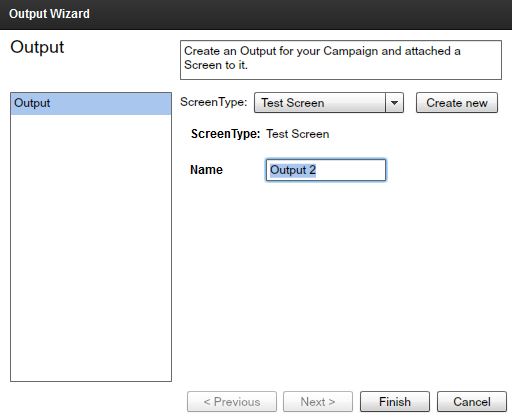
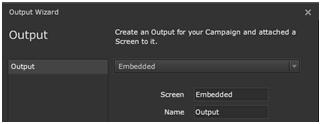
Step 7: Next let's set a new name for the Output. A Campaign can have more than one Output. You can add additional Outputs at any point.
|
|
Step 8: Click the Next button
|
|
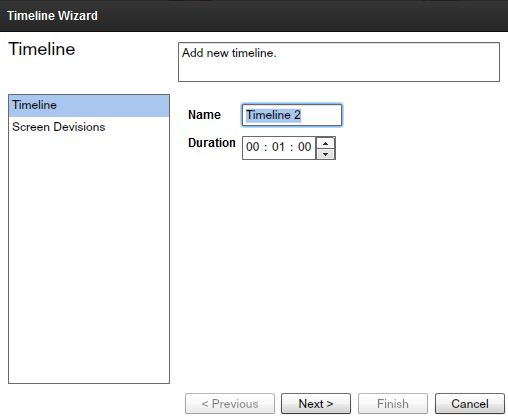
to access the Timeline section of the Campaign wizard. In this section, you will add a Timeline to your campaign. You can add an unlimited number of Timelines to a Campaign after you've created it.
Step 9: Set the name for the Timeline in the "Name" field.
|
|
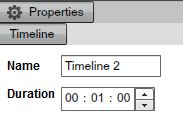
Step 10: Also in the Timeline Section of the Campaign wizard you can set the duration of the Timeline. The default duration is 00:1:00 minute. You can set the duration of the Timeline either by entering numeric values in the corresponding fields (hours, minutes, and seconds), or by using the UP and DOWN arrows keys.
|
|
After you've created a Campaign, you can change the duration of a Timeline.
Step 11: Click the Next button
|
|
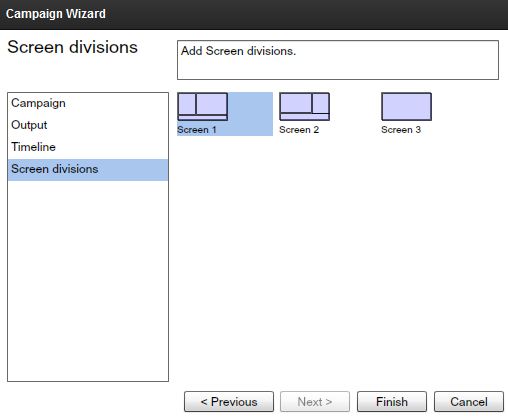
to access the Screen divisions section of the Campaign Wizard. In this section you'll choose a default Screen Division for the Timeline.
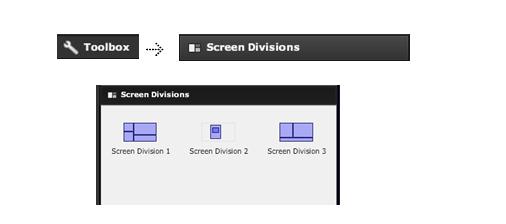
You can add multiple Screen Divisions to a Timeline after you've created the Campaign. For our example, we created in the Screens section three different Screen Divisions. We will choose Screen Division 1 by selecting it.
|
|
Click the Finish button to complete the Campaign Wizard or Cancel to abort all settings.
|
|
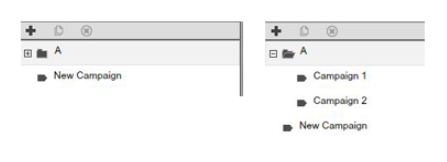
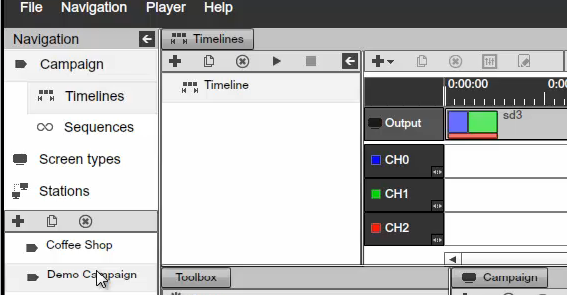
Congratulation, you just created a new Campaign, not so hard after all. In the Campaign's panel, check on the left side of the user interface and search for the Campaign you just created. In the next illustration we have a folder containing two Campaigns and the New Campaign we've just created.
|
|
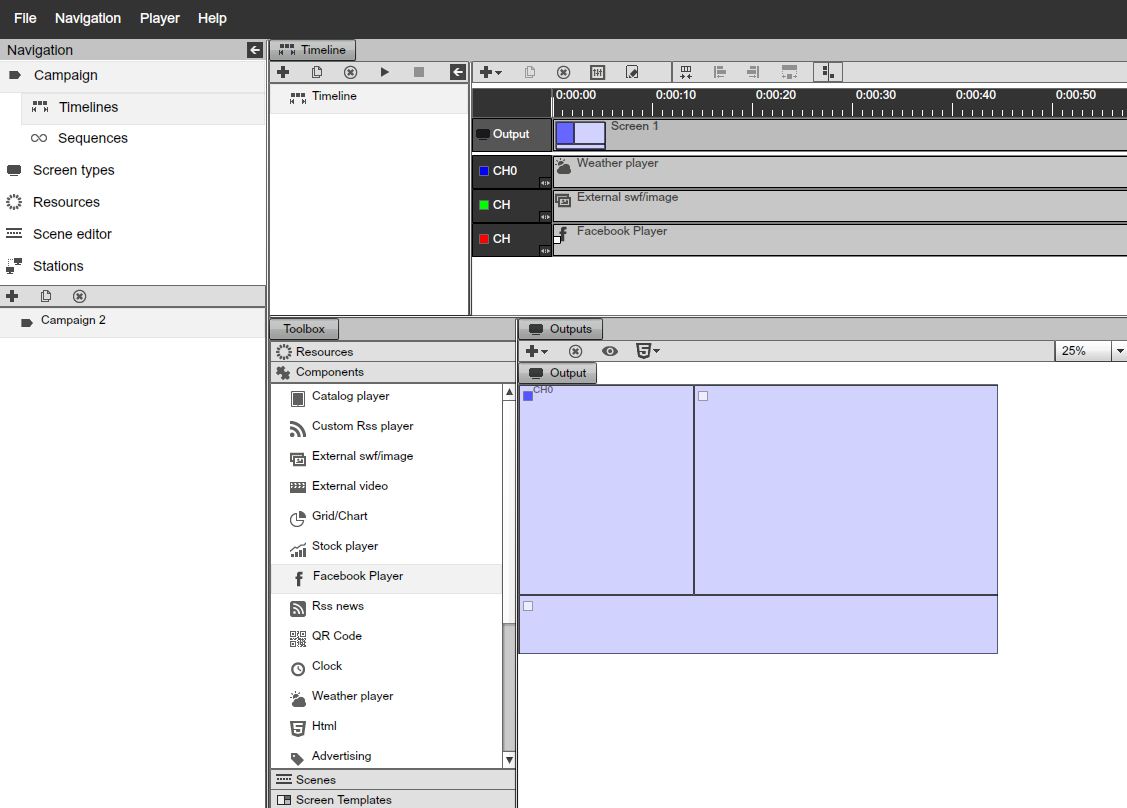
After you've created the New Campaign, several components of the Campaign were automatically created.
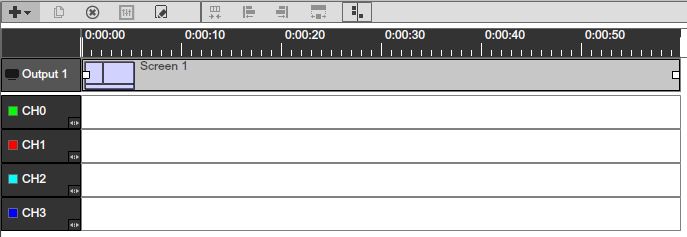
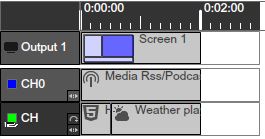
- 1. The Timeline containing the Screen Division for the Output.
|
|
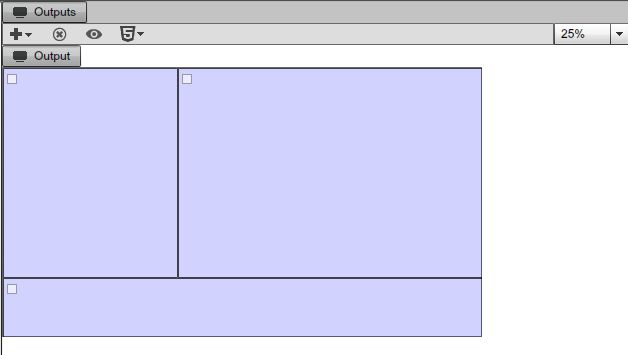
- 2. The Output containing the viewers or regions you drew in the Screen's section; each Output different
|
|
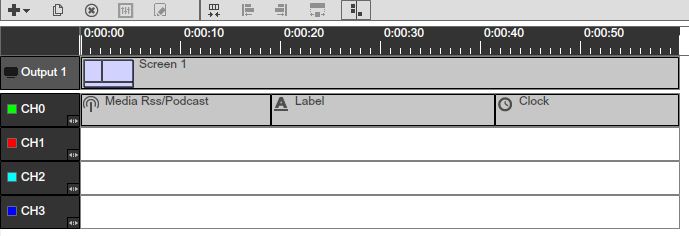
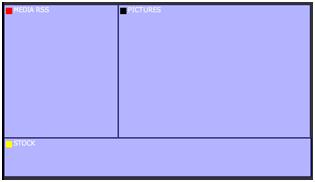
- 3. Channels appeared on the Timeline. Each Channel has a different color corresponding to the colors of the regions in the Output section.
|
|
In the Campaign's panel, besides the option to ADD a new Campaign, you can also duplicate or DELETE a Campaign.
DUPLICATING A CAMPAIGN
If you wish to duplicate a Campaign you'll have to select it, and then click on the duplicate icon located next to the Add icon in the Campaigns panel.
|
|
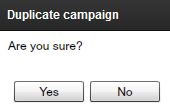
After you click on the Duplicate icon, a dialog box appears on your screen. You have the option to choose YES, and duplicate the Campaign, or to choose NO and CANCEL the operation.
|
|
If you click on YES, a new Campaign will be listed in the Campaigns panel. It will have the same settings as the duplicated one. It will be an exact copy of the Campaign you chose to duplicate.
DELETING A CAMPAIGN
If you want to delete a Campaign, you need to click on the DELETE icon,
|
|
located next to the Duplicate icon in the Campaigns panel.
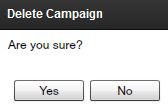
If you click on the Delete icon, a dialog box will appear on your Screen. You have the option to choose YES and DELETE the selected Campaign, or choose NO to CANCEL the operation.
|
|
You can access the Add, Duplicate or Delete options by right clicking on the name of an existing campaign in the Campaign panel, then choose the desired option.
THE PROPERTIES PANEL OF A CAMPAIGN
You can access the Properties panel of a Campaign by selecting the Campaign name in the Campaigns panel. The Properties panel of a campaign is located on the right side of the user interface.
|
|
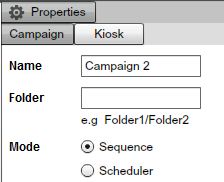
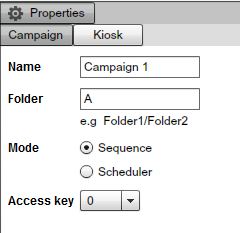
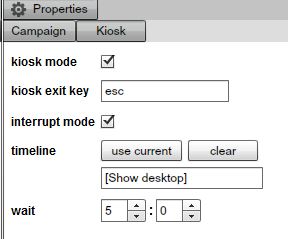
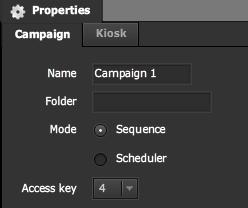
The Properties panel of a Campaign has two tabs which include Campaign and Kiosk.
CAMPAIGN SECTION OF THE PROPERTIES PANEL
In the Campaign section of the Properties panel you can apply different settings to a Campaign. These settings include:
- 1. Changing the name of the Campaign
- 2. Assigning a folder or subfolder to a Campaign
- 3. Selecting the Mode of a Campaign to either Sequence or Schedule
- 4. Verify the access key
CHANGING THE NAME OF A CAMPAIGN
To change the name of a Campaign you enter the new name of the Campaign in the "Name" field of the Properties panel.
|
|
ASSIGNING A FOLDER OR A SUBFOLDER TO A CAMPAIGN
If you didn't assign a folder or a subfolder using the Campaign wizard when you created the Campaign, than you'll be able to do so in the Folder field of the properties panel of a Campaign.
|
|
Enter the name of the folder in the field. You can also assign a subfolder to a Campaign by using the "/" key on your keyboard.
CAMPAIGN MODE
You can change the mode of a Campaign by selecting either Sequence or Scheduler.
|
|
The Sequencer is essentially a simple and effective way to serially set the play list order of all the timelines. This is accomplished by using a drag and drop operation.
The Scheduler allows you to set your timelines to play at any day and at any time. Use the scheduler to set the exact start and stop times. A graphical user interface is used to get a summary of all future playlists and to easily resolve conflicts.
You can always switch between the two modes directly from the Properties panel of a Campaign.
ACCESS KEYS
You can view what access keys have been assigned to you by the network administrator. However, only an administrator can modify the access key value through the Enterprise studio.
|
|
KIOSK SECTION OF THE PROPERTIES PANEL
You may enable the Kiosk mode for a Campaign from the Kiosk section of the Properties panel. The Kiosk mode allows you to interact with your Presentation using your mouse, keyboard, or finger gestures using a touch screen.
|
|
In the Kiosk section of the properties panel of a Campaign, you have several options, like enabling the Kiosk, setting up the Escape / exit key and more.
TIMELINES
After you access the Campaign Section of the SignageStudio, you will gain access to the Timelines Section. The other subsection is Sequences.
|
|
We will talk more about Sequences later in this Chapter, but for now we will cover what are Timelines and how we can use them to build a SignageStudio presentation.
THE TIMELINES
A timeline is a visual representation of the sequential play list of your media resources. A collection of all your timelines make up the final output of your digital signage presentation.
A Timeline is the place where you set and add channels. Channels contain all your media content (resources, scenes, and components), and where you'll define when content starts and ends. Channels are a visual playlist that you place the content within.
Timelines are an important element of a Campaign and you can create any number of Timelines and any number of channels within a single timelines.
THE TIMELINE PANEL
After you added a New Campaign to your presentation using the Campaign wizard, you will see that a Timeline was automatically created for you. You can choose to add additional Timelines to the Campaign, or duplicate existing Timelines.
|
|
You'll see all the Timelines you created listed in the Timelines panel. You can access their properties by selecting each timeline.
ADDING A NEW TIMELINE TO A CAMPAIGN
To add a new Timeline to a Campaign, click on the Add icon from the Timeline panel.
|
|
After you click on the Add button, you will gain access the Timeline wizard.
|
|
To add a new Timeline to a Campaign, you'll have to go through several steps in the Timeline wizard. The Timeline wizard has two sections: "Timeline" and "Screen Divisions."
Step 1: In the Timeline Section of the wizard, create a name for the new Timeline. Enter the new name in the "Name" field. Remember you can always change the name of a Timeline at any time if you choose to do so.
|
|
Step 2: Set the Duration of the Timeline. You can change the duration of a Timeline any time after you've create it.
|
|
Step 3: Click on the Next button
|
|
and choose a Screen Division. You can select the same Screen Division you chose for the previous Timeline(s) or a different one.
|
|
Click Finish to create the new Timeline.
After you've created a new Timeline, it will appear in the Timelines panel.
|
|
Besides adding a new Timeline, you can also Duplicate and Delete a Timeline from the Timeline's panel.
DUPLICATING A TIMELINE
If you want to duplicate a certain Timeline, you select it and click on the duplicate icon
|
|
located next to the Add icon in the Timeline panel.
After you clicked on the Duplicate icon, a new dialog box appears on your Screen.
|
|
You can choose YES and duplicate the selected Timeline, or you can choose NO to CANCEL the operation.
If you choose YES, a new Timeline will be listed in the Timelines panel. It will have the same settings as the duplicated one.
DELETING A TIMELINE
If you would like to delete a Timeline, you'll click on the Delete icon
|
|
located next to the Duplicate icon in the Timelines panel.
After you click on the Delete icon, a new dialog box appears on your Screen.
|
|
You'll have the option to choose YES and permanently DELETE the selected Timeline, or you can choose NO and CANCEL the operation.
You can also access the ADD and the DELETE options by right clicking on the name of a Timeline within the Timelines panel.
THE PROPERTIES PANEL OF A TIMELINE
Whenever you select a Timeline from the Timelines panel, you'll be able to access its Properties panel. In the properties panel you can change the name of the Timeline and also set the Duration of a Timeline.
|
|
CHANGING THE NAME OF A TIMELINE
To change the name of a Timeline you enter the new name in the "Name" field of the Properties panel.
|
|
CHANGING THE DURATION OF A TIMELINE
After you've created a Timeline, you can change its duration at the timeline using the "Duration" option in its Properties panel. Enter the numerical values in the corresponding fields (hours, minutes, and seconds), or use the small UP and DOWN arrow keys.
|
|
THE TIMELINE SECTION
The Timeline Section is a key component of the SignageStudio. You'll use a Timeline to set up your entire Presentation. In a Timeline you will:
- Drag your Scenes, Components, or Resources
- Define which Component will play in your Presentation
- How long it will play in your Presentation- Where it will play in your Presentation
TIMELINE SECTION - OVERVIEW
After you created a Campaign, a new Timeline was automatically created. The Timeline is located by default in the middle of the user interface next to the main Navigation menu.
|
|
A Timeline is comprised of several tools including:
- 1. Toolbar
- 2. Output
- 3. Channels
- 4. Time Markers
- 5. Scale Feature
THE TIMELINE TOOLBAR
In the top left area of the Timeline section, you'll see a toolbar containing several icons.
|
|
THE ADD ICON
The Add icon
|
|
is used to ADD Channels to a Timeline. Channels allow you to embed resources within them and then assign them to Screen Divisions. A region or division of a Screen can have only one Chanel assigned to it, but you can assign the same Channel to multiple Screen Divisions if you wish to have the same content play multiple times.
|
|
The "Add channel" icon allows you to add either a Local Channel or a Common Channel to the Timeline.
We will cover common channels later and explain the difference between local and common Channels.
THE DUPLICATE ICON
The Duplicate channel icon
|
|
is used to duplicate a certain Channel. To duplicate a Channel, you must select it and then click on the Duplicate Channel icon.
After you click on the Duplicate Channel icon, a dialog box appears on your Screen.
|
|
You can choose YES to duplicate the Channel or NO to CANCEL the operation. If you click YES, a new identical channel appears in the Timeline.
THE DELETE ICON
The Delete icon
|
|
is used to DELETE Channels from a Timeline, and any Output template Component, Resource, or Scene you previously added to the Timeline.
To delete something from a Timeline you select it and click on the Delete icon. After you've clicked on the Delete icon, a dialog box appears on your Screen
|
|
You can click YES to delete the selected component, or click NO the cancel the operation.
THE REMOVE SPACING ICON
The Remove Spacing icon
|
|
is used to remove the spacing between the Resources, Components, or Scenes added to a particular Channel. You can manually drag a component added to a Timeline using the mouse, but clicking on the Remove Spacing icon will do the same thing (and will save time).
In the following example, we added three Components to a Timeline.
|
|
To remove the spacing between the components we added to the Timeline, you must click either on the Chanel's name, or on any of the Components residing in the respective channel followed by clicking on the Remove Spacing button.
|
|
As you can see from our example, after we clicked on the Remove Spacing icon all the Components from the respective channel aligned one next to the other, leaving no spaces between them.
|
|
THE EDIT PLAYER ICON
You'll use the Edit Player icon
|
|
to access the Properties panel of a particular Component, Resource, or Scene you previously added to a Timeline. As an alternative to the use of the Edit Player option, you can also double click on a Component and access its properties panel to apply different settings to it.
THE OUTPUT AREA
The Output of a Campaign includes:
- Timeline area
- Main Output area
THE TIMELINE AREA OF THE OUTPUT
The Timeline area of the Output is located at the top of the Timeline. It represents the Template containing the Screen Divisions you assigned to the respective Output. Each Screen Division needs to have one Channel assigned to it.
|
|
The Output area of the Timeline includes:- 1. Output Name
- 2. Output Preview area
The Output name is located in the left side of the Timeline above the Channel names.
|
|
The Output preview area shows you a small graphic representation of the Template and the Screen Divisions assigned to the Output. Whenever you assign a particular Channel to a division of your Screen, you'll see its color filling the corresponding section of the Preview area.
If you didn't assign any Channels to the Output, the output would look hollow:
|
|
If you drag a Chanel into the Main Output area, the color of the respective channel fills the section of the template in the Preview. This way, you'll easily know which parts of your Screen Division have Channels assigned to them.
|
|
ADDING MORE TEMPLATES TO THE SAME OUTPUT
You can add additional screen division templates to add more diversity to your Signage Presentation; thus allowing you to change the screen division if your presentation in real time.
Step 1: Shorten the time length of the existing Output by dragging its end with your mouse.
|
|
Step 2: Open the Toolbox panel and click on the Screen Divisions tab.
|
|
Step 3: Choose a Screen Division you previously built and drag it to the Timeline; next to the existing one. Now, you'll have two Templates on the same output Section.
|
|
Having the configuration from our example, the Screen Division 1 will play first on your Station, and after 30 seconds the Screen Division 3 will take over.
THE MAIN OUTPUT AREA OF A CAMPAIGN
The main output area of a Campaign is the place where you'll assign Channels to a certain Output Screen, and also the place where you can Preview any Resource, Component or Scene added to a Timeline.
|
|
Here you can add more Outputs to a Campaign delete outputs, preview outputs; among other things.
THE TIMELINE CHANNELS
Channels allow you to embed resources within them and assign them to Screen Divisions in the Main Output area. A Screen Division can have only one Channel assign to it, but you can assign the same Channel to multiple Screen Divisions templates.
There are two types of Channels:
- Local Channels
- Common Channels
LOCAL CHANNELS
When you create a new Campaign, the system will automatically create a local Channel for every division of the screen. The Channels have a predefined color and you can change it from the properties panel. The Screen Division has four viewers which we previously drew in the Screen's section of the SignageStudio.
|
|
The four Channels from our example have the default names of: CH0, CH1, CH2, and CH3
Let's add some Components to the first Channel, which is CH0. We will add the Media RSS Component, the Label Component, and the Clock Component.
Drag the Components from the Components panel into the Timeline, on the first Chanel which is CH0.
|
|
ASSIGNING A CHANNEL TO A REGION FROM THE SCREEN DIVISION
To assign a particular Channel to a region or viewer in your Screen Division:
- 1. Drag the Channel from the Timeline.
|
|
- 2. Drop the Channel into a region of the Output, where you'll embed the content added to the Channel in the Timeline.
|
|
As for our example, all the Components added to the blue local Channel (CH0), will be embedded in the region located in the top right side of the Screen Division. Three more regions remain unassigned; therefore, you can add a Channel to each region.
|
|
ADDING A NEW CHANNEL TO THE TIMELINE
To add a new Channel to the Timeline you need to click on the Add icon.
|
|
After you've added a new Channel to the Timeline, you can add Resources, Components, or entire Scenes to it, you can assign the Channel to a particular division of your Screen, and you can apply settings to it.
DUPLICATING A CHANNEL
To duplicate a Channel you select it and click the duplicate button from the Timeline's Toolbar.
|
|
After you click on the Duplicate button, a dialog box appears, click YES to duplicate the selected Channel.
|
|
A new identical Channel is created on the Timeline. It includes the same Resources, Components, or Scenes you added to the previous one.
DELETING A CHANNEL
If you want to delete a Channel from the Timeline, you select the Channel and click on the Delete icon
|
|
from the Timelines Toolbar. After you've clicked on the Delete button a dialog box appears, click YES to permanently delete the selected Channel.
|
|
THE PROPERTIES PANEL OF A CHANNEL
To access the Properties panel of a certain Channel, first select it in the Timeline.
|
|
The Properties panel of a Chanel is located by at the lower right section of the user interface.
|
|
CHANGING THE NAME OF A CHANNEL
To change the Name of a Channel, select the Channel in the Timeline and then type the new name for it in the "Name" field of the Properties panel.
|
|
CHANGING THE COLOR MARK ASSIGNED TO A CHANNEL
Every Channel, either created with a new Campaign or added later to a Timeline, has a certain color assigned to it. This color is important as it will help you visualize the different Channels assigned to a Screen Division.
You can change the color of a Channel using the Color picker from the Properties panel. You can either enter a value in the hexadecimal field or choose a color manually.
|
|
THE RANDOM ORDER OPTION
The Random Order option is located below the Color picker in the Properties panel of a Channel.
|
|
If the Random Order, option is unchecked, all the Resources, Components or Scenes added to the selected Channel will play sequentially, one after the other, in the exact order you set within the Timeline.
If the Random Order option is checked, then all the Resources, Components, or Scenes added to the selected Channel will play randomly; making the presentation seem more unique.
THE REPEAT TO FIT OPTION
You'll use the Repeat to fit option when you want the first Component added to a Channel to play after the last one.
|
|
Example 1: We have three Resources added to a Channel, and the last one is a video file set to play in a continuous loop. With this configuration, when the video file ends, the system will automatically play it again in a loop. If you click on the first Resource from the Timeline and enable the Repeat to fit option, the system will play the first Resource right after the video file ends.
Example 2: Let's add two External Video Components to the Timeline and leave some distance between them.
|
|
If the Repeat to fit option is disabled, the gap between these files will remain and the second video will begin to play only after the gap and only for the length we previously set.
If the Repeat to fit option is enabled, both video files will play until completion, looping one after the other within the length of the Timeline.
THE RESPECT CONTENT LENGTH OPTION
The Respect Content Length option works only on videos and video related components like Media RSS. By default it's enabled. Which means the system respects whatever length you set the video to play, within the Timeline.
|
|
If you set a video file to start playing for about 10 seconds on the Timeline and leave the Respect Content Length option enabled, the systems respects it regardless of how long or short the video.
|
|
However, if you uncheck the Respect Content Length option, the system no longer respects the length of the Component you set on the Timeline. In this case, even if you shortened the Component length on the timeline, it will still play the video to completion.
|
|
This feature comes to shine with Media RSS, because you don't always know the exact length of a video with an MRSS feed, or how many videos will play in the RSS feed.
By disabling the Respect Content Length option, all the videos related to the Media RSS will play to completion within the given length of the Timeline.
COMMON CHANNELS
Common Channels allow you to reduce your management time by allowing you to reuse Channels over several Timelines within a single Campaign. We'll talk about different aspects and how to configure Common Channels.
ADDING A NEW COMMON CHANNEL
To add a Common Channel to the Timeline, click on the Add icon
|
|
from the toolbar and choose Common.
|
|
A new Channel is added to the Timeline, but notice it has a small hand over the Channel indicator. This indicates the Channel is a Common Channel.
|
|
To demonstrate what the Common Channel is, we will add two more Timelines to the Campaign. Now, you have three Timelines added to the same Campaign.
|
|
Switch to the second and the third Timeline and notice that each Timeline of the Campaign has the same Common Channel you added, thus all timelines have access to the same "shared" Common Channel.
To use the Common Channel, you'll assign it like a any other local channel to a certain region or viewer of your Screen Division. The real power of a Common Channel is the ability to change a Resource only one time, on that Channel, but have it propagate to all the Timelines.
One thing not very obvious with Common Channels is that Common Channels have their own length, independent of the Timeline they reside in. For example, right now we have Timeline 1 which has a total length of 1:00 minute, Timeline 2 which has a total length of 2:00 minutes, and Timeline 3 which has a total length of 3: minutes.
|
|
So what is the total length of our Common Channel?
On our Timeline 1, which has a total length of 1:00 minute, we have a Media RSS Component added to a Local Channel and two other Components added to a Common Channel.
|
|
If you try to drag the Media RSS Component outside the length of the Timeline, you'll not be able to do so, because local Channels are limited to the boundary of the Timeline they reside in.
However, if you try to increase the length of a Resource, Component or Scene added to a Common Channel, you'll notice no limitations by the boundaries of the Timeline, because Common Channels are independent of any single Timeline.
Therefore, if you click and drag a Resource from the Common Channel to the right, you'll see it go beyond the boundaries of the Timeline, because the Channel is Common.
|
|
Common Channels are useful especially when you have multiple Timelines that are almost identical. They run the same content and the same Channels. You only want one or two different Channels. You can use your Common Channel throughout your Timelines so everything will be almost identical. You will use the local Channel only for the places you are going to have different content which doesn't appear in the rest of the Timeline.
So local Channels and the content you add to them will be limited to the Timeline they reside in, and the Common Channels will play the Content added to them throughout all the existing Timelines.
THE TIME MARKERS
Time markers (also known as Time Scale) are guides set to help you position Resources, Components, or Scenes on the Timeline.
Time markers are located at the top of the Timeline. They have vertical lines to illustrate the measurement related to the duration of a Timeline in seconds and minutes.
The shorter vertical lines represent seconds and the longer ones represent minute indicators.
|
|
THE SCALE FEATURE
To have a clear view of the entire Timeline, especially when you are working with longer Timelines, you'll use the Scale feature.
The Scale feature is located at the top right side of the Timeline and allow you to zoom in or out from the Timeline.
|
|
To demonstrate how the Scale feature works, set the length of one of the timelines to 2:00 minutes.
|
|
You might not see the entire Timeline, depending on the size of your monitor. In this case, you'll need to use the scroll bar located beneath the Timeline and drag the slider to the right (so you can also see the end of the Timeline).
|
|
|
|
To save Time and have a complete visual control over the entire Timeline, you'll need to drag the Scale slider to the right and zoom out from the Timeline.
|
|
|
|
The Timeline section has decreased in size allowing you to have more control over the timing of your Timeline.
THE OUTPUTS OF A CAMPAIGN
We discussed Outputs briefly earlier. In this section we'll better understand how to use them and how to apply different settings to Outputs.
CONFIGURING THE OUTPUT
An Output is a representation of a Screen Division created in the Screen's section of the SignageStudio. The Output allows you to assign Channels in the different areas of a Screen Division, and also allows you to have visual control over the positioning of your content in a Screen Division.
MAIN OUTPUT AREA
The main Output area is located below the Timeline section.
|
|
The output area is used to assign Channels and embed your content. In the image above, we added four different local Channels to the Output.
OUTPUT TOOLBAR
|
|
ADDING AN OUTPUT
You can add a new Output and use it in the same Timeline along with other Outputs. If you add additional outputs to a Timeline, after you've built your Campaign and assigned the Campaign to a Station, you'll have to select which one of the multiple Outputs you would like the Station to bind to for a particular Campaign.
To add a new Output to a Campaign, you select the first icon of the toolbar, which is the Add button.
|
|
After you click on the Output icon and on Output, a new window appears on your screen. This is the Output Wizard that guides you through the process of adding a new Output to your Campaign.
|
|
Step 1: Attach a Screen to the newly created Output.
After you open the new Output Wizard, you select a Screen, which attaches to the respective Output. You'll select a Screen from the Screen dropdown list.
|
|
Step 2: Enter a name for the Output.
To assign a name for the new Output, type the name in the Name field.
Step 3: Finish.
To exit the wizard and finish creating a new Output, click on the FINISH button.
After you've completed the Output Wizard, you'll notice a new Output was created in the Output area. You'll also notice a new Output channel appeared on the Timeline, beneath the other existing Outputs.
|
|
The new Output channel from the Timeline has no template assigned to it like the existing Output.
ASSIGN A SCREEN DIVISION TEMPLATE TO AN OUTPUT
After you create a new Output, you assign a Screen Division to the particular Output. You may assign one or more Screen Division Templates to the same Output channel.
To assign a new Screen Division Template to an Output, you follow three simple steps:
- 1. Open the Toolbox panel and select the Screen Divisions tab.
- 2. Drag and drop a Screen Division onto the Timeline.
- 3. Adjust the length of the Screen Division
|
|
To assign certain Channels to the Output, you need to first select the channel on the Timeline and then drag the Channels into the corresponding regions of the Screen Division.
DELETING AN OUTPUT
|
|
You have the option to click YES and delete the Campaign Screen (which is the Output), or choose NO and cancel the operation.
Deleting an Output from the main Output area results in the loss of all your configuration and settings you made on the Timeline regarding a particular Output screen.
PREVIEW IN EXTERNAL BROWSER OPTION
You can preview any Output Screen anytime by select it,
|
|
located next to the Delete icon in the Main Outputs area toolbar. To preview an Output configuration, first select the Output from the main output area and then click on the Preview in External Browser icon
|
|
After you click on the preview icon, your default browser immediately opens and the SignagePlayer web version plays the Signage Presentation associated to the Output screen.
As an alternative, you can also right click on the Output viewing area and click on the Open Player option.
|
|
The SignagePlayer Web version loads the content inside a web browser. The content played can be accessed virtually from any computer. That said; the SignagePlayer Desktop version standalone application which needs to be installed on the Station/ Computer connected to your Screen.
SIGNAGEPLAYER OPTIONS
The last icon from the toolbar located in the main Outputs area is the SignagePlayer icon
|
|
- SignagePlayer Web version
- SignagePlayer Embedded version
|
|
THE SIGNAGEPLAYER WEB OPTION
After clicking on the SignagePlayer icon,
|
|
if you choose the SignagePlayer option, you'll see a new window appear
|
|
In this window you'll see the preview URL for the Presentation associated with the selected Output Screen. You can copy this URL to your clipboard and send it to others so they can preview the presentation on their PC; inside any web browser.
You can copy the Preview URL in two ways:
- 1. Click on the Copy to clipboard button
|
|
- 2. Select the Text and then click on Ctrl (Cmd) + C on your keyboard.
You can close the window by clicking on the CLOSE button.
SIGNAGEPLAYER EMBEDDED OPTION
After clicking on the SignagePlayer icon, if you choose the SignagePlayer Embedded option,
|
|
|
|
A snippet with the Embedded HTML code of your Signage SignagePlayer Embedded version can be can be copied and pasted to an HTML page.
You can copy the Embedded HTML code in two ways:
- 1. Click on the Copy to clipboard button.
|
|
- 2. Select the Text and click on Ctrl (Cmd) + C on your keyboard.
You can close the window by clicking on the CLOSE button.
OUTPUTS AREA AND ZOOM
The zoom feature allows you to have a clear view of the main Outputs area. To zoom in or out from the Outputs area, you use the drop down list containing the zoom percentage.
|
|
In the above illustration, the zoom option is set to 25%, which means the Outputs area was scale down by 75%.
|
|
|
|
PROPERTIES PANEL OF AN OUTPUT SCREEN
If you select an Output screen from the main Outputs area, you'll access its Properties panel.
|
|
The properties panel of an Output screen is located by on the right side of the application's user interface. You have two fields in the Output properties panel:
- 1. Screen Field
- 2. Name field
THE SCREEN FIELD
In the Screen field you'll see the name of the Screen you'll choose for the selected Output.
|
|
THE NAME FIELD
You can use the Name field to change the name of the selected Output screen. You can change the name of an Output screen at any time by typing the new name in the Name field.
|
|
TOOLBOX
The Toolbox panel is located next to the Timelines panel. From the Toolbox panel, you can access the Resources directory, the Components directory, the Scenes directory, Screen Division directory and more.
|
|
You can drag a Resource, Component, or a Scene directly to the Timeline and assign it to a particular Channel. You may also use the Screen Divisions tab to access Screen Division Templates and drag them to the Output channels on the Timeline. After you drag a Screen Division to an Output channel you can double click on it to access its properties panel.
|
|
In the Properties panel of a Timeline Screen Division, you can control two properties:
- Offset Time
- Duration
The two options are available in the properties panel of any Player added to a Timeline. If you select any Resource, Component or Scene added to the Timeline, you'll also access these properties
OFFSET TIME
Using the Offset Time option, you can set a delay for a starting point of a particular item added to the Timeline. You can control the exact time in hours, minutes, and seconds when timeline item will begin playing. You can either enter numerical values in the corresponding fields, or you may also use the UP and DOWN arrows keys.
|
|
A more commonly used alternative to using this feature is done simply by dragging an item added to the Timeline, so it will start playing at a certain selected offset. Let's say you'd like the first Resource (which resides within a particular Channel), to start playing with a delay of 10:00 seconds after the Timelines began. To accomplish this, you will either set the Offset time to 10:00 seconds, or drag the item until it reaches the 10:00 seconds time marker.
|
|
You'll notice while you're dragging the item on the timeline, the Offset changes accordingly.
In our example, all the Resources, Components, and Scenes added to the Timeline played normally; except the Video file which will start playing after a delay of 10:00 seconds.
DURATION
The second option in the Properties panel is the Duration.
|
|
You can change the duration of any item you added to a Timeline, either using the Duration feature or using your mouse and dragging the item to the left or right to increase or decrease its length.
PLAYER PROPERTIES PANEL
Each time you add a Component, Resource, or Scene to a Timeline, the System will interpret it as a player; a player which will play the content within it.
By selecting a Player, no matter if it's a video, a picture, a Weather Component and so on; you'll access its Properties panel. The Properties Panel of a Player contains the options of Offset Time, Duration, and enable KIOSK inputs for a particular timeline item.
|
|
By enabling the Kiosk inputs, you let the system know the selected Resource may be accessed by a Kiosk machine and users can interact with it.
DIRECT ACCESS TO RESOURCES
When you click on the Resources tab from the Toolbox in the Campaign section, you have access to all the options related to Resources (as in other Sections of the SignageStudio). Here you can add new Resources, delete Resources, and search for a particular resource using the search feature and more.
|
|
ADDITIONAL OPTIONS WITHIN THE TIMELINE
- THE RIGHT CLICK / CONTEXT MENU
After you've added something to the Timeline, either a Component, Resource, Scene, or Screen Division Template, you can right click your mouse on it the item and access the context menu. You can also access the same menu by right clicking on an empty area of the Timeline.
The menu contains the following options:
- 1. Copy
- 2. Paste
- 3. Delete
- 4. Add Local Channel
- 5. Add Common Channel
- 6. Edit Player
|
|
If you right click on an Output, the Copy, Paste and Delete options are not available from the right click menu.
In the case of Channels and Screen Division Templates, the Copy and Paste options are not available.
COPY / PASTE FUNCTIONS
To save valuable time, if you want to use the same Resource, Component, or Scene you already added to a Channel with other Channels, you can COPY the item from a Channel and PASTE it to another Channel.
DELETE OPTION
You can use the DELETE option from the right click menu as an alternative to other Deleting procedure we've covered, which is done by selecting the item you want to delete and clicking on the delete icon from the toolbar.
|
|
Another option to delete an item from the Timeline is to select it, and then press on the DELETE key on your keyboard.
ADD LOCAL CHANNEL / COMMON CHANNEL
Instead of using the ADD icon
|
|
to add a local or common Channel to a Timeline, you can choose to right click on an empty area (as an alternative, or an item from the Timeline), and choose to add either a local or a common Channel to the Timeline.
EDIT TIMELINE ITEMS
If you want to edit the Properties of a certain item you added to a Timeline, you can use the Edit player option from the right click menu.
Additionally, you can also click on the Edit icon,
|
|
or double click the respective item to edit its properties in the Properties panel.
A Timeline consists of one or more local or common Channels you'll use to build your Campaign. You assign Channels to an Output Screen, each Channel to a certain region or viewer, and then you add items to you Channels. These are the basic principles of building a Campaign, but to keep things organized you need to pay attention to certain details.
OVERLAPPING ITEMS
When you add multiple items to a Channel, you must avoid overlapping them. When you grab one of the sides of a certain item and drag it to the left or right to control its length, make sure you don't accidentally cross over other items on the Timeline.
For example, let's add two items to a single Channel, one External Video Component and one Picture.
|
|
Both our items cover the full length of the Timeline. If we want the External video to play for a longer period we must drag its right end, but this way, we'll overlap the picture.
|
|
To avoid this, either you increase the length of the Timeline, or you shorten the length of the picture so both items can play correctly on the same Channel. You can also click on the "Remove spacing" to align items on a channel.
|
|
Continuing with the same example from the above section, let's assume we want to shorten the length of the External Video Component.
|
|
If we drag the end of the External Video Component to the left, it shortens its length, but it will leave an empty area between the two items. In this case either you add a third item to the channel between the two existing ones, or you drag the picture item to the left and fill the empty area. Always make sure not to leave empty spaces between items added to the Timeline.
CHECK TIME MARKERS
When you add different items on a Timeline always check the Time markers (time scale) so it will assist you in setting and positioning the content at the right place on the Timeline.
VIDEO FILES AND THE TIMELINE
As we discussed earlier in this Chapter, Timelines are used as a host for your Resources, Components, Scenes, and bind into Screen Templates where channels are assigned.
When you're adding items on a certain Channel, you can set their length and change properties. You can add multiple items to the same channel. Those items can play sequentially or randomly inside your Campaign.
Having a diversity of items added to the same Timeline also require some attention as for the type of items you are using, therefore, you need to make sure when you build your Campaign you don't create any conflicts between the items you add to the Timeline.
For example, if you add a Video resource to a Channel and another Video file to a different Channel, you'll have a sound conflict, since both files play the sound associated with one video file will interfere with the sound associated with the other video file.
|
|
To avoid this kind of sound conflict, you must adjust some of the properties of one of the video files, like setting the volume to mute for one of the two video files.
PROPERTIES PANEL OF VIDEO FILES
When you access the Properties panel of a Video file, you can click on the VIDEO tab
|
|
and apply additional settings to the selected video file.
|
|
MAINTAIN ASPECT RATIO
If the maintain Aspect ratio is set to off, a video will occupy and fill the entire screen division; of course this may result in skewed content if the video's dimensions do not match those of the screen division. Turning the feature on, will keep the videos ratio of width to height, but may result in an added black stripes around the videos content box.
|
|
AUTO REWIND
The auto rewind option is only available in the case of Video files.
|
|
If you enable the Auto rewind option, when the Video file completes playing on the Timeline, it will automatically rewind and play again in a loop (within the length of the respective Timeline).
Enabling the Repeat to fit option
|
|
for the Channel wherein the respective video file resides, overrides the auto rewind option and the video file will not loop.
VOLUME OF A VIDEO FILE
In the properties panel of a Video file is the ability to control the sound of the video file. To increase or decrease the sound of a video file, you'll use the Volume slider.
To control the volume of the video file, drag the slider. Having the volume slider at 0 will mute the selected video file.
|
|
BACKGROUND ALPHA
You can control the visibility of the Background associated with the selected Video file by using the Background Alpha option. Use the slider to control, the Background Alpha option. Only videos produced and compiled with a background Alpha value of 0 can be set transparent.
|
|
SEQUENCES AND THE SCHEDULER
In the Campaign section of the SignageStudio you can set a Campaign mode to either Sequence or Schedule.
SEQUENCES
The sequencer is essentially a simple and effective way to serially set the play list order of all the timelines. This is done using simple drag and drop operation.
If you select a particular Campaign and go to its properties panel, you can set its mode to Sequence.
|
|
Sequencing is a Timeline playlist order you can use to control which Timeline plays and in what order. To demonstrate how the Sequencer works, we need to add a few Timelines to our Campaign. Earlier in this Chapter we demonstrated how to add multiple Timelines to a Campaign.
Let's add three Timelines to our campaign. Each Timeline can be configured differently, can a have a different length (which is the duration of playtime), different resources, and can be configured at a different screen resolution.
|
|
Next, to control the Sequencing order, select the Campaign mode to Sequence, and then click on the Sequences tab, located under the Campaigns and Timelines tabs in the main Navigation menu
|
|
When you click on the Sequences Tab,
|
|
you'll gain access the Sequences section of the SignageStudio.
|
|
The Sequences section contains three panels:
- 1. Toolbox Panel
|
|
- 2. Sequences Panel
|
|
- 3. Properties Panel
|
|
TOOLBOX PANEL
In this Toolbox panel, you'll see a list of all the Timelines you've created.
|
|
SEQUENCES PANEL
The Sequences panel represents the playlist of your Timelines. To control the order of Timelines, you need to select a Timeline from the Toolbox panel, then drag and drop it into the Sequences area. We will drag all our Timelines, one by one to the playlist.
|
|
In our configuration, the playing order of the Timelines will be as follows:
- Timeline 1 (which plays on the Output Screen)
- Timeline 2
- Timeline 3
If you want to change this configuration, for example, you want Timeline 3 to be the first Timeline to play followed by the other Timelines; you must click on the Timeline 3, and drag it on top of the other within the play list.
|
|
SEQUENCES PANEL
The Sequences panel has three columns:
- Index
- Repeat
- Timeline
INDEX
The Index directory contains numerical values for each Timeline added to the Playlist.
|
|
Timelines with lower values play before Timelines with higher values. Value 0 represents the first Timeline to play on your Output Screen; value 1 represents the next one and so on. The Index indicates the playing order. You'll organize the Timelines better after you've dragged them into the Playlist.
REPEAT
After you set the order the Timelines play in, you can choose to repeat one or several Timelines before the other starts playing.
|
|
The default numerical value for the Repeat feature is 1, meaning a Timeline plays once and then the next Timeline starts playing.You can change this value in the Properties panel of a Sequence
SEQUENCE PROPERTIES PANEL
If you select a Timeline in the Sequences panel, you can access the Properties panel of the Sequence.
|
|
The Properties panel contains three fields:
- Index
- Timeline
- Repeat
These fields correspond to the columns located in the Sequences panel.The Index and the Timeline fields are non-editable fields. You can use them to check the index order and the name of a particular Timeline.
REPEAT FIELD
To set the repeat value for a certain Timeline you enter the corresponding number in the Repeat field of the Properties panel.
|
|
If you want Timeline 1 to repeat playing for three times and Timeline 2 and Timeline 3 follows in the playing order.
First, you select Timeline 1 and change the repeat value from the default 1 to 3.
|
|
After you've typed the value 3 in the Repeat field of the Properties panel, you'll notice in the repeat column of the Sequences panel, the repeat number corresponding to the Timeline 1 has been updated accordingly.
|
|
In this case, the first Timeline in the playing order will be Timeline 1, which will play three Times before Timeline 2, and then Timeline 3 will follow.
ADDING TIMELINES TO PLAYLIST
In the example below we used three Timelines and set the index order to Timeline 1, then Timeline 2, and Timeline 3 in the playlist.
|
|
Having this configuration, after Timeline 3 finishes playing, Timeline 1 will start playing, Timeline 2, and Timeline 3; again and so on in a continuous loop.
Now, let's assume you would like to configure the playlist to look like this:
Timeline 1Timeline 2Timeline 3Timeline 2Timeline 1Timeline 3
You only have three Timelines added to the playlist now. You can only change the order of these Timelines. To configure this example, you need to drag the same Timelines first to the playlist, and then set the playing order for each Timeline.
|
|
If we have three Timelines in the Toolbox and add Timeline 1 to the playlist, but not the other two, only Timeline 1 will play on your output screen. Thus it is important you remember to add your Timelines to the Sequence playlist.
|
|
DELETING A TIMELINE FROM THE SEQUENCER PLAYLIST
You have two options if you want to delete a Timeline from the sequencer playlist.
- 1. Select the Timeline and then click on the DELETE icon.
|
|
- 2. Right click on the Timeline and choose DELETE.
|
|
After you choose Delete, a dialog box appears on your Screen.
|
|
Click on YES to DELETE the selected Timeline from the playlist, or click on NO to CANCEL the operation.
THE SCHEDULER
The Scheduler allows you to set your timelines to play any day and play anytime. Use the scheduler to set the exact start and stop times. A graphical user interface is used to get a summary of all future playlists and easily resolves conflicts.
The Scheduler allows you to build a programming guide for your Digital Signage Presentation. You can use a Scheduler instead of using the Sequencer. You must choose between these two options available for your Campaigns.
The Sequencer is simpler than the Scheduler. It allows you to play your Timelines one after the other in a sequential order.
The Scheduler is more flexible as it allows you:
- Flexibility of playing each Timeline only once
- Playing each Timeline on a repeat daily scheduler
- Playing each Timeline on a repeat weekly basis
- Set priorities on the Timelines to resolve schedule conflicts
To use the Scheduler instead of the Sequencer, you change the mode of a Campaign. Click on the Campaign and set the mode to Scheduler.
|
|
After you set the Campaign mode to Scheduler, you'll notice under the Campaign tab in the main Navigation menu, the Sequences tab has been replaced by the Schedules tab.
|
|
If you click on the Schedules tab, you'll access the Scheduler user interface.
|
|
SCHEDULER USER INTERFACE
The Scheduler user interface contains the following sections:
- 1. Schedule Area
- 2. Toolbox Panel
- 3. Rules Area
- 4. Properties Panel
SCHEDULE
The Schedule area is where you define the days you want your Timelines to play. It has two sections:
- Calendar
- Schedule Playing Area
THE CALENDAR
The calendar is a useful tool which will help you organize your scheduler. Before we demonstrate how to use the calendar, let's take a look at its user interface.
|
|
ZOOM OPTION
At the top left of the Calendar user interface is the zoom option.
|
|
You'll use this option to zoom in and out from the Schedule playing area, which is located on the right side of the Calendar.
|
|
DATE NAVIGATION
|
|
To navigate day-by-day in the Calendar, use the single arrow icons.
|
|
Click on the left single arrow to navigate backwards one day, or click the right single arrow to navigate forward one day.
To navigate week-by-week, use the double arrow icons.
|
|
Click on the left double arrow to navigate one week backward, or click the right double arrow to navigate forward one week.
When you open the Scheduler, you'll notice the calendar is set to the current date.
|
|
By holding down the control key, you can select additional days. You can set days anytime within the month, and you can set date ranges. Hold the CTRL key and use your mouse to click the days you'd like your presentation to play. As you select more days, you'll notice they're added to the Schedule.
|
|
You can also hold the shift key on your keyboard, click on the first day of the month, for example, and on the last day of the month to select the whole month.
This is a convenient way for you to select particular days within a month, and to have a good graphical view of what's happening within a specific month.
Another neat feature in the calendar is the ability to set a particular pattern when selecting days. Let's demonstrate this feature by selecting four days within the first week of the month. Hold down the CTRL key on your keyboard and use your mouse to select four days.
|
|
If you want to keep this selection, move it one day ahead with the selection, click on the right single arrow from the daily navigation, and you'll notice the whole selection moves one day forward.
|
|
The pattern is still consistent. It's jumping one day, but it's moving forward. You can click on the left single arrow to see the pattern is still persistent, but it moves one day backward.
This is a useful feature which also allows you to keep the same pattern of random selected days. For example, hold down the CTRL key on your keyboard and select a few random days.
|
|
Now navigate one day forward or backward using the single arrow key. You'll notice the pattern is still persistent.
You can also use the weekly navigation buttons to navigate one week ahead, or one week backward, and still keep the selected pattern.
Using the pattern feature, you can set up elaborate schedulers and use this mechanism to move back-and-forth to view a particular pattern.
SCHEDULE PLAYING SECTION
The Schedule Playing section (located next to the Calendar user interface), is where you'll drag your Timelines and set them to play at specific times within the days you selected using the calendar.
In the next illustration, we've selected from the calendar the 25th day of month. Therefore, this day is automatically added to the playing schedule.
|
|
If we want to zoom out on the schedule, drag the zoom slider all the way to the left and use the scroll bar to navigate to different hours.
|
|
If you want Timeline 1, for example, to play on this particular day, the 25th, starting at 9:00 AM, drag it from the Toolbox and drop it on the Schedule playing section. Position the Timeline at the 9:00 AM time marker.
|
|
TOOLBOX
The Toolbox contains a directory list of your Timelines. To add a Timeline to the Schedule, you must drag it from the Toolbox to the Schedule playing section.
|
|
RULES
Whenever you add a Timeline to the Schedule playing section, you create a Rule. You can see a directory of all your Timelines in the Rules panel, located next to the Toolbox panel.
|
|
The Rules section has two columns:
- Name
- Timeline
The default name of a Rule is Pattern.
TIMELINE
In the Timeline column, you'll see a directory of all the Timelines added to the Schedule playing section.
DELETING A RULE
If you wish to delete a Rule, first you select it and then you can either click on the DELETE icon,
|
|
or right click on any rule listed and choose DELETE.
SCHEDULER PROPERTIES PANEL
If you click on any Timeline from the Rules panel, you'll gain access to the Scheduler properties panel (located by default on the bottom right side of the user interface).
|
|
ENABLING A RULE
After you set up a rule, you can decide to temporarily DISABLE it or ENABLE it. This is a useful feature, as it allows you to control the schedule playing of a Timeline without the need to delete and recreate a rule each time you want to remove it from playing in a particular time.
To enable / disable a selected Timeline, use the enabled checkbox.
|
|
RENAME RULE
The default name of a rule is pattern, but you can change it anytime. To change the name of a pattern type the new name in the name field from the properties panel.
|
|
PRIORITIZING RULES
If you have multiple Timelines playing on the same day and in the same interval of time, you can use the priority feature to prioritize one Timeline over another.
Let's assume you have Timeline 1 and Timeline 2 playing at almost the same time, on the same day, overlapping each other.
|
|
In this case, you'll want to choose which Timeline will play prior to the other. We'll use the priority feature to set different priority levels for the two Timelines.
We will set, for example, the priority level for Timeline 1 to: high
|
|
And for Timeline 2, we'll set the priority level to: low
|
|
In case you have 3 or more Timelines overlapping, you may also choose the medium priority option.
|
|
When you select a Timeline and choose a certain priority level, you'll notice in the schedule playing section the color and the size of the Timeline graphical interpretation is changing as follows:
|
|
If you select a Timeline and change its priority level to high, its graphical representation will change its color to a light orange and its size will decrease.
|
|
If you select a Timeline and change its priority level to medium, its graphical representation will change its color to a light green and its size will be bigger than in the case of the high priority level.
|
|
If you select a Timeline and change its priority level to low, its graphical representation will change its color to a light blue and its size will be bigger than in the case of both high and medium priority levels.
|
|
Having different colors and sizes for your Timelines will help you better organize your priority levels in your schedule and avoid schedule conflicts.
DURATION OF A RULE
The default duration of a rule is 1:00 minute. To control the duration of a rule you have two options:
- 1. Use the default duration of 1:00 minute
- 2. Set a custom duration
To set a custom duration for a particular Timeline, first you must select it in the Rules panel and then enable the custom duration option in the properties panel.
|
|
After you enable the custom duration option, you can do the following:
- 1. Set the new duration in the designated fields. You can either type numerical values for the hours, minutes and seconds, or you can use the small UP and DOWN arrows.
|
|
- 2. Drag the sides of the Timeline to the either LEFT or RIGHT to control its length.
|
|
REPEAT RULES
If you select a Timeline in the Rules panel directory, you can choose from three different repeat options.
- 1. Repeat Once
- 2. Repeat Daily
- 3. Repeat Weekly
The repeat once option allows you to set a particular Timeline to play only once, at a specific date and time. You can set the date by clicking on the default date and using the calendar.
|
|
In the above illustration, the Timeline we selected will start playing on 10/01/2011 at 08:28:58 hours, and after its duration ends, it will stop playing because we set it to play only once.
The repeat daily option allows you to set a Timeline to start playing daily, at a certain time and between specific two specified dates.
Let's say for example we want to play the selected Timeline throughout the whole week, from Monday to Sunday, starting 10/01/2011 and set the start hour to be 08:25:58. This will be the correct configuration:
|
|
With this settings applied, the selected Timeline will play every day starting with the specified time, until the weekends.
The repeat weekly option will allow you to set a Timeline to play on certain days between two specified dates, starting with a defined time.
Let's assume we want to play the selected Timeline on every Monday, Wednesday, and Friday, starting with 10/31/2011 and ending with 12/31/2011, beginning with 08:25:58 hours. This should be the correct settings:
|
|
To demonstrate the features of the Scheduler, we'll set up an example where we'll add a few Timelines to the Scheduler and program them so they will play on our output screen on certain days of the week and at certain hours.
SETTING UP A SCHEDULER - EXAMPLE
For this example, we have created one Campaign and added three Timelines to the Campaign, We changed the Campaign mode to Schedule, and we are ready to customize the Scheduler options for the three Timelines.
Step 1: In the Calendar user interface, click on the 1st day of the month, hold down the Shift key on your keyboard, and click on the last day of the month. This operation will select the entire month.
|
|
You'll notice all the selected days are now associated with the Schedule playing section.
|
|
Step 2: Drag Timeline 1 to the Schedule playing section and position it to start playing at 8:30 AM.
|
|
Step 3: Drag Timeline 2 to the Schedule playing section and position it at 8:45 AM mark.
|
|
Step 4: Drag Timeline 3 to the Schedule playing section and position it so will start playing at 9:00 AM.
By now, you should have three Timelines added to the Schedule playing section. The first Timeline will start playing at 8:30 AM, the second at 8:45 AM and the third one at 9:00 AM.
|
|
Step 5: Select Timeline 1 from the Rules panel and let's apply some settings to it in the Scheduler properties panel.
|
|
Step 6: Make sure the Timeline it's enabled and type a new name in the name box.
|
|
Step 7: Set the duration of the Rule to 3 minutes.
|
|
Step 8: Set the Repeat option to weekly.
|
|
Step 9: Set the starting time at 8:00 AM.
|
|
Step 10: Set the start date to be 12/01/2011 and the ending date to be 01/05/2012.
|
|
Step 11: Set the rule to play only on Sundays, Mondays, Fridays, and Saturdays of the selected period.
|
|
With the above settings, we have configured a Timeline to play at certain Times, on certain days and to start at a predefined hour.
BUILDING YOUR FIRST CAMPAIGN
By now you should be comfortable with importing resources, creating Screens, building Scenes and using Components, and adding items to the Timelines using local and common Channels and building Campaigns.
In this section we'll build a new Campaign from scratch, and in the same time we'll recap all the Chapters we have discussed up to now in this book.
In the following example, we will cover the following steps necessary to create a Campaign from scratch.
- 1. Defining the general layout, the Background and masks of the presentation
- 2. Importing resources to the server and organize them into folders
- 3. Creating Screens and drawing screen divisions
- 4. Building a Scene and using some Components
- 5. Creating a new Campaign
- 6. Adding items to the timeline and manage them
- 7. Adding another Output the Campaign
- 8. Adding another Output Screen Template to the Timeline
- 9. Using multiple Timelines, local Channels and common Channels
- 10. Appling different settings to items added to a Timeline
- 11. Managing multiple Campaigns
- 12. Previewing the final Presentation
EXAMPLE - BUILDING A CAMPAIGN FROM SCRATCH
Step 1: In this first step, we need to define the layout of our signage presentation; how it will look, what the design will be and where we'll place our resources on the screen. You can use Flash, Photoshop or other software programs to create a Background from scratch, or you can use a prebuilt mask from the Media Signage shared library. We'll use this for the main layout masks we import from the MediaSignage shared library.
Step 2: You know how the general layout of your presentation will look. Now it's time to import files in the resource library. First, we will import the Masks.
Click on the Resources tab from the main navigation menu and choose Add from shared.
|
|
Select two premade mask from the library and click OK.
|
|
Next, we'll add a few pictures to the Resource library and assign a folder named Pics for all the imported files.
|
|
Now we have all the pictures in their special folder. We need to create thumbnails for each picture.
|
|
We've imported 8 pictures for our example and named them from Picture 1 to Picture 8.
|
|
At this point, we have imported two Masks and 8 pictures for the Presentation. The next step is to create Screens and setup the Screen Divisions.
Step 3: Click on the Screens tab from the main navigation menu. Create a new Screen using the Screen wizard, set the resolution to 192 x 1080 pixels, and name it First Presentation.
|
|
Now, take a look at the first imported mask and notice it has 5 transparent areas. You need to draw a region for every empty spot on the mask. We'll name the regions from 1 to 5.
|
|
For the mask, draw a full screen region which will be on top of all the other regions/viewers.
|
|
Creating Screen Divisions that will be used with masks can be difficult sometimes, but if you pay attention to the exact position and size of the transparent areas from your masks and use them for the regions you draw, you should have no problems.
For example, if the empty area number 1 from you mask is 1920 x 100 pixels wide, the corresponding region / viewer for the Screen Division should have the same size. Also the x and y positions should be the same.
After you finished the configuration for the first mask, analyze the second mask and define divisions for this mask as well. You'll have four regions, three for the empty areas and one for the mask itself.
|
|
Now, create a third Screen Division and draw only one region which will have 1920 x 1080 pixels.
|
|
Step 4: At this point, we have configured one Screen and three Screen Divisions. We will now use some Components and build a Scene.
First, let's click on the Scene editor tab so you can access the Scenes area of the application. We create a new Scene which has the same width and height with region 2, from the second Screen Division, which are 400 x 400 pixels. Depending on the mask you choose and the design of your layout, the numbers might be different.
Choose a color gradient background for the Scene and add three weather items.
Apply the following settings to the first weather item:
|
|
Apply the following settings to the second weather item:
|
|
Apply the following settings to the third weather item:
|
|
Add the Clock Component to the scene and use the following settings:
|
|
Feel free to experiment and try different settings for the components and for the scene.
We created a simple Scene for this example, containing three Weather items and one Clock Component.
|
|
Now we will create a second Scene using a prebuilt Stock component. Simply click in the import Scene icon and import from the Shared library a Stock simple Scene.
|
|
Step 5: Now that we have our Screen, the Screen Divisions are set and we even created a Scene, it's time to build a new Campaign.
Click on the Campaign tab to access the Campaign area and use the Campaign wizard to create a new Campaign and use the following settings.
|
|
Step 6: Remember we've created three Screen Divisions. For the first Timeline of this Campaign, we used the Screen Division 1 as the Output template.
|
|
As you can see, when we created the new Campaign, channels were automatically assigned to each region of the Screen Division. To keep things organized, we will rename all the channels in our example, according to the content we wish to embed in each region. Before renaming the Channels, delete one of the Channels and add a Common channel instead.
|
|
Now we have in our example six Channels:
-Mask
-RSS News
-Media RSS
-Pictures
-Label
Next, we will add items to these Channels and customize them.
MASK
On the Mask Channel, we'll add the Mask 1 we've imported from the shared library. After you drag the Mask to the Timeline from the Resources directory, increase the length of the resource so it matches the length of the Timeline.
|
|
RSS NEWS
On the RSS News Channel, drag the RSS News Component and increase its length so it matches the Timeline.
|
|
|
|
We customized the RSS News Component so it'll scroll vertically and show world news related feeds.
MEDIA RSS
On the Media RSS Channel, drag the Media RSS/Podcast Component and increase its length so it matches the Timeline.
|
|
Double click the Media RSS Component and apply the following settings to it:
|
|
We have now a Media, RSS Component on the corresponding Channel on the Timeline.
PICTURES
On the Pictures Common Channel, drag Pictures 1 to 6 that were imported in the Resource directory and set the duration of each picture at 10 seconds. The Timeline has a total length of 60 seconds.
|
|
After you set the duration of each picture to be 10 seconds long, use the remove spacing feature to arrange the pictures on the Timeline.
|
|
|
|
At this point we set the pictures to play sequentially on the Timeline. Each picture will play for 10 seconds.
LABEL
The next empty Channel is named Label. Drag the Label Component on this Channel and increase its length so it matches the Timeline.
|
|
Double click the Label Component and apply the following settings to it:
|
|
Now we a customized Label component added to the timeline.
STOCK
The fifth and the last Channel of this first Timeline, is named Stock. Drag the Stock player Component to the Timeline and increase its length so it matches the Timeline.
|
|
Double click the Stock player Component and drag the Simple Stock Scene into the Scene field.
|
|
At this point, we added all the items we wanted to the corresponding Channels and we managed to configure our first Timeline.
ADD A SECOND OUTPUT TO CAMPAIGN
Next, we will add a second Output to the Campaign. Use the Output wizard to define a new Output.
|
|
You'll notice a new Output appeared on the Timeline.
|
|
Drag the Screen Division 3 to this new Output Channel.
|
|
|
|
Next you must assign a Channel to this Output. We will choose the Media RSS Channel which will play in full Screen on this Output, because we only have one region in the Screen Division.
|
|
Now we have one Timeline and two Outputs in our first Campaign. We will move a step forward in our example and create a second Timeline, add some items to it, and customize them. Remember you can create as many Timelines as you want within a Campaign.
|
|
CREATE A SECOND TIMELINE
Use the Timeline wizard to add a new Timeline to the Campaign and make the following settings:
|
|
The Screen Division 2 we will use for this second Timeline has four regions, one for the Mask 2, and the other three for the items we'll add to the Channels. We will first rename all the Channels.
|
|
Now, as in the case of the first Timeline of our Campaign, we'll add items to this Timeline and customize them. This Timeline has the fallowing Channels:
- Mask
- RSS News
- Weather
- Pictures
MASK
On the Mask Channel, we will add the Mask 2 we've imported from the shared library. After you drag the Mask to the Timeline from the Resources directory, increase the length of the resource so it matches the length of the Timeline.
|
|
RSS NEWS
On the RSS News Channel, drag the RSS News Component and increase its length so it matches the Timeline.
|
|
Apply the following settings to the RSS news component:
|
|
WEATHER
On the Weather Channel, drag the Weather player and increase its length so it matches the Timeline. Now, customize the player.
Drag the Weather Scene we created earlier in the Scene field, and choose a location.
|
|
PICTURES
Assign the Pictures common Channel to the bottom right region of the Screen Division. With this operation we've configured the four Channels of the Second Timeline.
|
|
As you can see, the Output 2 Channel of this second Timeline is empty. We will leave it like this for our example, but feel free to add any Screen Division you want.
At this point, you can preview the Campaign in an external browser. If you configured the Timelines correctly and draw the regions of the Screen Divisions according to the dimensions of the Masks, the two Timelines created for this example should look approximately like this:
|
|
|
|
Additionally, you may also change the sequencing order of the Timelines, set the Campaign mode to Schedule, add more Timelines, Outputs or anything you think will enhance your presentation. In the above example, we recap some of the features discussed in this book. We've build a Campaign from scratch; we used multiple Timelines, Outputs, local and common Channels, Components, Resources and Scenes.
Components
ABOUT COMPONENTS
The SignageStudio uses Components to help you build a powerful signage presentation to enhance your viewer's experience. You can use most of the Components directly on a Timeline, but you can also use them in a Scene. You can add multiple Components to a Timeline or to a Scene.
LABEL COMPONENT
|
|
You'll use the Label Component to add text to your Signage presentation. To add a Label component in a Scene, use your mouse to drag and drop it inside the Main viewing area.
|
|
After you've dropped the Label Component in the Main viewing area, you'll be able to modify it and apply setting to it.
Tip: When you use a Component inside a Scene, most of the settings are available only through the properties panel, but you can modify the position and the size of a Component also directly in the main viewing area using your mouse. To modify the position of any Component click and hold your mouse and position it inside the Scene. To modify the size of a Component directly in the Main viewing area, use the handles you see on its margins after you click on the Component to select it.
PROPERTIES PANEL FOR THE LABEL COMPONENT
If you select a Label component after you dropped it into the Main viewing area, you'll be able to apply different settings and effects to it using the properties panel located on the right side of the user interface. The properties panel has three tabs: Layout, Common and Label.
|
|
LAYOUT
If you select a label component and you click on the Layout Tab you have the option to choose either for a Static layout or a Dynamic one. This section is similar to the Layout of Scene as discussed in a previous Chapter.
STATIC LAYOUT
You can set different values for the rotation, position, as well as the size of the Label component.
|
|
Another key feature is the Constrains section, located below in the Static Layout section.
|
|
After you select a Label component or any other item for that matter and drop it to a scene, you can anchor it so it will maintain its position even when the scene is resize (i.e.: scene is bound to a screen division that's different in). Using constrains you can anchor a component inside a Scene by selecting the anchor points.
|
|
DYNAMIC LAYOUT
Just like in the case of a Scene Layout or any other Component's layout, in this Section you can set different values for Rotation, Size, and Position of the Label component by using the point numbers.
|
|
THE COMMON SECTION
After you select a Label component in a Scene and click on the Common tab, you access:
- Appearance
- Border
- Background
- Glow
- Blur
- Shadow
LABEL TAB
If you select a Label component in a Scene and click on the Label tab in the properties panel you will be able to edit the text of the Label component.
In the upper area you can type the Text that you want to appear on the Scene.
|
|
You can type any number of characters, but when typing always keep in mind the size of the Label. You may need to increase the size of the label component to show all the text you typed.
In the lower area of the Label section in the properties panel you'll find settings you can use to format the text you typed above.
|
|
FONT FACES
The SignageStudio includes hundreds of dynamically loaded font faces. To use a certain font face you select the text in the type area and use the font selector. You can also use the scrollbar located on the right side of the font selector and to navigate to other font faces.
|
|
FONT SIZE
To control the size of the text you use in a Label component, you can either enter a value in the designated field or use one of the preset values from the drop down list.
|
|
FONT EFFECTS
In the Label section of the properties panel, choose the selected text and set the Bold, Italic and underline. Select the text and use your mouse to click on the desired option (not all fonts support these properties).
|
|
Examples:
|
|
FONT COLOR
To change the text color you use the color picker. It works like any other color picker in the SignageStudio. To change the color of a text, first you select the text. Next, click on the default color and use the color picker to change the font color. Here are some examples of different text colors:
|
|
TEXT ALIGNMENT
To change the alignment of text you use the alignment options.
- Align text to the right
- Align text to the left
- Align text to center
- Justify
Select the text and click on the specified icon:
|
|
BULLETS
Additional to text formatting, you can also choose to add bullets at the beginning of text rows. To add a bullet you select the text and click on the "Add bullet" icon:
|
|
EXTERNAL SWF / IMAGE COMPONENT
The external swf/image component is a powerful feature that enables you to link a certain swf file or an image that resides on the web (outside the MediaSignage server farm). To use this Component in a Scene, you drag and drop it to the scene, select it and load its Properties panel.
In the properties panel, the first two sections, Layout and Common, contain the same settings as any other Component.
|
|
LINK IMAGE / SWF RESOURCE
Here you insert the designated URL web address of the file you link to the external swf/image. Press enter after the URL to preview it in the main viewing area of the Scene.
|
|
EXTERNAL VIDEO COMPONENT
The external video component works in a similar manner as the external swf/image component. It enables you to link a video file that resides on the web, to your SignageStudio presentation. To use this Component in a Scene, you drag it to the scene using, select it and access its properties panel.
|
|
LINK VIDEO RESOURCE
Here you must insert in the designated URL field the complete web address/path of the video file you need to link to the external video component. After you typed the complete root of the file you'll be able to preview it in the main viewing area of the Scene.
|
|
HTML COMPONENT
The HTML component is one of the most versatile components in the SignageStudio. This component allows you to embed in your presentation anything viewed in a web browser. This can be an HTML5 Web page, a pdf file, a swf and other content.
You can also use the HTML component as a mini SDK (software development kit) where you can make different settings to an application or swf file that can be accessed through a web address, directly within the SignageStudio. To use the HTML component in a Scene you first drag and drop it with to scene's main viewing area, select it and load up the properties panel.
|
|
After you click on the HTML tab, you'll see two fields. The first one is the URL field and the second is the configuration field.
|
|
Any content can be accessed using the web address from the URL field, which will be displayed in the Main viewing area of the Scene.
|
|
CROPPING AN HTML WEBPAGE
If you want to show a certain part of a Web page in a scene while masking other areas of a page, follow these steps:
Step 1: Enter the location of the page in the URL field. We will use for our example the Yahoo weather forecast. On the Yahoo weather page we search for examples for Tel Aviv and Israel. We copy and paste the URL address in the URL field.
|
|
|
|
the actual weather forecast is not in the main view so we first need to change the X and Y position of the HTML component.
Step 2: Having a Scene with a default weight and Height of 400 X 400 pixels, enter 0 in the X field and -400 in the Y field of the HTML component.
|
|
Note: These values are relative and refer to this example. Using other Web pages may require entering different values.
|
|
Step 3: Increase the size of the Scene in weight and height and position the HTML component properly using the handles.
|
|
Step 4: Anchor the HTML Component in the Scene so it will remain in this exact position when played.
|
|
Step 5: Make sure that the Screen Division you want this scene to be assigned to matches the size of the Scene.
THE CONFIGURATION FIELD
Under the URL field is the Configuration field, enter the path of a remote web page you will use to configure your component. Any content can be accessed using the web address from the Configuration field.
REFRESHING A WEB LOCATION
Next to the URL and Configuration fields is a small button you can use to REFRESH the address you entered in the respective field.
|
|
RSS NEWS COMPONENT
The RSS, stands for Really Simple Syndication. The RSS News component is used to display RSS feeds in the SignageStudio. To use the RSS News component in a Scene you first drag and drop it into the Scene, select it and load up its properties panel.
|
|
|
|
RSS DIRECTION
After you've dropped an RSS News component into a Scene, notice the default direction of the RSS is Vertical, which means the RSS news is scrolling upwards.
|
|
Using the RSS News direction option, you can change the RSS direction from vertical to horizontal making the RSS to scroll horizontally instead of vertically.
|
|
TEXT DIRECTION
The Text direction can also be changed from the default Left to Right into Right to Left. This feature is useful when using RSS News feeds using a certain Right to Left written language; like Hebrew.
|
|
SCROLLING SPEED
You can control the Scrolling speed of the RSS News component using the speed field.
|
|
TITLE FONT
The RSS News component contains two sections of text: Titles and the Description. Title Font represents the section where you apply different settings to the RSS news feeds Titles.
|
|
FONT STYLE
To change the Font of the RSS Title, you need to select the font from the fonts list.
|
|
FONT SIZE
To increase or decrease the size of the Font used in the Title of the RSS, enter a value in the assigned field or use the UP and DOWN arrow keys.
|
|
FONT COLOR
To change to Font color of the RSS Titles, use the color picker form the Title font section.
|
|
TEXT EFFECTS
You can choose to make the text of the RSS Titles Bold, Italic or Underline if the selected font supports it.
In the Description Font section, you'll have access to the same settings as in the Title Font section described above. The only difference is the settings you make in this section will affect the description of the RSS news feeds, instead of the RSS Titles.
RSS NEWS SOURCE
To function, the RSS News Component needs to have a source from which it will grab the news feeds. This can be a preset news category, a custom URL address, or a Custom RSS created manually by the user.
RSS NEWS PRESETS
SignageStudio has many preset news categories you can choose from. Choose a news category from the drop down list:
|
|
When you choose a news category, notice the URL field under the presets dropdown list shows the web address related to that specific RSS feed.
RSS CUSTOM URL
If you click on the RSS presets dropdown list, you can choose [Custom URL].
|
|
Enter a URL address in the field to load your own RSS content.
EMBEDDED RSS
If you click on the RSS presets dropdown list, you will notice [Embedded RSS]. This option allows you to create a Custom Embedded RSS by writing text in the Title and Description fields and have it scroll; instead of binding to an external source feed.
|
|
Use the + and - icons to add or delete message entries.
|
|
In the following example we clicked on the + sign once and wrote text in Title and Description sections. We also changed font settings for the Title as well as for the Description.
|
|
|
|
icon and write the text in the specific fields.
|
|
To delete an embedded custom RSS feed you select it and press the DELETE button.
|
|
There is no restriction as to how many entries you can have. However, keep in mind that if your scroll is set to horizontal, the Description data will not appear in the presentation; only vertical scroll supports it.
MINIMUM REFRESH
Min Refresh option sets the period of time between RSS polls to the source aggregator. You can set the Minimum Refresh either by entering a value in the designated field or by using the UP and DOWN arrow keys.
|
|
Tip: If you decide to use an embedded custom RSS, you've written the text for it, and afterwards you change your mind and choose a different RSS source, note the Text you've entered for the embedded RSS will be lost and you'll need to write it again. You can copy and paste the RSS component to an unused timeline for "backup".
MEDIA RSS / PODCAST
The Media RSS / PODCAST component is used to embed RSS media feeds and podcasts into your presentation. To use the Media RSS / PODCAST component in a Scene, you first need to drag and drop it, selected it, and load up its properties panel.
|
|
Just like the RSS news component, here you can select the source of the RSS feed from a dropdown list of preset feeds or you can choose the [Custom] option and enter the location of the xml file manually.
|
|
Choose a source for the RSS feed, notice in the Main viewing area of the Scene how immediately the RSS video begins to load and the media starts playing.
|
|
The Media / Podcast RSS feeds are actually short videos which will play sequentially and update often by the aggregator. MRSS video list plays in random to give off a more unique playback experience.
The Media files being are downloaded and cached in the SignagePlayer Desktop version, if the connection between the server and the player will be interrupted, the feed will continue to play; and updated as soon as the connection is restored.
MAINTAIN ASPECT RATIO
The Maintain Aspect Ratio option allows you to maintain the width and height ratio of media files. Here are some examples of the Maintain Aspect Ratio option when disabled and enabled.
|
|
CUSTOM RSS ITEM
The Custom RSS Item Component is a more complex version of the RSS news component. This Component allows you to have custom control of all the sections of the RSS.
For example, if you want to build a scene and position the Title of the RSS on the left corner of the Scene, the Description of the RSS on the Right corner of the Scene and the Resource/image of the RSS someplace else on the Scene, and also mix in custom animation and transitions, you can only accomplish this using the Custom RSS Item component. To use the Custom RSS Item component in a Scene, you first drag and drop it into the main viewing area of the Scene, select it and load up its properties panel.
|
|
If you click the Item tab, you'll select the item you want this section of the RSS to represent. Choose from the dropdown list Title, Description or Resource from the properties panel.
|
|
If you choose Title for example, the Custom RSS Item component you dropped into the Scene will be the Title of the RSS. Description will correspond to the Description of the RSS and the Resource will be the Image displayed in the RSS feed.
After selecting an Item, you have several options to format the Text in the Properties panel.
|
|
We discussed these options earlier so you should be familiar with the settings. You can set the font face, the font size, the font color and apply font effects.
The Custom RSS Item Component is created only within a Scene and that Scene need to be added to a Scene player in the Timeline. It cannot be added directly to a timeline.
USE A CUSTOM RSS ITEM COMPONENT - BY EXAMPLE
Step 1: Create a new Scene and name it Custom RSS. Set the Background color Blue.
|
|
Step 2: Add a new Custom RSS Item Component to the Scene and select the "Title" Item in the Field dropdown list from the properties panel.
|
|
Change the font to Arial Black, the font size to 25, the font color to a dark yellow and underline it. After this, position the Item at the top left corner of the Scene.
|
|
Step 3: With the Custom RSS Item component selected, click on the Layout tab in the properties panel, choose Dynamic, and set the x value to -150 at Point number 1 and 0 at Point number 2. You can also choose an Easing option.
|
|
Step 4: Add another Custom RSS Item to the Scene. Select the "Description" item this time in the Field dropdown list in the properties panel.
|
|
Change the font to Arial, the font size to 20 and the font color to White. Next, position the Item in the middle of the Scene.
|
|
Step 5: With the Custom RSS Item component selected (Description), click on the Layout tab in the properties panel, choose Dynamic, and set the y value -400 at Point number 1 and leave the default value at Point number 2. You can also choose an Easing option.
|
|
Step 6: Add another Custom RSS Item to the Scene. Select the "Resource" item this time in the Field dropdown list in the properties panel.
|
|
Position the Resource Item at the top right corner of the Scene.
|
|
Step 7: With this Custom RSS Item component selected (Resource), click on the Layout tab in the properties panel, choose Dynamic, and set the Rotation at 360 degrees (drag the Rotation slider to the right end) at Point number 1. Leave the default values at Point number 2. You can also choose an Easing option.
|
|
Tip: Always remember to Anchor every component in the Scene so it will preserve its position when played in a Timeline .
Step 8: Click on the Screens Tab in the main Navigation menu and draw a new Screen Division. Name it Custom RSS Screen. Make sure the size of the Screen Division matches the size of the Scene with the Custom RSS Item in it.
Tip: Always remember to SAVE the project when you make changes to your presentation.
|
|
Step 9: Click on the Campaign tab in the main Navigation menu. We will discuss more on Campaigns in another Chapter, but to demonstrate how to use the Custom RSS Item Component, we need to place it on to a Timeline using a Custom RSS Player.
To accomplish this, after you clicked the Campaign tab in the main Navigation menu, click the plus sign (+) in the Left panel to add a new Campaign.
The new Campaign wizard will appear. We will discuss more about this wizard in another Chapter, but for now click NEXT in the first window.
|
|
Choose "Custom RSS Screen" from the dropdown Screens list and click Finish.
|
|
Now you have a Timeline with a single Chanel (CH0) which is the Screen Division you created earlier. We will talk more about channels in another Chapter.
|
|
Step 10: To link the Scene which has the Custom RSS Items to this Chanel in the Timeline, you select the Toolbox tab, located below the Timeline and access the Components and Players panel. It is almost the same as the Components panel in the Scene section, with a few exceptions.
Now drag and drop the Custom RSS Player on the Timeline, next to the Chanel (CH0).
|
|
Step 11: Double click the Custom RSS Player from the Timeline.
|
|
You can now access its Proprieties panel, select the RSS tab.
|
|
Here you can drop the Scene you've just created. First, click on the Scenes tab in the Toolbox. Drag and drop the Custom RSS Scene we created earlier in the Scene field of the Properties panel.
|
|
Step 12: Click on the PLAY button of the Outputs viewing area to preview the Custom RSS.
|
|
Step 13: You can apply different settings after you dropped a Weather Scene into the Weather Player.
|
|
- You can set the Interval, which represents the time which will pass until a new feed is displayed.
|
|
- You can select [Custom URL] from the RSS dropdown list and manually type a web address.
|
|
- You can select [Embedded RSS] from the RSS dropdown list and manually type Titles and Descriptions for a Custom RSS, as explained earlier in this Chapter, like in the case of the RSS News Component.
|
|
- You can select a different preset RSS source from the dropdown list.
|
|
- You can set the Refresh rate of the RSS feeds.
|
|
THE WEATHER ITEM COMPONENT
With the SignageStudio you either use prebuilt Weather Scenes or can build your own with the Weather Item.
IMPORTING AN EXISTING WEATHER SCENE
If you click on the Import Scene icon from the Scenes panel, you will be able to search for a pre-made Scene in the MediaSignage library. Click OK to import the Scene.
|
|
BUILDING A NEW WEATHER SCENE
In the Scene editor Section of the SignageStudio you can select from the Components panel the Weather Item Component. The Weather Item Component has a different implementation compared to the Custom RSS Item Component, but works in a similar manner. You first need to create a Scene, add the Weather items, and customize them, and then use that Scene with a Player in a Timeline.
To use the Weather Item Component in a Scene, you first drag and drop it into the main viewing area of the Scene. Drag the component and select it to load up its properties.
|
|
|
|
The first setting of the Weather section is the Forecast. With the Weather item selected here, you can choose the day the Weather item will predict the weather.
|
|
The next section is the Field. With the Weather Item selected here, you can choose what the selected item represents. It can be:- The name of the Day
- The Condition
- High and Low Temperatures
- The Temperature in Degrees- An image illustration of the weather forecast
|
|
Next, you apply formatting settings to the text of a selected item. Except for the Image, for all the other fields you can set a Font face, a Font color, a Font size and apply text effects like the Underline option.
|
|
If you select "Image" from the Field dropdown list, you can select a Weather style for the Image.
|
|
BUILDING A NEW WEATHER SCENE - EXAMPLE
Step 1: Create a Scene and name it Weather Scene. Change the Background color to a light Grey or any other color. Drag and drop a Weather item into the Main viewing area of the Scene.
|
|
Step 2: With the Weather item selected, click on the Weather tab in the Properties panel and make the following settings:- Select Current for the Forecast
- Select Day Name for the Field
- Select Arial Black for the Font Style
- Enter a Font Size of 30 Pixels
- Choose for the Font Color a Light Yellow
|
|
Step 3: Add another Weather Item Component. Place the new item beneath the previous one in the Main viewing area of the Scene. With the new Weather item selected, click on the Weather tab in the Properties panel and make the following settings:
- Select Current for the Forecast
- Select Temperature for the Field
- Select Arial for the Font style
- Enter a Font size of 27 pixels
- Choose for the Font color White
|
|
Step 4: Add another Weather Item Component. Place the new item beneath the other two in the Main viewing area of the Scene. With the new Weather item selected, click on the Weather tab in the Properties panel and make the following settings:
- Select Current for the Forecast
- Select Image for the Field
- Choose Animated Style 2 for the Weather Style
|
|
Tip: When you position a resource or a component in a Scene, you'll notice some green guides appear. Use the guides as a reference so you can correctly align and position an item in a Scene.
Step 5: Anchor all the items in the Scene and click on the Campaign tab in the Main Navigation menu. From the Toolbox, click on the Components tab. Drag and drop the Weather Player on the Timeline next to the Custom RSS Player (from our previous example). If you created a new Campaign, just drop it anywhere on the Timeline. Double click the Weather player to access its Proprieties panel.
|
|
Step 6: We will discuss more on the Player and the Common properties in another Chapter, but for now, click on the Weather tab
|
|
to continue with our example.
Here you can drop the Weather Scene you've just created. First, click on the Scene's tab in the Toolbox. Similar to the way we completed the Custom RSS example, drag and drop the Weather Scene in the Scene field of the Properties panel.
|
|
Step 7: Next, choose a Temperature unit and a Location. The Location may be either in the USA in which case you need to provide a Zip code for the area you wish to display the weather for or International, in which case you need to provide a City. We will choose for our example Fahrenheit, USA and 90220 Zip codes. This should be the result in the Outputs viewing area:
|
|
STOCK ITEM COMPONENT
The Stock item component works in a similar manner as the Weather and the Custom RSS Components, to use it you first need to build a Scene, add Stock items to the Scene and customize them, and then use the Stock Player to play the Scene on a Timeline.
To use the Stock Component in a SignageStudio presentation you have two choices:
1. You import a pre-existing Scene from the Media Signage library. To do this, you need to click on the Import Scene icon located in the Scenes panel on the left side of the application's interface.
|
|
After you click on this icon, you need to open the Stock Folder from the library and choose one of the available prebuilt Scenes. Click OK to import the Scene. We will discuss later in this Chapter how you can customize, ADD, or DELETE Stock items.
|
|
2. Create a new Scene and add Stock Components to a new Scene and customize them.
USING THE STOCK ITEM COMPONENT - EXAMPLE
After you have imported a pre-existing Stock Scene you can customize the Stock Components in it. This also applies to the case when you prefer to create a new Scene from scratch and add Stock Components to it.
To customize a certain Stock Component you select it so you can access its properties panel. You can use the Layout and Common sections to apply different settings or you can use the last tab, which is the Stock tab.
|
|
THE STOCK FIELD
To define the field represented by the selected Component, you need to select one from the dropdown list of the Stock Field.
Examples of stock fields:
|
|
ADDITIONAL SETTINGS
Since the Stock Fields are actually text fields that display different information, you can also use the available formatting options to customize the text.
The formatting settings are:- Font Style
- Font Size
- Font Color
- Font Effects (underline)
- Negative Color (for values with minus -)
|
|
In the following example we will customize a pre-existing Stock Scene and then we will add this Scene to a Timeline using the Stock player. This process is similar the Weather Scene example as we discussed earlier.
Step 1: Import a pre-existing Stock Scene by clicking on the Import Scene icon
|
|
and choose the Stock ticker template from the Stock folder.
|
|
Step 2: Apply different colors to the Stock items. You can also select an item and assign a different stock field. For this example, we will keep the default fields of the pre-existing scene.
|
|
Step 3: Click on the Campaign tab in the main navigation menu and open the Components panel from the Toolbox.
Drag and drop the Stock player on the Timeline. You can place it anywhere on the timeline.
|
|
Step 4: Double click the Stock player you just added on the timeline and you will access its properties panel. Click on the Stock tab to access the settings of the Stock component.
|
|
Step 5: To insert a Stock Scene on a Timeline, you need to add it to the Stock player. To do this, you drag and drop the Scene from the Toolbox into the "Scene" field.
|
|
You'll see, instantly, in the Outputs viewing area a preview of the Stock Scene. Click the PLAY button to preview the Scene.
|
|
Step 6: You can now set the scrolling direction to horizontal or vertical and the scrolling speed.
|
|
Step 7: In the symbol's list you can ADD or DELETE the Stock symbols which will be displayed.
|
|
WEBCAM COMPONENT
The Webcam Component is used to insert a playback device into the SignageStudio presentation. This can be any USB Web camera.
To use a Webcam component into a Scene, you need to drag and drop it from the components panel into the Main viewing area of the Scene.
You can add multiple Webcam components to a Scene and apply different settings to them. After you add a Webcam Component, you select it to access its properties panel.
|
|
When you load its properties, you'll be able to define an Input number. An input number represents a playback device connected to the computer.
|
|
If you have multiple playback devices connected to the computer, you need to select different input numbers for each Webcam component added to the Scene or directly on the Timeline.
WEBCAM COMPONENT - EXAMPLE
After you customized and positioned the four Webcam Components in a Scene you need to assign different inputs numbers for each component.
Select each Webcam component in the Scene and assign a different input number in the properties panel.
|
|
This way, the system will play the data simultaneously as it receives it from each individual Web Cam.
Note that the Web Cam needs to be connected to the computer that is running the SignagePlayer Desktop version and not to the PC running SignageStudio.
THE GRID/ CHART COMPONENT
The Grid / Chart Component can be used to create various Grids and Charts so you can use in your Presentation. Not that current release is preliminary and additional enhancements are on the road map.
To use the Grid/Chart Component in a Scene, you need to drag and drop it into the Main viewing area of the Scene.
|
|
|
|
|
|
The first field in the Chart section of the properties panel is the Chart Type.
|
|
Here you may select different types of Charts which will illustrate the data you entered in the sections below the Chart type field.
The following are the types of chart / grid you can choose from:
|
|
More types of chart / grid you may choose from:
|
|
GRID / CHART DATA SECTION
In the Data sections you set values which will get applied to the Grid / Chart Component.
The Data section is split into two categories:
- Columns
- Data
COLUMNS
In the columns area you'll enter the columns of the Grid / Chart component and you can name them accordingly.
|
|
A Grid / Chart component may have an unlimited number of Columns.
You can also choose to insert or delete columns. You can insert a new Column either above or below an existing column. You'll accomplish this by using the two assigned icons.
|
|
If you want to delete a Column you need to SELECT it and click on the DELETE icon.
|
|
GRID / CHART DATA
In the Data Section you can set values for the Column you inserted. The illustration of the Grid / Chart will update according to these values.
You can insert a new Data field either above or below an existing one by using the insert icons.
|
|
If you want to delete certain rows of values you need to SELECT it and click on the DELETE icon.
|
|
Another option you have available in the Data section is the Edit CSV feature. This feature allows editing of the data table manually.
|
|
SERIES
When you click on the Series Tab you will have the Option to add more fields to the Grid / Chart. The Series section is split in two categories:
- Display Text
- Y Field
|
|
DISPLAY TEXT
In the Display Text section you can type a new name or a description of the illustration. The default name is Series.
Y FIELD
In the y field you'll define a new category, a new field which will assign to a new Series. This field corresponds to the Columns field we discussed earlier.
In the Series Section, you can insert new Sections either above or below an existing one using the two assigned icons. You may also choose to delete a field using the DELETE icon.
|
|
A Grid / Chart component may have an unlimited number of Series.
USING A GRID / CHART COMPONENT IN A SCENE - EXAMPLE
In the following example we demonstrate how to create and customize a Line Chart in a new Scene.
Step 1: Create a new Scene and name it: Line Chart.
|
|
Change the Background of the Scene into a dark Blue or any other color or gradient.
Step 2: Drag and drop the Grid / Chart component into the Main viewing area of the Scene and increase the size of the Component so it matches the size of the Scene.
|
|
Step 3: Select the Grid/ Chart Component and click on the Chart tab in the properties panel. In the Data Section, change the name of the C1 Column to Example 1 and the name of the C2 Column to Example 2.
|
|
You'll notice as you change the names in the Columns section, the names of the columns in the Data section will also change.
|
|
Step 4: Click on the Series Tab. In the Display Text area, change the name of the Series 1 to Data 1, and the name of the C1 Y field into Example 1.
|
|
Step 5: Click on the insert below icon and add a new Series.
|
|
Enter in the Display Text area "Data 2" and also in the Y Field type "Example 2."
|
|
Notice in the Scene, Data 1 and Data 2 series appeared.
|
|
Next, we enter some values for these fields to build and further customize the Component.
Step 6: At this point our Grid / Chart Component do not show any illustration because we did not entered any values for the new created Series. To so, you need to click on the Data tab and enter some values in the Example 1 and Example 2 columns.
Remember you can add as many fields as you want in the Data field. Each field inserted will represent a value for the line trajectory in the Grid / Chart Component.
In the first field of Example 1 Column in the Data Section enter the value 10. In the second field enter the value 15 and in the third one enter the value 2.
|
|
Notice how three different points appeared on the Example 1 line of the Data 1. Each point or position of the Graph line corresponds with the value you entered in the data section.
|
|
Step 7: In the first field of Example 2 Column in the Data Section enter the value 7. In the second field enter the value 10 and in the third one enter the value 4.
|
|
Notice how the graph line of Data 2 appeared in the Scene with three different point positions. Each point of the Graph line corresponds with the value you entered in the data section of the Example 2.
|
|
* Tip: We recommend you try different options and features of the Grid / Chart Component to fully understand how to use it in your SignageStudio Presentations.
THE CLOCK COMPONENT
You can use the Clock Component to show the time and / or the current date in a presentation. You can choose between:
- Creating a New Scene
- Adding
- Customize the Clock Component
- Choose to Import a Preexisting Clock Scene from the Media Signage Library
IMPORT A PREEXISTING CLOCK SCENE
To import e preexisting Clock scene, you need to click on the Import Scene icon located on top of the Scene's panel
|
|
From the MediaSignage library open the Clock folder and choose one of the prebuilt Clock Scenes and click OK to import the Scene.
|
|
After you imported the Clock Scene you have several options to customize the Scene.
WORKING WITH A PREEXISTING CLOCK SCENE
A preexisting Clock Scene contains SWF Components built outside the SignageStudio. When you import a Clock Scene, notice the corresponding SWF files appear in the Resource's panel.
There are several options you can customize:
1. You can change the background of the Clock Scene.
|
|
2. You can change the Layout and other common properties. 3. You can select on the SWF tab in the properties panel and apply different settings to the SWF file.
|
|
Under the SWF tab, you set a maintain aspect ratio as well as the clock and the offset according to the GMT.
THE TYPE
The type of the Clock is a value which corresponds to a different style or graphics for the clock. Setting this value to a different number will be the same as importing a different clock Scene from the Media Signage library.
For example the scene we just imported has the type value of 14.
|
|
Let's enter different values in the Type field and see the results.
|
|
|
|
As you can see, there are various clock designs you can choose from.
THE OFFSET
The offset field allows you to change the time as it's been displayed by the clock. To set the clocks to display a different hour, enter a different value in the Offset field which corresponds to GMT.
CREATING A NEW CLOCK SCENE
You can also build a new Clock Scene from scratch, besides the option to import a pre-existing clock scene.
To use the Clock component in a new Scene you drag and drop it from the Components panel into the main viewing area of a new Scene.
|
|
After you dragged the Clock Component you may select it to access its properties panel.
|
|
FORMATTING THE TEXT OF THE CLOCK COMPONENT
You have the option to set the Font style, the Font size, the Font color and also to apply a text effects (underline).
|
|
CUSTOMIZING THE DATE / TIME DISPLAY
After you add a Clock Component to a Scene you can choose what information that particular clock will display. You can set the Clock to show one of the following:
1. Date
|
|
When you select the Date option, the Clock Component shows only the current date.
|
|
2. Time
|
|
When you select the Time option, the Clock Component shows only the current time
|
|
3. Time / Date
|
|
When you select the Time / Date option, the Clock Component shows the current time and the current date.
|
|
4. Custom
|
|
When you select the Custom option, you can customize the information the Clock Component displays.
To customize what the Clock Component will display, you enter the information in the Format field, based on the explanation table located below the Format field.
CREATING AND CUSTOMIZING A NEW CLOCK SCENE - EXAMPLE
Step 1: Create a new scene and name it Clock Scene. Drag and drop a Clock Component to the Scene and set the background color of the Scene to a dark blue or any other color or gradient.
|
|
Step 2: Select the Clock Component and click on the Clock tab in the properties panel. Set the Font style to Arial Black, the Font size to 50 pixels and the Font color to yellow.
|
|
Step 3: Add a second Clock Component to the Scene. Select the Clock Component and click on the Clock tab. Choose the Font style Broadway, set the Font size to 40 pixels and the font color to white.
Enable the Date option for this Clock Component.
|
|
Step 4: Add a third Clock Component to the Scene. Select the component and click on the Clock tab in the properties panel. Choose the Font Arial, set the Font size to 40 pixels and the Font color to a light pink.
Enter in the Format field the following data:
|
|
This should is the final result:
|
|
Tip: We recommend you try different settings available for the Clock component so you may use the full features of this Component in your presentations.
CATALOG ITEM COMPONENT
The Catalog Component is an advanced feature of the SignageStudio. It allows you to go through a sequential number of items or products.
Because this is an advanced feature of the software, if you're just getting started with the SignageStudio, you first need to understand how the software works. After you are comfortable working with the software you should be able to take advantage of the Catalog component.
To use the Catalog Component you drag and drop the Catalog items directly into a Scene, customize it and use the respective Scene on a the timeline, binding it to the Catalog Player.
We will discuss more on the Catalog Component in the "Catalog" Chapter.
EXTERNAL APPLICATION / CAPTURE COMPONENT
In this section we will cover the External Application component. The Component allows you to run a binary file, an external application into a particular Screen Division. If you want to run a Firefox, a Point of Sale or even a VLC media player inside a Screen Division, the external application component will allow you to do this.
The External Application component is an advanced feature. For most users you can accomplish most objectives with native components, including the video players, the swf players, RSS / Video podcast and others. However, if you do need to integrate additional capabilities you can use the External Application to achieve that.
In this introductory part of the External Application Component we will cover the basics of using the external components, later in this Chapter we will be focusing on demonstrating its functionality.
Let's create a new campaign.
|
|
Now choose any Screen from the dropdown Screens list and click FINISH.
|
|
Now you have a Timeline with a single Chanel (CH0). We will discuss more on Timelines and Channels in another Chapter.
In the Campaign section, under the Toolbox, open the Components panel. Drag and drop the ExtApp/Capture Component to the Timeline.
|
|
Double click the ExtApp/Capture component from the Timeline to access its properties panel, select the ExtApp tab. You can now configure the ExtApp Component.
THE EXTERNAL APP OPTION LIST
The SignageStudio has several predefined application settings which are commonly used with the Ext App.
|
|
Select the Custom option from the ExtApp dropdown list.
|
|
After you selected the Custom option, you will manually enter data in the "app name" and "command line" fields located below.
|
|
APP NAME FIELD
In the app name field you enter the full execution path of the binary file which is the application you installed on the SignagePlayer PC. You must enter the full exact path to execute the application.
For example, if you want to run the Firefox browser, you first need to install the Firefox.exe on the computer which has the SignagePlayer running on it, and enter the full path to the .exe file in the "App name" field.
If you are not using Microsoft Windows, you are will need to enter a different path as per the OS of the SignagePlayer is running on.
COMMAND LINE
The Command line field is where you write certain arguments you want to pass to the application you'll execute. Arguments are specific commands controlling certain settings of an application.
For example, if you want the Firefox browser to open cnn.com web page, you'll enter in the "Command line" field the following argument: cnn.com
|
|
Next, we will configure several commonly used applications to demonstrate the advanced features of the ExtApp / Capture Component
CAPTURE / LIVE HDD / MEDIATV
Now we are going to review the installation of the SignagePlayer with a Capture device (also known as the mediaTV). The Capture Card will allow you to connect full High Definition to a specified Screen Division.
This input can be an S-VIDEO, a Composite, a Component, and HDMI and will allow you to connect any device to a specified Screen Division.
This means you can take any type of device, like a Cable Box or Satellite Box (such as dish network or Direct TV, or even Security Cameras or Streaming Server). You can take any type of device which outputs on any of the inputs we support. You can show in a specified Screen Division any type of live video HD format.
First, we will cover how to configure the SignageStudio with the Capture card support. Afterwards, we will cover the Windows Operating System showing you how to install the driver and how to configure the device. The final step will be the physical connection of the Capture device / mediaTV.
SIGNAGESTUDIO SETUP FOR CAPTURE
The first thing you should do is decide in what type of Screen Division you want to play the Live TV. We will use a Full Screen for our Screen Division example.
|
|
After you set the type of Screen Division you want to use you go to Campaign, SET a new Campaign, and ADD the ExtApp / Capture Component to the Timeline. Let's add a Common channel to the Timeline by clicking the ADD button on the upper left corner of the Timeline.
|
|
Any type of resource or Component which will be inserted into a Common channel will play continuously throughout all the Timelines.
Next, drag the Common channel on the Output Screen Division of your choice, drag and drop the ExtApp / Capture Component onto the Common Channel.
|
|
Double click the ExtApp / Capture component to access its properties panel and select from the dropdown list of the ExtApp fields the Aver MediaCenter HD options
|
|
Everything is preconfigured for you. You don't need to manually type any data; however you do need to check the Aver Media file path from the SignageStudio, making sure it matches the path on your SignagePlayer PC.
INSTALLING THE CAPTURE CARD DRIVER
For the Next step, let's configure the Windows Aver to support the Live capture. To do this you need to log into the windows platform at the Computer which has the Signage Player installed. We do support the XP and Windows 7 Operating Systems for the SignagePlayer desktop version running with HD capture card. Note: you can order the mediaTV device from the MediaSignage web site.
We support the Aver Media Device for the Capture Card and you need to visit the official website located at www.avermedia-usa.com and search for the Aver TV capture Device.
|
|
|
|
If you do have a small factor player and you cannot put the PCI inside because maybe you don't have enough empty slots or no extra room, we do have our own PCI express version of this Card.
Therefore, if you are interested in getting the external version, please check this link for more information: Go to MediaSignage
After you've downloaded the driver you need to install it by going through the standard installation process.
|
|
After the installation click on the TV icon and select the source: Composite, S-Video, Component or HDMI.
|
|
One thing to know about the HDMI is, most providers streaming HDMI over the cable or satellites (dish network or direct TV); also transmit an additional protocol called HDCP. An HDCP is actually an encryption protocol which prevents you from using a Capture device with HDMI. This is so you don't rip content like movies and other copyright content. If you use one of these providers and they do use HDCP, you will have to use a Component type connection (it will still give you great HD quality). So if you do see the HDCP error, go ahead and revert to Component instead HDMI.
After you selected the Source you can check to see if everything else is working properly according to the Aver Media installation manual.
CONNECTING THE CAPTURE DEVICE
In this Section we will cover how to connect the source feed which can be a DVD player, a Camera, a tablet, Satellite TV, and so forth to the capture card device.
|
|
The capture device has two connections: One is a Dongle Input and the other is the HDMI Input. If you are using the HDMI, you need to connect the device directly to the HDMI Input.
If you are going to use a Dongle you are going through Component, S-Video or Composite. So the Video input source will connect either through the Dongle or the HDMI input to the Capture device. The capture device is connected to the motherboard via PCI and you can connect any type of Screen to the motherboard.
Unlike the case of the video source, whereby you transmit though the HDMI, the sound has separate cables you'll use.
|
|
You need to connect the green connection from the back of the motherboard from the back of the PC; use the green connection and connect the RC Audio to the TV. So the Video will come through the HDMI/DVI/VGA, but the Audio will actually come over the RCA left right Stereo cable.
For the Audio in, you need to connect the Left Right cable from the input device (DVD player for example) to the pink connection input at the back of the PC.
|
|
The benefit of this type of audio configurations is that if the capture device is not used on a particular timeline, the audio will get muted (in addition to hiding the video input.
You'll also want to make sure the audio back port or the input port (which in our case is the pink port), is enabled. To check this under Windows, you need to go to the Control Panel and under Sounds --> Advanced make sure the Rear Pink In is not muted.
|
|
If you followed the installation correctly you'll have a great high quality image with no interlacing.
FIREFOX AND THE EXTERNAL APPLICATION
MediaSignage supports the latest version of WebKit; the open source standard for HTML decoding, as a native HTML component that can be dragged directly onto the timeline or inside a Scene. However in some instances you may want to use Firefox (for example if you want to take advantage of a Firefox native plugin). Firefox as an external application allows you to run the Firefox browser inside a Screen Division.
The first thing you must do is to install the Mozilla Firefox browser on the computer which will have the Signage Player installed.
Next you configure a Campaign and add to the Timeline the Ext / App component. To execute the Firefox application you need to type the exact path of the .exe file. Under Windows, the default path will be:
|
|
The next step is to go to the SignagePlayer Desktop version and apply settings to the Firefox web browser. Our goal is to have a clean window of the browser, without any buttons or toolbars or panels surrounding the browser. To do this you first need to install a plug-in called Hide menu bar. You can download this plug-in from this location: Go to Mozilla plugin site
After you've downloaded and installed the Hide Menu plug you need to restart Firefox and start changing some settings.
1. Click on the View tab and then uncheck the Status bar.
|
|
2. Click on the View tab --> Toolbars and uncheck the Menu Toolbar. At this point the Menu Toolbar is gone so you need to click on the Alt key to access it.
3. Click again on the View tab --> Toolbars and uncheck the Navigation toolbar and the Bookmarks Toolbar.
At this point we have a clean window, without any panels or toolbars.
|
|
4. The next thing you want to do is to configure the Firefox browser so it will not use the Tab system (so there's no extra tabs on top, and also because you must apply some settings). This is so the Firefox browser will not prompt you with any messages on startup.
You must press on the ALT key on your keyboard once again, go to view and check the menu toolbar temporarily. Now, go ahead and type about: config in the search field of the browser.
|
|
After you access the back settings area of the Firefox browser, you check the settings from the next snapshot to make sure the configuration matches what you have on your setup.
|
|
Having these settings assures you the browser will not prompt you with any dialogs.
Next, go to the main toolbar and uncheck all these checkboxes:
|
|
Now disable the Navigation toolbar. You are done with configuring the Mozilla Firefox browser (running in a particular Screen Division you assigned for it). When the browser plays in your presentation it will have no buttons or extra toolbars comp
USING THE VLC APPLICATION WITH THE EXTERNAL APPLICATION
In this section we will review the Video Lan or VLC external application and how it can be used in your presentation; along with the ExtApp component.
VLC is a very flexible open source application used for playing audio-video files. It supports many types of Video formats like .avi / .mov / .mpeg / and many other formats. Using the VLC you can play content directly form a DVD, you can use the VLC server to stream content and much more.
Let's explore how to use VLC both on the Windows platform. We will cover different Command line arguments you can pass to the VLC application (so you can interact with it and embed it inside a particular Screen Division).
The first thing you must do is install the VLC application on the computer which runs your SignagePlayer.
The official website of the VLC application is here:Go to Videolan
After you have installed the VLC application on the Windows SignagePlayer PC, go ahead and create a new Campaign and add the Ext/App Component to the Timeline.
Enter the path to the application in the app name field.
|
|
Regarding arguments, you can use thousands of different arguments and parameters which you can pass to VLC. In this Go to Videolan you can find most command lines you can use with the VLC application.
|
|
We will cover a couple of arguments as an example. Visit the VLC web page so see what other parameters are available.
RUNNING A DVD PLAYER WITH THE VLC APPLICATION
The first thing we will cover is running a DVD player with the VLC application. If you have a DVD inserted in your DVD drive and want to play the DVD in a particular Screen Division.
In the command line of the VLC application, type the following:
|
|
These arguments will allow you to use the DVD player as the primary source of the DVD.
The "dummy-quiet" will allow you to run the VLC without any buttons or any chrome. A clean window will be embedded into a Screen Division. You don't want to see any buttons or any File menus. This is what "-I dummy quiet" argument will allow you to do.
The "dvdsimple:\d: argument will open up the DVD drive, which is the DVD player you are going to use to play the media file. It will automatically start playing the DVD. You can review the help file from the VLC website and search through many other arguments you can use.
If you want to use the VLC application to play a file located in a different place on your computer, you must replace the "dvdsimple:\d:" argument with the file path of the respective video file.
For next example let's play an .avi which is not natively supported.
|
|
In this example, the movie.avi video file will play as soon as the VLC external application loads. The video file must reside in the exact location you entered in the command line of the ExtApp component.
Another powerful feature is the ability to play a resource from the Resource's panel directly in the VLC player. This means you will not have to copy a file to the remote SignagePlayer manually when using VLC. Instead, the file can be uploaded just like any other resource in the SignageStudio, and it will be copied to the remote SignagePlayer and passed as an argument to VLC.
To play a resource with the VLC player, you drag the Resource right after the "- I dummy-quiet" argument. The system will use a macro to identify and play this particular file with the VLC. You can use these macros with any kind of application.
As you can see, just under the command line field there is a text line saying: Drop resource file here.
|
|
This means you can drag and drop a Resource from the Resources directory directly in the command line field and play the file automatically with the application you are going to use; in our case the VLC application.
The macros will tell the VLC application to open up and play the respective file located in the Resources directory.
Another useful command line argument is this: "- -mouse-hide-timeout 1"
|
|
The "mouse hide" argument will force the mouse cursor to disappear within 1 millisecond. This is a useful command since in a Digital Signage presentation you don't want the mouse cursor to be present.
RUNNING THE VLC AS A SERVER
Here are some more command line arguments useful with the VLC application. These arguments will allow you to use the VLC application as a server.
|
|
Let's assume at your business you have 10 Signage players and you want to Stream DVD content to all of the players. You don't have to install the DVD player on every single Device or every single player. What you can do is install a single server and run VLC as a server to stream down the content.
In the command line arguments listed above, we have on the server side the dedicated machine running the server within your business. You'll run vlc.exe, which is the executable, the "dvdsimple" argument we discussed earlier, and a few other command arguments like:
|
|
You'll need to replace this address with the IP address and the access port of your Signage player or Windows platform.
For the SignageStudio, you will run the VLC client and set the same IP address as the server. Then set to deinterlace mode and set the aspect ratio.
|
|
So, if you want to use the connect to a VLC server, instead of suing a local file type with a long command line with all the arguments, including the IP address, aspect ratio and so on.
POWERPOINT AS AN EXTERNAL APPLICATION
In this section we are going to demonstrate how you can use PowerPoint with the External Application, so you can embed a PowerPoint presentation inside a Screen Division. To play a PowerPoint presentation, you first need to download and install the PowerPoint viewer on the computer which runs the Signage Player. Afterwards you create a Campaign and add the ExtApp to the Timeline.
You can download the PowerPoint viewer for free at this web address: Go to Microsoft
Or here Go to Signage
After you've downloaded and installed the PowerPoint viewer, you enter the entire path to the application in the "app name" field of the External application Component.
You can type it manually or if you use the default installation path. You can select the Power Point Viewer option from the dropdown list of the ExtApp field:
|
|
For the Command line, you can enter: /A/S
|
|
The "/A" argument is telling the PowerPoint viewer to automatically slide from one slide to another.
The "/S" argument will tell to skip the splash screen when first loads.
Next we're going to configure the PowerPoint Presentation so the slides will automatically switch from one slide to the next and will automatically loop. All this can be configured and saved into your .ppt file so the settings will propagate from where you run them in the Signage Presentation.
We used PowerPoint 2007 for this example.
In the PowerPoint application you set up the slide show so it will have the following settings:
|
|
Next, select all the slides and check the "automatically after" option from the Animation menu. Choose timing in seconds, which will represent the period between slides.
|
|
In our example, each slide will show for 5 seconds before moving to the next slide. And when the last slide is reached, it's going to go back and play the first one. Save the settings and go back to the SignageStudio.
Import the .ppt file as a Resource and then drag and drop it in the command line field of the ExtApp / Capture Component (after the other arguments you entered).
Note that .pptx are not supported so save your PowerPoint slides as .ppt
|
|
This will tell the PowerPoint Viewer application to play the file located in the Resources directory and show it in your presentation embedded in the Screen Division you assigned to it.
To play the slides at the native size you must use the ExtApp Component in Full Screen, or if you want a different size to match a certain Screen Division, you'll need to resize the slides from the PowerPoint application.
The PowerPoint component also supports Macros just like the VLC component. To use it, upload a ppt file just like any other file; onto the resources library. Continue br dragging and dropping the .ppt right after the path of ppt viewer under its properties panel (same as we've done with the VLC). This process will allow you play .ppt files without having to copy each PowerPoint file to any of your remote SignagePlayers.
If you are going to use the ExtApp Component with the PowerPoint Viewer application, you might experience some clipping, and you might find it difficult to follow all the steps you need to take to use the PowerPoint Viewer as an external application. There is a better way to get a .ppt or .pptx file into our system, convert it to a native .swf file.
You can find many PowerPoint converters online, but one easier to use is called Flashpoint PowerPoint to Flash Converter. You can buy it from this website:Go to Flashdemo
|
|
This Converter will install as a plug-in to your PowerPoint application and will convert all your .ppt or .pptx files into pure vector based SWF files. These can be natively imported into the SignageStudio.
Once installed, it will be very easy to follow some easy steps to convert a PowerPoint file to a SWF file.
CONVERTING A .PPT OR .PPTX FILE TO SWF USING FLASHPOINT CONVERTER
|
|
|
|
Either choose to use the PowerPoint Viewer with the ExtApp Component, or convert the PowerPoint presentation to SWF. The SignageStudio will support embedding your PowerPoint presentation and use them in your Signage Presentation.
Station Management
REMOTE PLAYER MANAGEMENT
After you've finished building a Campaign you are ready to assign it to a remote SignagePlayer.
We provide several types of SignagePlayers:
- SignagePlayer Desktop version
- SignagePlayer Web version
- SignagePlayer Embedded version
- SignagePlayer Mobile version
The SignagePlayers are developed using an open source framework called FLEX which is available through the publicly available Apache repository. The SignagePlayers runtime is powered by common web technologies including HTML5, Adobe AIR, Adobe Flash, JavaScript, C++ and Java.
|
|
SIGNAGEPLAYER - DESKTOP VERSION
The SignagePlayer Desktop version is our dedicated player. Designed to run on a dedicated computer and always connected to one or more physical screens. The SignagePlayer Desktop version caches all content so it can run offline or when the internet connection is lost. The SignagePlayer Desktop version is remotely managed from the SignageStudio. Some of the remote commands include live snapshots, play, stop push new updates, and software revision control. The SignagePlayer Desktop version is a highly optimized media player.
The mediaBOX, which is the MediaSignage recommended media player device, ships with the SignagePlayer Desktop version pre-installed on it and ready to be registered to an account.
SIGNAGEPLAYER - WEB AND EMBEDDED VERSIONS
The SignagePlayer Web and Embedded versions are lighter versions of the Player. They don't have remote control capability and they are used to preview the presentation, share the presentation with others, or to embed it on to your own website.
Regardless of which version of the player / operating system you are using, when you make a change to your presentation, whenever you decide to push the update; that change will propagate to all Players. MediaSignage uses the "build once and run everywhere" ideology.
For the Web and Embedded Players, the only requirement is you that you need to have Adobe Flash installed.
SIGNAGEPLAYER - MOBILE VERSION
The SignagePlayer mobile version is similar to the SignagePlayer Desktop version. It was designed as a dedicated playback player that can run with or without internet connectivity with full remote control capabilities.
The SignagePlayer mobile version is supported on both Apple iOS as well as Android devices.
STATIONS AREA
To access and control each remote Desktop / Mobile player you have installed, you need to click on the Stations tab from the main navigation menu.
|
|
From the Stations you'll control all dedicated players (Desktop and Mobile).
INSTALLING THE DESKTOP PLAYER
To play a Signage presentation using the Desktop Player, you download it and install it on the same computer directly connected to your Output Screen(s).
Download the SignagePlayer Desktop version and follow the installation wizard to install it.
You can also install Adobe AIR runtime manually; however it is part of the Get Started install process.
|
|
Installing the SignagePlayer Desktop app includes:
- Adobe AIR runtime
- Desktop Player
- SignageController
When the Desktop Player comes up you will be prompted you register with the same Username and Password as you've used to create your free account; which is the same account you use to log into the SignageStudio.
Next, click on the Register button and you'll gain access to the SignagePlayer settings.
The SignageController is a watchdog application that monitors the health of the SignagePlayer. Its core responsibility is to restart the SignagePlayer and to monitor its working performance.
The SignageController is added to the startup folder and will auto-start upon OS load; it is the SignageController that kick starts the SignagePlayer Desktop version after the OS is loaded. To see the SignageController user interface, click on the "eye" button on the SignagePlayer Desktop toolbar. We will cover the SignageController in more details in a section below.
|
|
|
|
|
|
Always make sure the SignageController is connected and running in the background.
To test that the SignageController is working properly, close the SignagePlayer Desktop version; the SignageController internal socket will disconnect and it will re-launch the SignagePlayer.
|
|
Login to the SignageStudio with your login credentials and select the Station navigation tab, select a campaign and a Screen from the designated dropdown lists. For this example, we will set the Station name to My Player.
|
|
In the next Screen choose the Station mode. There are two available Station modes:
- Test Station Mode
- Real Station Mode
|
|
The Test Station Mode: will keep current applications and allow for open windows when testing the SignagePlayer. The test mode is a none aggressive playback mode that will allow to easily switch back to your OS desktop.
Real Station Mode: will force close on all running applications and hide balloon pop up messages including hiding the Taskbar. This mode is recommended for dedicated SignagePlayer operation.
Note: You can change this mode at any time from the SignageStudio.
|
|
SIGNAGECONTROLLER
As mentioned previously, the SignageController is utility installed on the computer running the SignagePlayer Desktop version. It gets installed in your startup folder. This utility was developed in C++ and it adds additional support functionality.
The SignageController ensures the SignagePlayer Desktop version is always running; that it is healthy and has enough working memory. It'll also enable you to remotely manage the player, set up power saving, reboot conditions, run live snap shots and more.
The SignageController will automatically start when you first reboot your computer. It resides in the Startup folder, but you can also start it manually by accessing the startup programs. Start the SignageController by clicking on the SignageController.bat file located in the startup folder.
|
|
Once started, it will minimize itself running as a background process. When the SignageController is working, the SignagePlayer status will change to connected.
|
|
SIGNAGEPLAYER - USER INTERFACE
The Controller button open the SignageController log information.
|
|
START
|
|
The start button allows you to start the player after it has stopped.
STOP
|
|
The stop button allows you to stop the player after it has started.
PING
|
|
You can ping the Server to validate server connection.
SNEAKER NET
|
|
The import button is used to import SignagePlayer data generated by the SignageStudio. This feature is used for Offline updating of the SignagePlayer presentation.
SETTING
|
|
Use the setting button to access the SignagePlayer configuration.
|
|
The window contains two tabs:
- General
- Screen
GENERAL TAB
Under the general tab, you'll find two options:
- 1.Auto Start at Login
- 2.Balloon tips (apply after reboot)
|
|
If you enable the Auto Start at Login option, the player will start playing automatically after you Log into your computer.
If you disable the Balloon tips option, the player will remove any OS alert or popup messages which may interfere with the presentation.
SIGNAGEPLAYER - LINUX INSTALL
Ubuntu is a version of Linux, and it's a freely distributed Operating System. It is popular as it saves the license fees associated with the purchase of an Operating System. If you want to download Ubuntu, you can visit the Ubuntu official website: Go to UBUNTU
Ubuntu is an advanced Operating System and not as user friendly as the Windows Operating System. If you aren't too technical you may want to stick with the Microsoft Windows Operating System.
The Linux player has several disadvantages over Windows as it does not support Video hardware acceleration and does not support Live TV / mediaTV. Thus we recommend Windows over Linux.
First thing you must do is install the Adobe AIR Runtime (if you don't have it already). You can download it from its official website: Go to Adobe
|
|
For our example we'll save the file to the default directory (which is the Desktop), we'll open an application terminal.
|
|
Take the file downloaded (an executable file), and run the installation process.
|
|
At this point, you can download and install the SignagePlayer Desktop version from our website: Get Started
We'll use our default /opt directory for the installation of the SignagePlayer.
After you've installed both Adobe AIR runtime and the SignagePlayer, change the directory in the application terminal.
|
|
Notice we have a file named install.sh.
|
|
This is an executable file, but it's not marked as executable in the first stage. We're going to change it using the CHMOD command. Remember to perform the command as root.
|
|
The install.sh has turned green as it is now an executable file. Next we run this as executable; also remember to run it as root.
|
|
The script is prompting us if it's ok to remove the "password prompting". This is important as it will prevent the OS from waiting on confirmation key every time it loads.
Next provide a valid OS user name, as it will automatically login after OS reboot.
|
|
Next enter YES to "Would you like to auto start the SignagePlayer at boot up?"
|
|
Next, we are prompted if to remove the Gnome panel. Choose YES for a clean window desktop.
|
|
Complete by entering YES to reboot the PC and apply changes.
|
|
Next we're going to set our Ubuntu machine to automatically LOGIN without prompting us for any USERNAME or PASSWWORD.
Depending on your configuration, you can go to System - > Administration - > Login window, and set the system automatically login without prompting for any username or password every time you reboot your PC.
|
|
|
|
Now click on the Security tab and enable the Automatic Login option.
|
|
Under the dropdown menu you should see the user you've created.
|
|
You can also allow local system administration. It is not mandatory, but it will make things easier to manage at the level of the OS.
|
|
Close the window to save the changes.
|
|
After rebooting, you'll be prompted to agree with the Adobe AIR runtime license agreement. This is a onetime action.
|
|
Enter your login credentials, choose a Campaign and a Screen, and select the Register button. This is also a onetime operation and will link the SignagePlayer to a particular account. If you are an Enterprise user, remember to provide an "End user" account info and NOT your enterprise credentials.
|
|
After you've registered the Station, you can click PLAY. The Signage Presentation will begin playing.
ADVANCED SETTINGS - UBUNTU LINUX
RESTORING THE GNOME TASK MANAGER
After the installation is complete, you'll not be able to see the Gnome taskbar on the Desktop. To restore it follow these steps.
Step 1:
Right click on an empty area of your screen and choose Create Launcher.
|
|
Step 2:
In the next window, choose the following settings and click OK.
|
|
Step 3:
Open the xterm terminal from the Desktop.
|
|
Step 4:
What happened to the gnome panel? It actually cd (changed directory) to /usr/bin and its name was changed to gnome-panel.old
|
|
To bring it back you use the mv command and change its name back to gnome-panel. Remember to do this from root. Make sure you use sudo before mv command.
If you don't want it to run, you can always rename the gnome panel again.
|
|
SIGNAGEPLAYER - LIUX INSTALLATION DETAILS
To run the SignagePlayer on an Ubuntu / Linux machine, the SignagePlayer has to run as root. It cannot run as a standard user. Let's look at some of things which were actually modified during the installation.
Use the following command on the terminal: sudo/vi/etc/sudoers. Scroll down and you'll see a new entry added. This was done to remove root password promoting by the OS.
|
|
Also if you type the command cd/opt/SignagePlayer/share/linux and ls, you'll see multiple files listed.
|
|
The SignagePlayer Desktop version should never be executed to load directly by a User, instead it is the responsibility of the SignageController to fork the SignagePlayer process. The SignageController has privileges of root and they will pass down the fork tree to the SignagePlayer.
|
|
Always run the executable signageController.sh as root
|
|
Next we are going to review: How the SignagePlayer automatically starts. Our install script install.sh took care of this task. If you cd to your home directory, and go to the config directory, you'll see a directory called auto start. In this directory we added the SignagePlayer.desktop command. This causes the SignagePlayer to automatically start.
If you want to see this from the GUI, go to System - > Preferences - > Startup applications and see the SignageStartup file listed.
|
|
This is how the SignagePlayer to automatically starts upon OS boot up. To get more details, select the SignageStartup file and click the EDIT button.
|
|
You'll see it runs a script named gnomeStartup.sh.
|
|
|
|
From the startup, it points to this singageController.sh file, which is the proper way you should be executing the SignagePlayer. This is because it takes care of running the SignagePlayer as root (very important). If you run the SignagePlayer not as root, but as a standard user, you may get privilege related errors.
If you want to run the SignagePlayer manually, type the commands cd /opt/SignagePlayer/share/linux, and the ls command, and open the ./signageController.sh file.
|
|
|
|
SIGNAGEPLAYER - MAC INSTALL
In this section we'll cover the Mac mini platform running the SignagePlayer Desktop version.
|
|
The Mac mini is a good solution for running the SignagePlayer; mainly because of its small size and powerful processing unit.
To have the SignagePlayer running on a Mac mini, the first thing you do is to install the Adobe AIR runtime (if you don't have it already). Go to the official website of Adobe AIR and download it. Go to Adobe
|
|
After you downloaded the file, proceed with the installation process.
Next install the SignagePlayer Get Started
After the installation is complete you will receive a warning letting you know the installation is not yet done. Kick off the install.sh script from a terminal session.
|
|
You first open a terminal and run the file to complete the installation. Launch a terminal and cd; change the directory, to the install directory.
|
|
After you changed the directory type the ls command to view its content.
|
|
Next, give full permissions to all the files within the directory.
|
|
At this point you may be prompted to enter your admin password. Next, make sure you know which user logs in by default on your Mac. One way of knowing is by typing the echo $USER in the command Terminal.
|
|
User is the actual username in our example. Now you can run the command sudo ./install.sh to start the installation process.
|
|
After pressing ENTER, the first question is if we want to remove the password prompting for the sudo root.
|
|
We require root privileges to be able to run the SignagePlayer Desktop version; so choosey / YES
Next, provide username we used to login to the computer.
|
|
The next question is: Would you want to automatically start the SignagePlayer on boot up? Choose y/YES.
|
|
Next, choose y/YES to reboot the computer.
After reboot, you'll see the doc has gone, the top menu bar is gone, and you have a clean Signage Player running.
|
|
INSTALLATION REVIEW - MAC
In this Section we'll discuss some of the changes we've made to the file system and how the install.sh file operates.
The first thing we'll do is launch the Terminal. Let's see how the SignagePlayer knows to automatically start when you boot up the PC. This is done through a directory called Library /. If you type the command Lunch Agents you'll see a file named local.signageplayer.plist.
|
|
If you cat the file you'll see the content that was injected to auto starts the player.
|
|
The signagecontroller.sh file you see listed above is the batch file that launches the SignageController; which in turn launches the SignagePlayer.
In order to run as root and without having to prompt you for a password every time, the script uses the sudo command.
|
|
If you go to the end of the file, you'll see we made a few entry changes which will actually allow the player to launch without user interaction.
|
|
We also hide the menu bar and the doc. First we changed the directory to Applications / SignagePlayer.app / Contents.
|
|
and the file Info.plist was modified.
|
|
In this file you can see the entries which allow you to hide the doc and the menu bar.
|
|
SIGNAGEPLAYER - STATIONS
As soon as you click on the Register button, a new Station will appear in the SignageStudio. It will have a status of Ready and it will be set to accept remote commands from the SignageStudio. A GREEN icon indicates that all is working.
|
|
Now we've installed a Desktop player on a computer and connected the Computer to one or more screens. We can visit the Stations area of the SignageStudio application to control and manage the SignagePlayer Desktop and its content.
After you access the Stations area (by clicking on the Stations button from the main Navigation menu), you'll notice it has three sections:
1. Campaigns (on the left side of the interface)
|
|
2. Stations (on the center side of the interface)
|
|
3. Properties panel (on the right side of the interface)
|
|
CAMPAIGNS AREA
In the Campaigns area, you'll see listed a directory of the Campaigns you created. You'll associate a Campaign with a Station using the Station's properties panel.
|
|
STATIONS AREA
In the Stations area, you'll see all your Stations listed; meaning the Computers on which you have installed SignagePlayers (Desktop and Mobile). You can remotely manage the players from this area.
To control the listed players in the Stations section, you'll use the toolbar located on the top of the Stations panel.
|
|
THE PLAY OPTION
To start playing a selected Station, select it in the Stations panel and click on the Play button.
|
|
After you click on the Play button, a new dialog box appears on your Screen.
|
|
In the dialog box you can choose to save changes to server and to update station/s with changes.
The save changes to server option refers to any change you made to your Campaigns since you last saved. If you enable this option it will save all the changes to the server before the Player starts playing your Campaigns.
The update station/s with changes refers to applying the changes you saved using the first option (to the selected Station). If enabled, this option will update the selected station and all other Stations using the Campaign you've applied changes to.
In the dialog box, you have the option to click on the PLAY button and the Player will start playing immediately, or to click CANCEL and abort the operation.
You'll notice after you choose to play a particular Station, its status will change from Ready to Playing.
|
|
THE STOP OPTION
To stop playing a certain Station, first select it in the Stations panel and then click on the STOP button.
|
|
After you click on the Stop button, a dialog box appears on your screen.
|
|
You can click YES to Stop the Station from playing, or NO to cancel the operation. If you click YES, the status of the selected station will immediately change from Playing to Ready.
|
|
PING SIGNAGEPLAYER OPTION
Ping will retrieve the latest statistics from the Player and verify it is alive.
|
|
If you click on the ping button you'll notice the Peak memory and other Player statistics will update.
THE SNAPSHOT OPTION
If you click on the Capture button,
|
|
the server will request a real time snapshot from the Station. The station will reply with an image of the current playback state.
|
|
You'll notice the system took a picture of whatever was playing on the Station at that particular moment. You have the option to set a quality of the preview. Higher quality snapshots result in a longer delay between previews.
|
|
Set a zoom level for the LIVE capture.
|
|
CHECK NEW VERSION
The Check New Version feature
|
|
allows you to propagate MediaSignage latest releases builds to the SignagePlayer. The latest software revision will automatically download and install on the remote SignagePlayer with no user interaction.
REMOTE UPDATES
Clicking on the Updates button
|
|
will save whatever changes you've made in the SignageStudio, and will push it to one or more Stations.
EXPORT DATA
The Export SignagePlayer data
|
|
allows you to export the current campaign bound to a station and all its associated data to a folder. You can later import the data locally on the computer where running the SignagePlayer using a USB drive. This manual update is sometimes referred to as SneakerNet as you need to walk (i.e.: sneakers) to the physical station to perform an action.
This method is mostly used to update your SignagePlayer offline when no internet connection is present at the location.
REBOOT STATION
The reboot feature will physically reboot the computer where you have installed the SignagePlayer Desktop version. If you select a Station and click on the reboot button,
|
|
|
|
CLEAR PLAYER CACHING
|
|
Clear caching allows you to remove the local data used by a particular remote Player. In the previous Chapters we mentioned our Signage Platform uses an advanced caching system which allows continuous playback even when the internet connection is interrupted.
When you click on the Clear Player Caching button, a new dialog box appears.
|
|
You can click on YES to CLEAR the caching data remotely or you can choose NO to CANCEL the operation.
DELETING STATION
To DELETE a station, you select it in the Stations directory and click on the Delete button.
|
|
When you click on the delete button, a dialog box will appear on your screen.
|
|
If you choose YES, the selected station will be permanently DELETED. If you choose NO, you CANCEL the operation.
STATIONS AREA - STATISTICS EXPLAINED
Below the toolbar we discussed earlier, is where all your Stations are listed; along with several Statistics for each Station. The Statistics are organized in columns.
Tip: You can click and drag a column's name to change its place in the section. Arrange the columns using your mouse. This applies to all columns found in any section of the SignageStudio.
|
|
We will now discuss each Statistics column from the Stations area.
CONNECTION
In the Connection field, you can check if a Station is connected to the server and if it can be managed from the SignageStudio. The connection is indicated by a colored LED. The LED can have three colors:
- Red
- Green
- Yellow
|
|
The red LED indicates no connection.
The green LED indicates the Station is connected using a Socket.
The yellow LED indicates the Station is connected using HTTP pooling.
CONTROLLER
In the Controller field, you can check if the SignageController of a particular Station is running or not.
|
|
If the SignageController is not running, the status will say not running and you will not be able to take advantage of some features like remote snapshot and computer reboot. In this case, you need to check if the SignagePlayer Desktop version and the SignageController installed correctly on the computer connected to your Screens.
STATION
In the Station field, you'll find the name of the Station.
|
|
You can change the name of any Station at any time directly from the SignageStudio.
LAST UPDATE
The Last Update field displays the last time the SignagePlayer was updated. Check out this field to know precisely when you updated the selected Station with the latest changes.
LAST STATUS
In the Last Status field, you can check the latest status of a Station. In this column you'll see the last even the SignagePlayer reported back to the server. Remember that if a Player is currently off, the last status will indicate the last reported even prior to losing connection to the server.
|
|
CACHING
In the Caching field, you can see the number of cached resources and the number of resources ready to be cached by the player. In the screen shot below, you'll notice the selected Station has a total of 21 Resources available for caching and all 21 have been cached.
|
|
STARTED
In the Started column, you can see when the SignageController first started.
|
|
RUNNING
In the Running column, you can check how long a particular SignageController has been running. In the image below, the first field indicates the SignageController is not running. The second field indicates around 2 hours and 11 minutes passed since the SignageController associated with the selected Station began working.
|
|
CURRENT MEMORY
The current memoryshows the current volatile memory available on the selected Station.
|
|
PEAK MEMORY
The peak memory field shows the latest amount of memory used by the SignagePlayer on the selected Station.
OS
The OS column indicates what Operating System of the selected Station. In the image below, the selected Station uses Windows 7 as the Operating System.
|
|
VERSION
The Version field indicates the version of the SignageStudio.
|
|
AIR VERSION
The AIR Version field indicates the SignagePlayer Adobe Integrated runtime version. The AIR version is controlled by MediaSignage, but you are always safe installing the latest version from Adobe; if you wish to do so.
|
|
These are all the columns in the Stations area. You can click on any column title to change the sort order.
|
|
The arrow indicates all the Stations will be listed in an ascending or descending order based on the respective column title.
STATION PROPERTIES PANEL
When you select a Station in the Stations directory, you'll access its properties panel. In this section, we'll discuss each station's property in detail.
|
|
The properties panel of a Station has three main tabs:
-1. Station
-2. Location
-3. Advertising
|
|
STATION
Under the Station tab, there are four categories:
-1. General
-2. Station Mode
-3. Reboot Conditions
-4. Power Saving
|
|
GENERAL
When you click on the General tab (under Station in the properties panel), you'll gain access the following settings:
|
|
- 1. Name
- 2. Campaign
- 3. Output
- 4. Send Notification
|
|
NAME FIELD
To change the name of a Station, first you select it in the Stations directory and type the new name in the Name field located in the properties panel of the selected Station, press enter to complete the process.
|
|
CAMPAIGN
To show your Signage Presentation on a particular Station, you'll select a Campaign that will be played by the SignagePlayer installed at the location. To re-assign a Campaign, first select the Station and choose a Campaign from the dropdown list.
|
|
You can switch between the available Campaigns at any time and assign different Campaigns to the same Station whenever you want. Remember to click File > save and restart player with changes if you wish to apply the changes immediately.
OUTPUT
In the Campaigns Chapter, we discussed creating more than one Output within the same Campaign. If you create more than one Output within a Campaign, you need to choose one from the Output dropdown list to assign it to the selected Campaign.
|
|
You can only assign one Output at a time to a select station.
SEND NOTIFICATION
The send notification feature allows you to receive an email every time a Station goes down.
|
|
To use the send notification feature, you first set up a default email address that will be used by the system to send emails.
Go to File in the main top menu of the SignageStudio interface and choose Setting.
|
|
In this window you'll set the email address where you want to receive notifications.
Enter the email address in the email field.
|
|
STATION MODE
In Test station mode: All your applications and open widows will keep running. This feature is recommended when testing the SignagePlayer on your own PC.
In Real station mode: All running applications and opened windows will be closed as well as hiding the Task Manager. This option is recommended for dedicated SignagePlayer operation; i.e. you'll only use the computer for playing your Signage Presentation.
To change the Station mode of a particular Station, you select the Station in the Station directory and click on the Station Mode tab, choose either Test Station mode or Real Station mode.
|
|
|
|
REBOOT CONDITIONS
When you select a Station from the Stations directory and click on the Reboot conditions tab, you'll have access to several settings which allow you to control and schedule the rebooting of the selected Station.
These settings are:
1. Reboot Exceed Memory
2. Reboot Every Day
3. Reboot on Error
|
|
REBOOT EXCEED MEMORY
In the reboot exceed memory section you can program the selected Station (hardware) or the SignagePlayer Desktop version (software),, to reboot if a certain memory threshold is exceeded.
Let's demonstrate how this feature works.
Step 1:
Set a maximum limit for the RAM memory in the Giga field.
|
|
The minimum amount of memory required is 1 GB. You can type a different numerical value or you can use the UP and DOWN arrows keys.
Step 2:
Set the action that will take place if the amount of memory is exceeded.
-1. Off
-2. Player
-3. Station
|
|
If you choose the OFF option, the feature will not be applied.
|
|
Enabling the Player option, will program the SignagePlayer Desktop version to reboot if the amount of memory set at Step 1 is exceeded.
|
|
Enabling the Station option, will program the Station / Computer to reboot if the amount of memory is exceeded.
|
|
REBOOT EVERY DAY
Using the reboot every day option, you can program either the SignagePlayer Desktop version (software) or the Station (hardware) for a daily reboot.
To schedule a particular Station or Player to reboot every day, follow the next steps:
Step 1:
In the designated field, set a time when you would like the Player or the Station to reboot.
|
|
In the first field enter the hour and in the second one enter the minutes. You can also use the UP and DOWN arrows keys to set the time. In the image above, the reboot will take place every day at 23:59 hours.
Step 2:
Set the action to take place when the time is reached. You have three choices:
-1. Off
-2. Player r
-3. Station
|
|
If you choose the OFF option, the feature will not take effect.
|
|
Enabling the Player option, will program the SignagePlayer Desktop version to reboot every day when the time is reached.
|
|
Enabling the Station option, will program the Station / Computer to reboot every day when the time is reached.
REBOOT ON ERROR
Using the reboot on error option, you can program either the SignagePlayer Desktop version or the Station which runs the Player to reboot every time an error occurs.
Set the action to take place if an error occurs while playing the presentation.
Just as in the above cases of rebooting, you have three choices:
1. Off
2. Player
3. Station
|
|
If you choose the OFF option, the feature will not be used.
|
|
Enabling the Player option will program the SignagePlayer to reboot if a certain error occurs.
|
|
Enabling the Station option, will program the Station / Computer to reboot if a certain error occurs.
|
|
POWER SAVING
If you click on the Power Saving tab, you'll gain access to a section of the properties panel where you can control when Stations and Monitors turns ON or OFF To save energy.
|
|
To schedule a monitor or station to turn ON or OFF at a particular day and at a certain time, follow the next steps.
STEP 1:
Select one of the two available options, either the Monitor or the Station.
|
|
STEP 2:
If you select the Station in Step 1, you can choose each day of the week and at what time the selected Station turns OFF. A Station cannot be turned ON remotely from the SignageStudio, but it can be physically set to turn ON if the BIOS of the computer support it.
|
|
If you select the Monitor in Step 1, you can set a day and time the monitor of the selected Station will turn ON or OFF (go into standby mode).
EXAMPLE 1: Schedule a Station to turn OFF
Select the day and the time you want the selected Station to turn OFF. We'll set the selected Station to turn OFF every day at 19:00 hours.
|
|
EXAMPLE 2: Schedule a Monitor to turn ON or OFF
Select the day and the time you want the Monitor of the selected Station to turn ON or OFF.
In our example, we will set the monitor to turn ON every weekday at 10:00 AM and on weekends at 11:00 AM. We'll also set the monitor to turn OFF every weekday at 19:00 hours and on weekends at 21:00 hours.
This is what the configuration should look:
|
|
ADVANED POWER SAVING OPTIONS
In this section we'll discuss how you can physically set the PC to run your Signage Presentation to turn back ON. Setting your physical SignagePlayer computer to Turn OFF every night will save on energy and will increase the lifespan of the PC.
If your BIOS support it, you can physically set your SignagePlayer PC to automatically turn back ON in case there is a power failure or if an alarm is set for that purpose.
BIOS SETTINGS
The first thing you do is to boot your PC. Press the DELETE key or the F2 key (depending on your PC) to go in to the BIOS. When you are inside the PC BIOS, enter the Standard CMOS Features.
|
|
Confirm that the date and time are correct; this step is important.
|
|
Next, go to the Power Management Setup.
|
|
Under the Power Management Setup, you set the PowerOn after Pwer-fail setting to ON.
|
|
This will allow the system to come back ON if there is a power failure. If you have this option in your BIOS make sure it's enabled.
Next, select the Power-ON by Alarm option.
|
|
This option needs to be enabled if you want the machine to automatically turn back ON in any day and at any time. If you set the Power-ON by Alarm to ON, you can set the date to 0 or every day, depending on your BIOS version. This setting will enable the Computer to turn itself back ON every day. Also you can set the Resume Time or the Alarm Time to specify the time when you want the Computer to turn back ON.
|
|
We've seen how you can set the Computer to Turn Back ON at a certain time and date. If you want to set the machine to Turn OFF, you can do it remotely, directly from the SignageStudio as we've discussed earlier.
You should check the date and time set for the operating system. Make sure the time and date set on your Operating System matches the time and date set on the BIOS.
|
|
1. LOCATION
If you click on the Location tab
|
|
in the properties panel of a selected Station, you can associate a location to that particular Station. This feature is useful when you're planning to allow advertisers to play ads on your Station.
We'll discuss more on Advertising, on the Incoming and Outgoing ads in another chapter, but for now we will demonstrate how the Location feature works.
Let's say, for example, you have a Station located in Los Angeles, USA. To save the location and associate it with your Station, you enter the address or zip code in the Location field
|
|
Next, click on the right arrow key or press ENTER on your keyboard to search for the map of LA. If you typed the correct data, you'll immediately see (just below the Location field), a map of the city and surrounding area.
|
|
LOCATION MAP CONTROLS
After you've entered an address or zip code in the Location field, you can control the map of that location in several ways.
1.TYPE OF MAPS
There are three different types of representation you can choose from:
1. Map
2. Satellite
3. Hybrid (map and satellite)
|
|
2. THE ZOOM FEATURE
You can zoom in or out of the mapping representation, using the zoom buttons located on the top left side of the map.
|
|
If you click on the Minus (-) sign, it will zoom out of the map. If you click on the plus (+) sign you'll zoom into the respective map.
You can also left click with your mouse on a particular area of the map, and it will zoom in to that respective area. If you click several times, it will keep zooming into that area.
Every time you use the zoom feature, you'll see in the bottom left corner of the map how the scale representation changes. It will show the zoom distance in miles and kilometers.
|
|
3. DRAGGING THE MAP
You can use your mouse to drag the map around, to view other locations. Click and hold the left button of your mouse and then drag the map around.
ADVERTISING
The last tab in the Properties panel of a Station is the Advertising tab. In the Advertising section you'll access several settings regarding the mediaADNET and the Advertising engine.
|
|
We will discuss more about this feature in another chapter, but to summarize; here you'll be able to choose if a certain Station is public or not; meaning it can or cannot be found by advertisers who want to buy advertising space. You can choose what rates you are charging so you decide how much advertisers should pay you for allowing them to play ads on your screens.
REMOTE UPDATES
There are several ways to update the remote SignagePlayers.
1. THE SAVE DIALOG
The easiest way to update all your remote Players is through the SAVE dialog. Click on FILE and then choose SAVE (upload) from the main Menu of the SignageStudio user interface .
|
|
After you choose SAVE, a new dialog box appears.
|
|
In this dialog box, you can enable the Restart stations with changes option. Enabling this option, will synchronize all Stations and update them with the latest changes you made inside the SignageStudio. Every single Station, every single SignagePlayer Desktop version installed anywhere in the world and is connected to the SignageStudio, will reboot and play with the latest changes you made to your Signage Presentations.
If you leave this option disabled, the system will save the changes to the server but it will not propagate them to your Stations; until the next player reboot.
Using the SAVE dialog is efficient if you have a smaller network. If you have a larger deployment, it can be hard to manage all the SignagePlayer and update every single one of them with the SAVE dialog.
2. THE UPDATE BUTTON
Another option is to save the changes using the SAVE dialog, but leaving the Restart stations with changes option disabled.
|
|
This way, we are saving the entire configuration to the server but we are not updating each Player installed on location. If you want to apply the latest changes only to a specific player, select it and click on the update feature from the Stations toolbar.
|
|
|
|
You can choose YES to update/synchronize the selected Station, or you can choose NO and CANCEL the operation.
You can also select multiple Stations by holding down the Ctrl key on Windows and select each Station with your mouse.
|
|
|
|
to apply the latest changes only to the selected Stations.
Another option is holding down the Shift key on Windows and with the left mouse you can select a series of Players from the Station's directory. Use the Ctrl key to select or deselect Stations.
Once you selected the Stations, you can click on any of the available buttons in the Stations toolbar and the operation you choose will affect only the selected Stations.
|
|
One import thing to remember is to always SAVE the changes to the server before updating the selected Player or Players.
Let's say for example we make a change to a particular Campaign.
|
|
next, we go back to Stations, select one or more Stations and click on the update button.
|
|
Choose YES on the Sync Station dialog.
|
|
Even if we clicked on YES, the updates are not going to be reflected on the selected Players because we never saved the changes. Anytime you change something in the SignageStudio you must remember to choose SAVE (upload) from the File menu to first save the changes to the Server.
|
|
Only after you've saved the changes to the server can you select one or more Stations and click on the Update button
|
|
to update the Stations.
3. THE PLAY BUTTONAnother way to update the remote Players is to select them and click on the Play button.
|
|
|
|
You have two options:
-1. Save Changes to Server
-2. Update Station/s with Changes
If you enable the Save changes to server option, the system will save whatever changes you have made to your presentation to the server.
It will do this before it instructs the selected Player/s to restart.
You may sometimes notice this option is not available.
|
|
This is because you didn't make any new changes to the presentation. If you go back and make any change to the Presentation, after you click on the Play button, you'll notice the option becomes available.
|
|
If you enable the Update station/s with changes option, the system will tell each remote SignagePlayer to contact the server and see if there are any changes made, before it starts playing.
|
|
If the option is disabled, the system will simply instruct all the selected Players to start playing.
4. Closing the SignagePlayer on location
Another option you can use is to update the SignagePlayer by physically closing it
|
|
If you close the SignagePlayer Desktop version, the SignageController will restart it. As soon as it comes back on, it will contact the server again and it will stream down the latest changes. If for some reason the internet is not available, the Player will load the cached content.
OFFLINE UPDATER (SNEAKERNET)
The Offline updater allows you to physically take your Signage Presentation from the SignageStudio and update the SignagePlayer Desktop version that doesn't have an internet connection on location.
This is very useful if you have for example a billboard and you physically go to you billboard once a week, have a USB flash drive prepared, and update the Signage Presentation manually.
For the next example, we have a Station that is Offline.
|
|
We are going to update this Station without connecting to the internet.
We will take the entire Signage Presentation that supposed to run at this particular Station, we copy it into a Flash drive and manually update the content at the location.
Note: To update offline a Station, the SignagePlayer Desktop version needs to be registered at least once, when you install the SignagePlayer Desktop version, the Station had to be connected to the internet. After that, the internet connection is preferable but not mandatory.
Step 1Assign a Campaign and an Output to the Station that is currently offline. Everything that resides in this Campaign, every resource, every file and the entire Campaign and Output Screen configuration will be exported to a dedicated folder.
Assign a Campaign and an Output to the Station that is currently offline.
|
|
Click on the Export SignagePlayer data button
|
|
Here you can see how all the resources, the global data; outputs data that have been exported.
|
|
|
|
to search for a location on your computer or external drive. Once you defined a location, the path to that location will be visible in the export window. We will choose for this example to save the data on a new folder named Player 1, on the Desktop and then copy the data on to a USB Flash Drive.
|
|
Step 3Click on the START button
|
|
to begin exporting the SignagePlayer data. There are five operations to complete:
- 1. Download Resources
- 2. Receive Global data
- 3. Receive Outputs data
- 4. Receive styles
- 5. Save to drive
If all the operations are completed successfully, you'll get a message telling you that the player.data folder is ready to be imported from SignagePlayers.
Step 4
After the exporting process has finished you can go to the newly created player.data folder.
|
|
Notice the player.data folder contains two main folders:
|
|
The xxxxx from the business folder will be replaced with the number associated to your business. If you like to check that the number is correct, you can access Help -- > About in the main menu of the SignageStudio application and you can see the business number displayed in the About box.
These folders contain all the data that is necessary if you decide to copy the same configurations, the same settings, the same presentations you have on the SignageStudio and use them on a different computer that has the SignagePlayer Desktop version installed.
We will open for example a persistent.xml file from the businessxxxxxx folder using the Adobe Dreamweaver editor.
|
|
Notice that the file contains xml data regarding all sections of your Signage Presentation like the Screen Divisions illustrated above. You can manually make changes to the XML file and save them for later use if you like. This is an advanced feature of the SignageStudio so make sure that you know what you are doing when editing xml files outside the Studio.
Step 5Now that you have exported and saved the SignagePlayer data, to use that data on a computer that has the SignagePlayer Desktop version installed but no internet connection, you import it locally, using the SignagePlayer Desktop interface.
First, copy all the data from the Flash Drive to the Computer on location.
Import the SignagePlayer data physically by opening the SignagePlayer Desktop version and click on the Import button.
|
|
|
|
Click on the browse button and search for the player.data folder.
Click the START button to import the data into this SignagePlayer.
|
|
A message will let you know that the Import process is completed and the Player will reboot to load the new data.
|
|
Notice that the Signage Server is not connected, the Station is still offline
|
|
but the SignagePlayer Desktop version is running the latest Signage Presentation we've configured and imported physically on the machine.
WEB AND EMBEDDED SIGNAGEPLAYERS
The SignagePlayer Web and Embedded versions are lighter versions of the player. They don't have remote control capability and they are used mostly either to preview the presentation or to embed it on to your own website.
Remember regardless of which player version you are using, the SignagePlayer Desktop version, Web player, embedded or even mobile; when you make a change to your Signage Presentation, that change will propagate to all the Players.
WEB PLAYER
Unlike the SignagePlayer Desktop version, the SignagePlayer Web version doesn't need require an installation. To work, the SignagePlayer Web version needs to run in a Web browser and Adobe Flash must be installed on the computer that will run the Player. Also, make sure window popup is enabled to open the Web Player.
You can use the Web Player to preview the Signage Presentation while you are working on it.
1. Using the main Navigation menu of the SignageStudio.
In the main navigation menu of the SignageStudio, located on the top left side of the user interface, you'll find the Player button.
|
|
When you click on the Player button, a drop down menu will appear. The dropdown menu contains two options:
- Player Preview
- Install AIR Player
|
|
If you click on the Install SignagePlayer Desktop version button, it will take you to our download page.
If you click on the Player Preview button, a new window dialog will appear:
|
|
|
|
When you make changes to any part of your Signage Presentation, after you click on the Player Preview button, you have the option to enable the "save changes to server" option. Enabling this option will have your latest changes saved on to the server, before the Web Player is launched.
CAMPAIGN
|
|
To preview a Presentation you first select a Campaign. If you created multiple Campaigns, you'll see a dropdown list containing all your Campaigns.
CAMPAIN-SCREEN
|
|
After you selected a Campaign, you also need to select a Campaign-Screen or Output associated for that Campaign. If you created more than one Campaign-Screens, you'll have it available in the dropdown list.
|
|
After you selected a Campaign and a Campaign-Screen, you may click on the Play button. You also have the option to cancel the operation by clicking on the Cancel button.
|
|
After you click on the Play button, a new dialog box will appear.
If you enable the Restart station with changes option, the system will restart all of your remote Players and update them automatically with the latest changes you've made to your Presentation. Next, the default Web Browser will launch and the SignagePlayer Web version will load.
|
|
After the Web Player has finished loading, your Signage Presentation will start playing inside your Web Browser.
1. Click on the dedicated button located in the middle of the Screen to enter Full Screen mode. In Full Screen mode, the Web Player will occupy the whole screen.
|
|
While you are playing your Signage Presentation in Full Screen mode, you can press the Escape key on your keyboard to exit Full Screen mode.
2. Click on the Preview in External Browser button
To preview a presentation using the Web Player, you can also use the Preview in External Browser button,
|
|
located in the Outputs area of the Campaign section. If you click on this button, your default browser will launch and play the selected Campaign associated with the Output screen.
3. Using an automatically generated web link.
Another option is the SignagePlayer Web version with generated link. Any person with access to the link can view your presentation; the same Presentation that's running at the physical Output Screens is now available on the Web. It can be accessed at any time using any flash powered Web Browser.
You have three options to generate the link for your Web Player:
- The first option is to run the Player using the main navigation menu or the Preview in External Browser option, as we discussed earlier, and simply copy the link from the Web Browser.
|
|
- The second option is to use the SignagePlayer button from the Outputs area of the Campaign section of the SignageStudio.
|
|
If you click on SignagePlayer button, you'll get a dropdown menu; choose SignagePlayer Web and a new window will appear.
|
|
This is the Preview URL window. It allows you to Copy the URL to your clipboard and play your Signage Presentation. You can send this URL to anyone. Whenever you update this particular Campaign, it will automatically propagate and Play the latest version of the Presentation.
Remember when we used the Player Preview from the main navigation menu, the system asked us which Campaign and which Screen to preview? However when you click on the SignagePlayer button from the Outputs area
|
|
SIGNAGEPLAYER EMBEDDED VERSION
We covered the SignagePlayer Desktop version and the SignagePlayer Web version. The SignagePlayer Embedded version is designed to be embedded inside an HTML website.
You'll access the SignagePlayer embedded version by selecting a Campaign and clicking on the SignagePlayer button from the Outputs area.
|
|
After you click on the SignagePlayer button, you choose the SignagePlayer embedded. When you do so, a new window will appear.
|
|
|
|
This is an HTML snippet. You can copy the code to your clipboard, paste it into your website, and have the same SignageStudio presentation playing embedded inside an Adobe Flash powered browser.
Notice the HTML code has Width and Height parameters. These are not available options for the Web Player, because using the Web Player will allow you to play your Signage Presentation in Full Screen, or at the full width and height of your desktop area.
Using the embedded version, allows you to play your Signage Presentations inside an embedded webpage or an HTML page, so you need to define the Width and Height for the Signage Presentation
WIDTH AND HEIGHT OF EMBEDDED PLAYER
Let's say you want the embedded Presentation to have a size of 800 x 400 pixels.
|
|
Assuming you have already build an HD Screen of 1920 x 1080 pixels for your Campaign, you can follow the next steps to setup a Screen and assign it to that Campaign to be played within the SignagePlayer embedded version.
Step 1:
In the Screens area of the SignageStudio, add a new Screen
|
|
and set the resolution to 800 x 400 pixels.
|
|
Step 2:
Add a Screen Division and draw a configuration which will be played by the Embedded Player.
|
|
Step 3:
Switch back to the Campaign section, select a Campaign and a Timeline and add a new Output to the existing Campaign.
|
|
When the Output Wizard opens, choose the embedded screen we've created earlier.
|
|
At this point, we've created a second Output which has been added to the Campaign on to the selected Timeline. We will rename the two Outputs to HD and Embedded to keep things well organized.
|
|
Tip: When you are working with the SignageStudio, try to keep things organized. Assign proper names to the components, use folders and subfolders, make sure you manage the entire workflow.
Step 4:
Assign the Channels associated with the Embedded Output.
|
|
At this point, we have two Outputs named HD and Embedded. The HD Output is set to a resolution of 1920 x 1080 pixels and the Embedded Output is 800 x 400 pixels.
Step 5:
Select the Embedded Output by clicking on its corresponding tab in the Outputs area and then click on the SignagePlayer button.
|
|
|
|
Step 6:
Select the SignagePlayer Embedded option.
|
|
Step 7:
Now you can copy the HTML code from the snippet and paste it onto a Webpage.
The presentation we've set in the above example will play at a resolution of 800 x 600 pixels, which will correspond to the resolution we have in the HTML code. Of course, you can set a different resolution in the HTML code, but it should match the resolution of the Output Screen you've set in the SignageStudio to avoid content skewing.
Step 8:
We will use the Notepad application to demonstrate how to use the HTML code of the Embedded Player.
Open Notepad.exe paste the HTML code from the Embedded Player snippet, then save the file with any type of name. Make sure you add the .html extension.
|
|
Step 9:After you've saved the HTML file, you can open it and watch the Signage Presentation embedded on the basic Web page we've created in our example.,
|
|
You can use the embedded version of the SignagePlayer on more complex websites. In our example we created a simple, basic webpage using Notepad, just to demonstrate how you can use the embedded player. You should definitely take advantage of the embedded version; it is a very useful and quick way to enrich your website. You can actually create banners and dynamic content that you can put on your website.
The SignagePlayer Embedded version can even be used with touch screens or mouse / keyboard inputs to present interactive UI to an end user; resembling Kiosk functionality. Remember to enable Kiosk mode at the campaign and resource level to enable user interaction.
SERVER CONNECTIONS (ADVANCED)
In this section we'll discuss how to connect the SignagePlayer Desktop version to the mediaCLOUD. There are two different ways to connect the player to the backend servers:
-1. Connection via sockets
-2. Connection via HTTP polling
LIVE SOCKET
When you have installed a SignagePlayer Desktop version and set the SignageController to auto start, you'll see the SignageController status as "Running" under the Stations.
|
|
And while the SignageController is working; you still need to enable proper internet / intranet connectivity so you can connect to the mediaCLOUD backend servers.
The SignagePlayer communication is done from the SignageStudio application to the mediaCLOUD servers over HTTP over port 80.
|
|
If you look at the above diagram, you can see any command sent from your machine, form the SignageStudio, will first reach our Servers over port 80 using standard HTTP protocol. From this point, the transmission of any command will propagate from the Server to the SignagePlayers installed on the field.
The communication between the SignagePlayers and the mediaCLOUD server farm on the other hand, can be done via real time sockets or HTTP.
Using sockets is the default behavior and this is how we try and connect the Servers with the SignagePlayer Desktop versions. Sockets will allow you real live connection, so anytime you do a Stop or Play or any type of command from the SignageStudio, the command will propagate immediately to the selected Players. This is because you have a live connection between your SignagePlayer and the mediaCLOUD.
HTTP POLLING
Under a firewalled environment where socket connection may be blocked, you may not be able to connect with the socket connection; thus the SignagePlayer Desktop player will fall back on port 80 HTTP polling.
|
|
One drawback of using the HTTP protocol is you don't have a live connection like you would in the case of using sockets. If for example, you give a Stop command from the SignageStudio to our Servers, this command will not reach our Servers right away.
|
|
With the HTTP protocol, the SignagePlayer Desktop versions poll our Servers every 60 seconds.
|
|
This means if you sent a Stop command, a Play command, and a Screen Capture command in sequence, only the last command (which in this case will be the Screen Capture), will get sent to the SignagePlayer, and only within a 60 second duration window.
Live socket and HTTP connections are both supported but the live socket is preferred if you can add rules to your firewall to access our specific servers.
If you are having issues connecting to our server, it would be safe to assume you must have a local firewall.
The SignageStudio Stations will indicate the status of each remote player:
Yellow: connected via PollingGreen: connected via live socketRed: not connected at all
To allow access to our servers be sure to open port 80 of both type socket and http to *.signage.me of inbound and outbound.
For explicit:
master . signage . me
business . signage . me
neptune . signage . me
galaxy . signage . me
mercury . signage . me
venus . signage . me
But note that servers are often edited, so *.signage.me will allow for greater flexibility.
CONNECTION INDICATORS
If you are using a Socket connection, under Stations you'll notice a green LED light in the Connection field. The green light indicates you're connected with the Signage SignagePlayer Desktop version using Socket.
|
|
If you see a yellow LED light
|
|
it means you're using the backup HTTP protocol; so you may want to investigate why.
Possible causes are:- A Firewall is installed on the actual Operating System of the SignagePlayer
- You have a Firewall within your Network or on the Router
- You have a proxy installed
- Enhanced network security settings
- Other settings
You might want to investigate other options preventing a connection using a Socket, but if don't mind using the HTTP Protocol and wait between each command, we fully support this option as an alternative to a Socket connection.
One thing to keep in mind: If you're using the HTTP protocol, it can actually take up to 5 minutes to update the Status of the SignagePlayer from yellow to red if you have a disconnect; with the a socket connection you would not experience such long delays in updates.
CONTINUOUS CHANNEL
SIGNAGE STUDIO COMPONENTS
In this Chapter we will discuss the Continuous Channel. This is a new feature that allows you to playback channels across timelines. We will explain how to take advantage of the Continuous Channel.
For our example we have two Timelines. Timeline 1 and Timeline 2. If we decrease the length of a resource at this point, that resource will still play for the duration of the channel since there are no other resources after it on the channel.
|
|
Things are different when it comes to the connection of channels between Timelines. For example, if we play the Channel 1 all the way and then when Timeline 2 starts it will switch to Channel 1 present on that Timeline.
|
|
|
|
However, if we decrease the length of the resource in a way that it will start not from the beginning, but from the middle of the resource, what will happen is that the playback will start from Timeline 1 and it will play all the way through and when it switches to Timeline 2 the videos or resource will continue to play into Timeline 2 until half way through when it reaches the beginning of our resource.
|
|
|
|
So essentially, continuous channel allows you to play channel content through timelines as long as there is no content at the beginning of the following Timeline. In our scenario, it is simple to set up because you can see the Timeline 1 and Timeline 2 have the same exact screen division configuration. But let’s see what happens if we have a new Timeline, called Timeline 3 that has a different configuration for the screen layout. So let’s go ahead and add another Timeline.
|
|
This time we will select a different screen configuration.
|
|
Next we will add some content that will start later in the Channel.
|
|
Now if we switch between Timeline 2 and 3, we can see that we do not have the same number of Screen Divisions.
|
|
|
|
So the system will try its best to actually map the screen divisions using their index numbers into the following screen division.
So to wrap things up, the Continuous Channel allows you to play videos or RSS or any type of content from one Timeline to the next and this actually blends very nicely with the transition effects because with transitions you can simply enable transitions between content and not really have to worry about the transitions between timelines. If you are not familiar with the GPU transition feature i recommend you read the dedicated chapter.
Catalog
INTRO TO THE CATALOG
The Catalog is an advanced feature of the Digital Signage Presentation Software. It allows you to go through a sequential number of items or products, presenting them dynamically to the viewer along with text and other Components.
We constructed one Catalog as an example so you can have a basic understanding of it. Before we demonstrate how to build a Catalog from scratch, let's take a look at one and see what it does and it works.
Under the Campaign's area, in the Timeline, we see the Catalog Player is assigned to a particular channel.
|
|
We'll double click the Catalog Player so we can access its properties and click the Play button from the main Outputs area.
If you are just starting with the software, you might want to go through chapters preceding this one, and come back to the Catalog component after you master the application as the catalog is a more advanced feature.
|
|
In this example we sampled a store selling skates. When we clicked on the Play button the images and text located below played sequentially and dynamically in the Preview area; essentially flipping through a list of products. The catalog is an internal database of items with data and images associated with each individual item. With the catalog we can flip through these products while sorting for selected group of items.
|
|
You can see the different images of skates, different prices, the stock status, and the description. All this is powered by the Catalog.
The advantage of using the Catalog is so you can add hundreds or even thousands of products to a presentation; easily and without having to configure each item individually; you only create a single template.
The catalog template will allow you to preview the products without having to recreate each template for each single product. Also supported are categories; create subcategories of products to be viewed within the Catalog.
To use the Catalog feature, on the file menu enable the Catalog so it appears in the SignageStudio Navigator menu.
|
|
The Catalog category has two subcategories:
-1. Items
-2. Categories
|
|
ITEMS
Whenever you enable the Catalog option in the main navigation menu, the Items subcategory will be open by default. Under the Items subcategory, there are four different sections.
-1. The items search feature
-2. The toolbox panel
-3. Items area
-4. The properties panel
|
|
First, we will briefly discuss each of these sections and then we are going to give an example of how to build a new Catalog from scratch.
ITEM SEARCH
To build a Catalog you can take advantage of resources. In the above example, we used images with skates as our resources. Sometimes, you may have hundreds or even thousands of products in your Catalog and if you want to search for a particular Item it may be difficult, so you can use the Catalog search feature.
The search option is located on the left side of the Catalog section.
|
|
To search for a particular item, simply enter its name on the search box and only this item will be displayed in the Items section (acts as a filter). We will discuss the Items section later in this Chapter and demonstrate how the search feature works.
TOOLBOX PANEL
The toolbox panel is located by next to the main Navigation menu. The toolbox contains the Resources directory.
In our example, we've imported and saved to the server several Pictures of different skates.
|
|
ITEMS SECTION
The Items section is located next to the Toolbox panel, in the center of the Catalog section of the SignageStudio.
|
|
In this section, you'll be adding products that are part of the Catalog. In our case, the products are the Skates images we imported earlier using the Resources directory.
- 1. The ADD Button
- 2. The DELETE Button
- 3. The NAME Directory
ADDING ITEMS TO THE CATALOG
There are two ways you can add Items to your Catalog.
- 1. Using the Add button
|
|
- 2. Drag and drop Resources
ADD BUTTON TO ADD ITEMS
To add resources to the Items section you can click on the ADD button.
|
|
After you clicked on the Add button, notice a new Item has been added to the list.
|
|
assign a resource to it, change its name and settings.
DRAG AND DROP TO ADD ITEMS
Another option you can use to add items to your Catalog is by dragging and dropping Resources directly on to the Items area.
You can also click on several Resources while holding down the Ctrl key on your keyboard to select them and then you can drag them to the Items area.
Another thing you can do is to click on one Resource to select it, hold down the Shift key on your keyboard the click another resource to select multiple Resources in the list and add them to the Items directory.
|
|
After new items are added to the Catalog, you can assign new names and apply additional settings.
DELETING AN ITEM
To delete an Item you select it and then click on the DELETE button.
|
|
ITEMS PROPERTIES PANEL
The last section of the Catalog area is the Items Properties panel. The properties panel of an item will be visible only after you create the item; either by using the Add button or by using the drag and drop options we've discussed earlier. Whenever you add a resource to the Items area the Resource becomes bound to the Item.
If you click on a particular item after you've added it to the Items directory, you'll be able to access its properties panel.
|
|
The three sections of the Property panel are:
- 1. Item
- 2. Info
- 3. Resource
|
|
ITEM SECTION
If you click on the Items tab, you'll gain access to the name field.
|
|
RENAME ITEM
To rename an Item, select it and type the new name in the Name field (located under the Item section of the properties panel.
|
|
INFO FIELDS
After you select an Item, if you click on the Info tab, you'll see four tabs:
- Info0
- Info1
- Info2
- Info3
|
|
Each info section will contain the information specific to the item. You can use these fields for anything you want, like item price, item cost, item description etc.
For example, let's type in the Info1 the price of the selected item. We'll do this operation to all the items. Each item holds its own unique Info.
To enter any kind of information in the Info sections, click on the Info tab and enter your text below.
Under the Item0 section, we'll type a price for the respective product.
|
|
Under de Item1 section, we'll type a name to describe the product.
|
|
We'll leave the other two Info sections empty, but you can enter any type of information you want in all four Info fields.
RESOURCE SECTION
Select the Resource section of the properties panel, you'll be able to see a preview of the Resource associated with the selected Item.
|
|
If you added a new Item by dragging and dropping a Resource in the Items category, you'll be able to see a preview of the item.
|
|
|
|
ASSIGNING RESOURCE TO AN EXISTING ITEM
|
|
You'll assign a resource by selecting one in the Resources directory from the Toolbox panel, drag and drop it to the Resource preview area of the Property panel.
If you've added a new Item to the Catalog directly using the drag and drop operation instead of the Add button, and want to replace the existing Resource associated with the respective item, you'll also use the drag and drop it over the existing resource.
CATEGORIES
The Categories section is where you get the real advantage as you will be able to filter and present only a subset of items.
|
|
The Categories section will allow you to create different categories and associate each product to one or more Categories.
In our example we are selling Skates; Girl Skates, Boy Skates and unisex roller blades. We can associate each product with different Categories. For example, you can create a category called New Products and associate new products (regardless of gender) with this category, every time new products arrives.This allows you to dynamically show new products in your Presentation simply by associating a new product in the proper category.
The Categories section has two main areas;
-1. The Categories Directory
-2. The Properties Panel
|
|
CATEGORIES LIST
ADDING NEW CATEGORIES
If you look at the Categories directory, you'll notice an empty Folder named Categories.
|
|
To add a new Category, you must click on the Add button.
|
|
Click the Add button to create a new Category.
|
|
You can rename the Category through its Properties panel.If you want to add another Category, first you select the main Categories' folder, and click on the add button once more.
|
|
SUBCATEGORIES
To build a more organized Catalog, you can create Subcategories. If you want to create a Subcategory, select an existing Category (not the main Categories folder), and click on the Add button once more.
When you click on the ADD button, a new dialog box appears.
|
|
If you click YES in the dialog box, the selected category will become an actual folder and a new Subcategory will appear under it.
|
|
Select the Category folder instead of the main Categories folder and you click on the Add button, another Subcategory will be added.
You can add as many Categories and Subcategories as you like to keep things organized.
|
|
DELETING CATEGORY / SUBCATEGORY
To delete a Category or Subcategory, you select it and then click on the DELETE button.
|
|
When you click on the Delete button, a new dialog box appears.
|
|
CATEGORY PROPERTIES PANEL
Whenever you select a Category or a Subcategory from the categories directory, you'll be able to access its properties panel and rename the category.
|
|
For our example, we'll create a single Category with three different Subcategories of products:
- Roller Blades
- Ice Skates
- New Products
|
|
ASSOCIATING ITEMS WITH CATEGORIES / SUBCATEGORIES
After weve created the Category and the three Subcategories form our example, we need to associate each particular product / item with the type of a product it is.
The first step in this direction is to access the Items' area and select the first product listed; which in our case is Picture 1.
|
|
You'll notice in the Item section of the Properties panel of the selected item, under the Name field, our new Category.
|
|
Click on the arrow to expand the three Subcategories.
|
|
To associate the selected Item, which in our case is Picture 1, with a Subcategory, you select the checkbox next to the Subcategory name. We'll choose for our Picture 1 the Roller Blades Subcategory.
|
|
For Picture 2 and 3 Items, we'll choose Ice Skates.
|
|
Let's suppose Picture 3 Item is an Ice Skate, but also a new product. In this case, we'll assign the Picture 3 Item to the New Products' category as well.
|
|
You're able to associate multiple Categories or Subcategories with a single product.
We've covered all you needed to know about adding Products and creating new Categories and Subcategories of products. Next we will cover associating the Catalog with a Scene.
CREATING A CATALOG SCENE
After you've defined and named you products, associated your products / items with different Categories and Subcategories, you build a Scene which will contain your Catalog items.
Using the Scene editor, create a Catalog template that will display all of the products. Later in this chapter, we'll discuss how to associate different products with the Catalog Scene, but for now, we'll be focusing on creating the actual Scene.
Create a new Scene, and name it My Skates.
|
|
Add a Background to the Scene.
|
|
Under the Components directory, you'll see the Catalog item Component.
|
|
Drag the Catalog item Component into the Scene.
|
|
COMPONENT ITEM PROPERTIES PANEL
The Properties panel of a Catalog Item contains three tabs:
- Layout
- Common
- Item
We've already discussed the layout and Common sections; which are the same for all Components.
THE ITEM SECTION OF THE PROPERTIES PANEL
The Item section of the Properties panel contains several sections.
- 1. Field
- 2. Font style
- 3. Font size
- 4. Font Color
- 5. Text effects
|
|
THE INFO FIELD
When you add a Catalog item Component to a Scene, you assign a field to it. The field will be displayed by the Catalog item Component in your presentation.
|
|
The fields listed here represent the fields we previously covered when we explained the Items area of the Catalog section of the SignageStudio.
|
|
The first field is the name field, corresponding to the name of the presented item.
|
|
The Info 0, 1, 2 and 3 fields correspond to the ones from the properties panel of the Item in the catalog section.
|
|
The last field represents the resource associated with the item.
|
|
The last sections are related to the font used to describe certain fields.
|
|
At this moment, we added one catalog item component to the Scene. Next, we'll assign a field to this Component.
Click on the Catalog item Component you've added to the Scene. Choose the Info 1 field from the dropdown list in the properties panel.
|
|
The description of the Catalog item Component has changed from name to info 1.
|
|
This means the Catalog item Component will display the data we've entered in the Info 1 section of the Items category. Remember, we entered a description for our Skates and named the respective product Skate.
|
|
Next, we'll change the color and font of the Info 1 description.
|
|
Now add another Catalog item component to the Scene and assign the resource field to it. It will display the resource in the Scene.
|
|
Now have the Resource in the bottom of the Scene and the description of the product on the upper side. Next, we'll add a new Catalog item component and assign the Info0 field to it. We have set in the Item section of the Catalog that Info0 field will contain the price of the products.
To continue with our example, we'll add the third Catalog item Component next to the Resource. We also changed the Font color, style, and size.
|
|
Another thing you can do after you've added Catalog item Components to the Scene, is to add different effects to these Components. Anytime a new product or a new item is sequenced in, we'll see this special effect.
Let's say we want the description field of the product to have a Blur effect. Select the Dynamic Blur effect and apply the following settings:
|
|
You can also add to the Scene any other static information like a standard label or RSS component for example.
|
|
At this point, we've created a template which will be used to show the description, the price and the resource / image of different products.
BINDING CATALOG TO SCENE
Next we will associate different products with the Catalog Scene we've created earlier in this Chapter. This will be done on the Campaign's Timeline.
First, click on the Campaign tab from the main Navigation menu to enter the Campaign section of the SignageStudio.
Add a new Channel to the Timeline or use an existing one to be associated with our Catalog. We already have a Channel on our Timeline and we'll rename it Catalog.
|
|
Next, we'll open the Toolbox panel and search in the Components directory for the Catalog player Component.
|
|
Drag the Catalog player Component to the Timeline, and onto the Channel named Catalog, and increase its length so it matches the length of the Timeline.
|
|
Now, double click the Catalog player to access its Properties panel.
CATALOG PLAYER PROPERTIES PANEL
The Properties panel of the Catalog Player has three sections:
- 1. Player
- 2. Common
- 3. Catalog
In previous Chapters, we've covered the Player and Common sections of the Properties panel. Now, we'll review the last section of setting up the Catalog.
|
|
The Catalog section contains several fields:
- Scene Field
- Kiosk Mod Option
- Time Interval
- Categories Zone
SCENE FIELD
Similar to other Player Components (like the Weather Player for example) in the Scene field you bind a scene from the Scene's directory.
In our case, we will add the Catalog Scene we've created earlier. Drag and drop the My Skates Scene onto the Scene field. This will associate the Scene we created with the Catalog Player.
|
|
KIOSK OPTION MODE
The Kiosk mode feature is used to enable Kiosk functionality to the Catalog.
|
|
TIME INTERVAL
This is the time interval in seconds between Item iteration displayed by the Catalog.
|
|
You can increase or decrease the default time either by entering a numerical value in the designated field or by using the UP and DOWN arrow keys.
CATEGORIES
In this area you'll see all the Categories we've created in the Catalog section of the SignageStudio.
|
|
The next thing we'll do is to set up the actual Categories this particular Catalog is going to display.
As we mentioned, under the Catalog section of the properties panel, we have all the Categories created earlier.
Let's assume we want this particular Catalog to show only New Products, not the Roller Blades or Ice Skates categories. For this, you select only the New Products category listed in the Properties panel.
|
|
Now, if click on the Play button from the main preview area of the Outputs, you'll see the catalog Player display sequentially all the Products / Items and descriptions associated only with the New Products category.
|
|
You can add additional items to this New Products Category to easily present newly received products.
You can also check all the Categories and the Catalog will play all the Products we have in our Catalog setup; not just the New Products category.
|
|
As you can see, the Catalog is a very flexible feature that allows you to easily cycle through thousands of items easily; create a single Template and use it everywhere.
In future releases we are going to make the Catalog even more powerful. You'll have 3D objects, rotating carousels, many new dynamic product displays, sorting capabilities, interactive widgets and more.
FOLDERS AND FILTERS
INTRO
In this chapter we are going to talk about Folders and Filters. With Folders and Filters you can find better ways to manage your content. So now here under the screens into the signage studio what I will like do is to create two separate folders, one for the Flower Shop and one for the Demo Screen.
|
|
So let’s say we want to put the Flower Shop under LA folders, so go and select the Flower Shop, go to its properties, type LA and press Enter.
|
|
And the Demo Screen we will go and put in NY. So you can see we have two separate folders and we can view each one by selecting the folder that it's in.
|
|
Now you can imagine if you have a lot of different screens, this can become very useful. You can also create sub-folders so I can go over here, select LA and under LA I can put West LA and press Enter and you can see that the Flower Shop screen configuration is now under LA and then West LA and then we have the actual screen.
|
|
Now let’s go and add another screen, so we will just click on the + Sign and you can see there is an option right here to assign the screen already to a Folder. We will just skip it for now, click on Finish.
|
|
So by default it just comes up under the root so you see the 800x600 screen configuration we just created is just directly under the root.
|
|
Now go and select it and put it under the NY folder, press Enter. You will notice that the NY folder now holds both screen configurations.
|
|
|
|
Now if you want to get really fancy we can go NY/A/B/C, press Enter and you can see that I can create unlimited number of Folders and put all my content there.
|
|
|
|
So now we can take our newly acquired knowledge and use it on the campaigns as well. So we will switch to Timelines and select our Flower Shop campaign, go to its properties and type LA and press Enter. And now we to go to the Campaign Demo and this time and type just NY, press Enter and sure enough we have the same folder structure as before.
|
|
Now if we wanted to delete a particular folder, all you have to do is simply select the items, so in this case Flower Shop, delete the name from the properties panel for that folder , press Enter and now it's directly under the root.
|
|
This future really shines when you managing Stations. If you have hundreds even thousands of Stations that you need to manage, each Station is bound to a particular campaign. So in this case we have two campaigns one in LA and one in NY. So if you switch to Stations, you can drill down and look at only the LA campaign stations, you will see only four stations are running the LA campaign which is really the Flower Shop because that's what the Flower Shop is associated with the LA folder.
|
|
If we switch to NY, we are looking at the Campaign Demo and there are two stations that are bound right now to the Campaign Demo.
|
|
So essentially putting the campaigns inside folders allows you to filter as well through the stations. So again if you are managing a lot of different stations, this can become very useful.
So up to this point we have covered the Stations in the Campaigns as well as the Screens. Next let’s talk about the Resources and the Scenes. So we will show you how to actually use the Folders and the Filters to manage that, and it works pretty much in the same way but you actually have a little more options.
So here under the Resources we have the same management of folders just like before. So if we select the particular file in this case an image and we put that in the Images Folder you can see it now if we select that folder we have a single file a single image in it.
|
|
If we want to add another one, this time what we can do is instead of actually having to type in the name, we can actually take it and drag and drop it. This is something we couldn't do it before.
|
|
So we have a little bit more flexibility when it comes to the Resources. Next let's go and create another folder, we will go and select a whiskey image and put it under Ads, press Enter. Now if we wanted to take this Whiskey image and actually drop it into images away from Ads, all we have to do is simply select it and drop it over your under images and there it is.
|
|
Now under the Ads you can see we have nothing so you now have to get rid of this directory and all we have to simply go to File, Sync and it will remove the Ads directory.
|
|
Another neat capability of the Resources folder management is to be able to filter so if we select the root for example and we go and then type in 202, we will see only the file that have that particular text or string in their name.
|
|
So the Resources module allows you greater flexibility since you can actually drag and drop, and you can also filter using the filter box. And when it comes to Scenes you can actually use the same capability, and you can see that now we have the same folder system and we can filter just like before. So if we select the Weather and type 37 the scene will be found.
|
|
Let’s go and drop couple of more things in there, as our Limited Time Offer Scene, put it under the Weather.
|
|
So both the filtering capability and the drag and drop are really powerful when you have a lot of different Scenes or a lot of Resources and you can quickly find exactly what you are looking for and move them around in different folders. Now the last thing we wanted to show you is multi selection so we will switch back to the Resources although you can use it in Scenes as well, and simply hold onto CTRL button on Windows and you can select multiple files and you can for example drag and drop them.
|
|
Another thing you can do is you can multi select and for example delete, so you can multi delete and multi drag and drop again by holding down the CTRL button.
Kiosk Builder
INTRO TO THE KIOSK
In this Chapter we'll be covering the Kiosk. Kiosk are a set of features that enables a user to interact with the Screen. You can think of an ATM machine as a Kiosk, or a user digitally ordering food at a restaurant, or a customer buying movie tickets through a terminal. These are all Kiosk examples. Our Digital Signage platform has the Kiosk capability; so you can take advantage of the latest touch screen and tablet technology and provide a kiosk solution to your customers.
We also developed a custom Kiosk SDK Module so you can develop your own kiosk solution.
Next, we'll be covering the different aspects of the Kiosk feature:
- How to Enable the Kiosk Mode for Your Campaigns
- How to Upload the Different Kiosk Modules onto the System
We will demonstrate the Kiosk feature by downloading a Kiosk module we've developed and use it as an example. This Kiosk module is a restaurant food finder and you can download it from the following link: Kiosk Module
After you downloaded the zip file you can upload the file named RestaurantModule.swf onto the server from the Resources section of the SignageStudio.
|
|
After the resource has been uploaded and saved on to the server, we need to mark it as a Flex module. This is because the module was developed using the open source Adobe Flex framework available through the Apache repository.
Also, we must allow the uploaded resource to access external domains by enabling the Trust content option.
The Flex module and Trust content options are located in the Properties panel of the selected Resource.
|
|
After you click on the Trust content option, a Warning message appears on your screen.
|
|
Click OK to enable the Trust content option. Remember to SAVE the settings.
Next, we will access the Scene Editor area of the SignageStudio by clicking on the Scene Editor tab from the main Navigation menu.
|
|
After we've created a new Scene, we'll drag the RestaurantModule.swf resource onto the Scene. We'll set a blue border for it so it will be seen more easily. We will also increase the size of the resource, because we want the Kiosk module to occupy the full Scene.
|
|
You can easily change the size of a resource or Component within a Scene using the Constrains feature. If you anchor the object, which in our case is the SWF file, type the number 0 on the x and y axes and the resource will match the size of the Scene.
|
|
Next select the Campaign tab from the main Navigation menu.
|
|
CAMPAIGN KIOSK MODE
To enable the Kiosk mode for a Campaign, you select it in the Campaign panel and click on the Kiosk tab in its Properties panel.
|
|
In the Kiosk section of the Properties panel you enable the Kiosk mode.
|
|
Enabling the Kiosk mode option, will allow mouse and keyboard interactivity with this particular campaign; you can also use your finger and virtual keyboard in tablets and touch screen capable screens.
After you've enable the Kiosk mode, you also have to define a Kiosk exit key. The Kiosk exit key, allows an Administrator to exit the Kiosk. You don't want public users to go in to the OS and exit the Kiosk.
Enter in the Kiosk exit key field the password you want to set as an exit key phrase.
|
|
Note: Only the SignagePlayer Desktop version uses the ESC + password functionality (not the Web Player).
To actually close the Kiosk as an Administrator, you press the Escape key on the local machine and enter the password you've set in the field described above.
After we setup the Campaign and enabled the Kiosk mode, we'll drag onto the Timeline the Kiosk Scene we've created earlier.
|
|
After you added the Kiosk Scene to the Timeline, double click on it to access its Properties panel.
In the Properties panel, you enable mouse and keyboard functionality for this Kiosk Scene and you'll do this by enabling the Kiosk inputs option.
|
|
You can enable or disable Kiosk interactivity per specific resource making the Kiosk functionality more flexible. If you want mouse and keyboard interaction you must enable the Kiosk inputs option per specific resource on the timeline. This will allow for example to enable interaction with one HTML component, but not with other swf animations and HTML components.
The final thing we should do is to preview the presentation. We'll use the SignagePlayer Web version for this, but we recommend using the SignagePlayer Desktop for better performance (and remember that password protection is only supported on Desktop version).
|
|
You can click on the images and test the mouse interaction with the Kiosk module.
If you have a touch screen device or tablet, you'll be able to use your fingers to interact with the Kiosk module instead of using an actual mouse.
SCREEN SAVER MODE
In this section we're going to discuss using a Digital Signage presentation in a Screen Saver mode. This feature is useful if you have for example, a Point of Sale system and you want to integrate the Digital Signage presentation as a Screen Saver; so if the operator stops using the Point of Sale system for a certain number of seconds or minutes, the Presentation can kick in and start playing. First, access the Campaign area of the SignageStudio by selecting the Campaign tab from the main navigation menu.
|
|
In the Campaign area, select a Campaign you want to use the screen saver mode in. Next, access the properties panel of the campaign, click the Kiosk tab and you'll see the two main options under the Kiosk section:
- 1. Kiosk mode
- 2. Interrupt mode
|
|
INTERRUPT MODE
To use your Signage Presentation in a Screen saver mode, select Interrupt mode.
|
|
To kick off the Presentation after a user stops moving the mouse, enable the interrupt mode for the selected Campaign.
|
|
and set it to [Show desktop]
|
|
This means the entire Signage Presentation will start playing normally, but only when there is no mouse activity for the designated timer length.
In the same section, you'll also see two additional fields which are used to setup the waiting period; or how long to wait before no mouse activity is present to begin and play the presentation.
|
|
The first field from the left is where you'll enter the minutes. The second field is used for seconds. You can either type numerical values in the fields or use the UP and DOWN arrow keys.
INTERRUPT MODE WITH KIOSK MODE
In the previous section, we covered using the interrupt mode and having the [Show desktop] option enabled; that will allow the Signage Software to play your entire Presentation normally (every time a user stops using the mouse for a predefined period of time). We said this can be accomplished by setting terms of minutes or seconds.
Another option of using the Interrupt mode is together with the Kiosk mode. If you enable both Kiosk mode and the Interrupt mode, you'll be able to set a particular Timeline to play and allow users to interact with a predefined timeline.
To demonstrate this, we'll enable both the Kiosk mode and the Interrupt mode for a particular Campaign.
|
|
Under the Interrupt mode checkbox, there is a field named timeline having two buttons. You'll see the default option corresponding to these buttons is the [Show desktop] option.
|
|
Next, select a Timeline containing a Kiosk module you want users to interact with.
|
|
click on the use current button to bind the selected timeline as the Interactive timeline for your touch screen.
|
|
this action will replace the [Show desktop] with your selected interactive timeline.
|
|
Now the Presentation will play like it normally does, with the settings you defined, and as soon as a user moves the mouse or interacts with the screen, Timeline 1 (in our case) is going to run for the Kiosk mode and users can interact with it across touch screens and tablets.
If a user stops interacting with the Timeline for the pre-defined period of time, then the Signage Presentation will begin to play normally until someone moves the mouse or interact with the Screen again.
|
|
Press the Clear button to revert back to [Show desktop] screen saver mode.
|
|
Music Player
INTRO TO THE MUSIC PLAYER
In this section we'll discuss the Music Player. The Music Player is a standalone application that is installed on top of the SignagePlayer Desktop version. It allows you to run background music and have different Channels of music that you create. The background music is independent of the Signage Presentation; meaning, if you have videos playing with sound you'll have two sound sources. In most cases, when you are running the Music Player, you may want to disable any other audio resources in your Signage Presentation.
To use to Music Player, click the Music tab from the Studio Navigator.
|
|
|
|
MUSIC CONFIG
The Music Player includes:
- 1. Channels
- 2. Resources Directory
- 3. Playlist
CHANNELS
Music channels contain playlists with songs you choose. To create a Music channel you click on the ADD button.
|
|
You can create as many Channels as you like.
|
|
In this section, you can also delete music Channels. To delete a music Channel, select it and click the DELETE button.
|
|
|
|
If you click on YES, the selected music Channel will be deleted. You also have the option to choose NO and CANCEL the operation.
MUSIC TOOLBOX
From the Toolbox panel you'll access the Resources directory. Before you start using the Music Player you first need to upload the music files to the server; the supported format is .mp3.
For our example, we'll upload eight .mp3 files.
|
|
Select the files and drag them to the Playlist area so you create Playlists within different Channels.
PLAYLIST
After you created a Channel you can add music files to the corresponding Playlist. The Playlist area is located at the center of the SignageStudio.
|
|
To add music files from the Resources directory to a Playlist, you first select them with your mouse then drag and drop them into the Playlist area. You can also select multiple files by holding down the Ctrl for individual file selection or Shift for a range selection.
To delete a sound file that you added to the Playlist, you select it and then click on the DELETE button.
|
|
|
|
You can choose YES and DELETE the selected music file, or you can choose NO to CANCEL the operation.
RENAMING A CHANEL
You can rename a music channel by entering the new name in the name field of the Properties panel of the selected Channel.
|
|
Assign folders and subfolders to the music Channels to better organize your music collection in the same manner you manage resources.
|
|
Let's demonstrate how to create Channels, Playlists and how to remotely manage the Music Player.
First, click on the ADD button,
|
|
Proceed with renaming the channels:
- Pop Music
- Jazz Music
- Rock Music
|
|
After creating the music Channels, we select the Pop music Channel and drag and drop a few Pop music files from the Resources directory of the corresponding Playlist.
|
|
|
|
Next, we'll select the Jazz music Channel and bind the Jazz song selection to it. Repeat the process for the Rock music Channel.
We created three different Channels, each Channel having its own Playlist of songs.
Next, we go to the Stations section of the SignageStudio.
|
|
We select a Station where we want the Music Player to run, click on the Music remote control button located on the top menu of the Stations section.
|
|
|
|
This window is a remote controller for the Music Player. It contains several settings that you can use to remotely manage the Music Player.
MUSIC REMOTE CONTROL
To activate the Music Player installed on the remote machine, first you select a Channel / Playlist from the corresponding dropdown menu.
|
|
Once you've selected a Channel, select a particular song from the dropdown list located below the Channel selector.
|
|
If you click on the STOP button, the Music Player will stop playing the current music selection.
|
|
If you click on the PLAY button, the selected song will start playing.
|
|
If you click on the NEXT button, the Music Player will start playing the next song after the current selected song.
|
|
If you click on the random list button, all music files from the current selected Channel will shuffle.
|
|
If you click on the sequence list button, all the music files from the selected Channel / Playlist will play in a sequential order.
|
|
The immediate action allows you to immediately apply changes to the Player as opposed to waiting for the current song to complete before applying your change.
|
|
If you have, the immediate action option enabled and you select a new song from the Playlist, the current song will stop immediately and the Music Player will start playing the song you've selected.
But maybe you don't what the changes to take effect right away. Perhaps people are sitting at the location and listening to the current song selection. If you have the immediate action option set to disabled, that action will take place only after the current song completes playing.
VOLUME
Another option on the remote controller is controlling the volume.
|
|
Using the minus button will decrease the volume while plus button will increase the volume.
CONTROLLING MUSIC FROM BROWSER
You can also have the same control over the Music Player from a web browser. The remote controller window has a URL path.
|
|
This URL will allow others to manage the Music Player virtually from any web browser; allowing employees and colleagues the ability to control the playlists. Simply copy the URL and shared it with others.
|
|
MUSIC PLAYER - USER INTERFACE
When you remotely start the Music Player, it will appear as a small window at the corner of your Screen.
|
|
It will display the name of the Song playing, the Volume, and a graphical illustration of the volume intensity. The Music Player is a standalone application and with its remote control functionality, it is an easy way to inject background atmosphere to your screen locations.
Mobile Controller
INTRO TO THE MOBILECONTROLLER
The MobileController allows you to view the status of your remote SignagePlayers and apply basic management functions using a simple HTML user interface.
You can have live access to your Digital Signage network from anywhere with the Mobile Controller.
|
|
The UI is optimized for mobile devices such as the Android and iPhone.
|
|
Best of all, you get full remote control to all your remote SignagePlayers, including:
- Live Snapshots
- Play
- Stop
- Reboot
- Stats
- Much More
To launch the MobileController portal point your mobile browser to: MobileController
Use your existing login e-mail and password as you do to login to the SignageStudio, it's that simple! Note that if you are an Enterprise user, DO NOT login with your enterprise credentials as you will not be able to view any stations; you must use an end user account.
|
|
|
|
You'll see a list of all your registered Stations.
|
|
To use any of the available controls, first select the Station by clicking on the SELECT button.
|
|
The following controls are available:
- 1. THE REFRESH BUTTON
Click on the refresh button to refresh the selected Station list.
|
|
- 2. PLAY
Click on the Play button to start Playing the selected SignagePlayer.
|
|
- 3. STOP
Click the Stop button the stop playing the selected SignagePlayer.
|
|
- 4. LIVE SNAPSHOT
Click on the Live Snapshot button to retrieve a LIVE snapshot image of whatever is currently playing on the selected Station.
|
|
- 5. CHECK NEWER VERSION
If you click on the Check for newer version button, the system will check if the selected Station has the latest version of the SignagePlayer installed.
|
|
- 6. UPDATE
If you click on the Update SignagePlayer with the new changes button, the latest Changes that you and saved to the server will get pushed down to the remote Station.
|
|
- 7. REBOOT STATION
If you click on the Reboot Station button, the selected Station will reboot at the hardware level.
|
|
- 8. CLEAR PLAYER CACHE
If you click on the Clear Player Cache button, the system will clear the local cache of the SignagePlayer.
|
|
- 9. LOGOUT
If you click on the Logout button, you will be logged out of the SignageController.
STATIONS STATISTICS
The following Statistics are available:
Signage Controller status
|
|
Name of the Stations listed
|
|
The last status of your Stations
|
|
The last update of your Station
|
|
Caching status
|
|
Current memory
|
|
Peak memory
|
|
Enterprise Edition
When you join the mediaCLOUD Enterprise edition you'll be able to take full advantage of all the advanced features. Start using a powerful and flexible Digital Signage today. The mediaCLOUD Enterprise edition is designed to maximize the potential growth of your business and MediaSignage provides all the necessary tools.
Take advantage of the features you need to operate a successful and reliable digital signage network; full access to the EnterpriseStudio with all its advanced management capabilities, including, white label/branding, multi user management, advertising engine and more.
With the mediaCLOUD Enterprise edition you are free to market yourself as you please, opening the gate for you to choose your own business model.
We offer a simple, yet robust solution with low barriers to entry. No complicated contracts and no long term obligation. We make it easy for you; just as you would expect from MediaSignage!
Tap into the potential of digital signage and energize your sales. Add digital signage consulting to your services and grow your business. Our Enterprise users rely on our solutions to ensure their message is displayed when and where they need; 24/7, 365 days a year. Digital signage is not just for public spaces and retail anymore. Corporations are now discovering digital signage as an ideal tool to communicate with staff and clients; screens are popping-up in lunch rooms and lobbies.
Digital signage doesn't need to be a hard sell because MediaSignage will give you the flexibility you need to match any price and outbid the competition while delivering a superior quality product. Now you can manage your clients through your own account and brand the complete solution. Bundle your own creative services for a complete one-stop experience; make digital signage an integrated part of your business.
We know your success is our success, and so we developed a program that allows you a substantial growth while keeping costs down.
Want to start your own business? Want to get passive monthly income?
Start your own Digital Signage network and stay ahead of the curve. The industry of Digital Signage is still young and many opportunities exist.
|
|
When you join the mediaCLOUD Enterprise edition you'll pay a flat subscription of $99.00 per month. You get unlimited SignagePlayer Desktop and Mobile licenses (screens) you use. You can also manage an unlimited number of businesses. That's it, simple? We think so!
Get full access to all the advanced mediaCLOUD management features as well as a long list of business advantages. The important thing to remember is that you are always free to charge your customer's whatever price you want. You may choose to include several hours of technical support to your customers, signage content creation, or possibly graphic design assistance. You can provide training courses and online Webinars.
MediaSignage gives you the flexibility to maintain your own pricing strategy that's right for you. It's your business and your success; we just help you get there. We don't take a percentage of your advertisements, we don't charge ridiculous fees, and we let you run your own responsible Digital Signage business; your way...
ENTERPRISESTUDIO
The mediaCLOUD Enterprise edition will get you access to the EnterpriseStudio; a real time monitoring tools which allows for central management of your subscribers and full administration over all accounts. You're also able to disable delinquent accounts and notify your customers of updates and changes. The EnterpriseStudio includes many advanced features, such as the advertising engine, multi user control, access control lists, branding, the mediaSTORE and more; all covered in the following chapters.
WHITE LABEL / BRANDING
When you sign up as a mediaCLOUD Enterprise user you can take advantage of the Branding / White Label. Designed for individuals and companies who own or operate a Digital Signage network. It allows you to embed the complete MediaSignage solution onto your own website. These include all components, including login screen, SignageStudio, SignagePlayers and support components, all in a matter of minutes. Your web visitors can open new Digital Signage accounts directly on your website, while returning customers can login to their accounts through your web portal.
Give it your own look as if you developed the entire software suit; using your logos and company information. MediaSignage becomes transparent to your clients so you can market it your way.
ADVERTISING ENGINE
So you are managing a bunch of remote screens, but now it's time to capitalize on them. Well, the Advertising Engine allows you to do just that. With the Advertising Engine you can provide proof of play (POP) to your advertisers, open your network to outside Ad managers and even post Ads across businesses. The Advertising Engine is the ultimate tool to help you turn a Digital Signage business into a successful one.
BENEFITS
- White Label / Branding with your Logo, link backs and more
- Advertising Engine, Manage an advertising network
- Create access lists and user permission control
- Modify the overall Theme through editable CSS
- Get discounts on hardware and accessories
- Receive phone support and none client assistance
- download marketing material (source code available)
- Manage sub accounts and much more
- Access to the mediaSTORE
With branding you have the ability to host the complete application on your own website. This way, existing customers can login to their accounts on your website (through your web portal) and new customers can create new accounts and get associated as sub-accounts under your Enterprise umbrella.
Some of the other benefits include support for multi users, create ACL or Privileges and Access Control Lists where you can assign users only access to certain areas of the SignageStudio.
You'll be able to manage all your businesses from a single location using the EnterpriseStudio.
- Advertising Engine
The Advertising Engine will allow you to send proof of play to advertisers and also join the MediaADNET where you can build your own advertising network. There are over fifty features associated with the advertising Engine and we will cover them in detail in another Chapter.
- No Limits
Install unlimited number of screens at infinite number of locations.
Enterprise users receive 10 Gigabyte of storage on the mediaCLOUD to store videos, animation, and images (additional space can be granted if needed at no charge. None Enterprise Users total server storage TBA).
Enterprise users can download and upload with no limits as we do not cap bandwidth speeds (none Enterprise Users bandwidth limit TBA).
- Multi User Management
Collaborate with other users. Work together on the same campaign and use source control to merge your work. Use perforce like features to manage your updates between you and other team members.
- Central SignageStudio access
Manage unlimited number of accounts and remote SignagePlayers all using central login. Get a global view of your entire player stats and receive live notifications.
- EnterpriseStudio access
Manage your network, setup branding, apply permissions, inject access control lists and more, all using single point and click management.
- EnterpriseStudio White Label / Branding
Brand the entire solution. Copy and paste the provided HTML snippet and allow customer login and create new account; accessed directly from your own website. All with your own domain, custom logos and link backs.
- SignagePlayer White Label / Branding
Set the Signage Player to display your company's information anytime the Player is started or rebooted. Make MediaSignage transparent to your clients.
- Branded Embedded SignagePlayer
Embed the SignagePlayer Embedded version directly onto your own website. Enterprise edition users can remove the Copyrights snippet and set no references to MediaSignage.
- Advertising Manager
Manage thousands of Ads across any number of businesses using the "Incoming" Ad Manager module and provide proof of play to your advertisers. Set Approval rules and schedule Advertising start and end dates.
- API / SDK
Develop your own user interface using Web services and application program interface (API) for your Advertisers using web services and embed it all onto your own website. Use any programming language including ActionScript 3, ASP.NET, PHP and more. Create a fully automated system with your CMS for Ad package creation, resource uploads and more.
Use the software development kit (SDK) and develop custom SignageStudio and SignagePlayer components. Use working samples to get up and running in hours, not days.
- Advertising Engine
Take advantage of a robust Advertising Engine including incoming and outgoing Ad management.
- Access Control List
Access Control Lists (ACL) allows you to set specific regions within the SignageStudio using 8 levels of control. Hide area you do not want specific users to access while maintaining full admin access to others.
- Privileges
Privileges are set to control what users can do within the SignageStudio. Privileges include, read, update, delete, and modify control. Create unlimited number of sub-users each with its own privileged group assignment.
- Multi Player central management
Get a Global view of all the Players across the entire network from a single screen.
- Multi user management
Create unlimited number of users each with its own ACL and privilege group. Use default privileges for easy group privileged assignment.
- SignageStudio custom themes and CSS control
Choose a custom look and feel for the SignageStudio through pre-configured CSS Themes.
- Unlimited support
MediaSignage dedicated support through phone, email, forum and Live Chat. Support is guaranteed within 24 hours. Normally we reply to Enterprise member inquiries within 1 hour of extended business hours.
- Private Library of resources, videos, backgrounds and masks
Access hundreds of pre-made resources including backgrounds, masks, source SDKs, videos, images, SWF animations and more.
- Discounts on mediaBOX
Receive 5% OFF the mediaBOX; all version, including Linux / Ubuntu and Windows / Embedded version.
- Discounts on the mediaSERVER
Receive 5% OFF the mediaSERVER. Also get access to our special pricing on Microsoft Windows 2008 64bit server edition license.
- Media SERVER Licenses discounts
Get lower prices on the mediaSERVER Licenses; prices drop to as low as 135.00 per single license (depends on volume).
- 25% OFF on some accessories
Receive discounts on accessories, such as, wall mounts, USB OS Imager, and other peripherals.
- Marketing material branded to your Company
Take advantage of marketing material including flyers, brochures, business card, white papers and more. Download the Photoshop source files and modify with your own company's logo and information.
- Participate in the Lead generation program
Receive leads generated from potential new clients and increase your business exposure.
- Access the mediaADNET
Expose your Advertising Network through our mediaADNET and increase the exposure of your screens to national and international advertisers.
- Link backs from MediaSignage.com to your website
Increase online traffic to your own Digital Signage website through link backs and access the partner program.
- Early access to special promotions and package discounts
Receive early access to special discounts, promotions, news and beta release of the software.
- General consulting and advice
Consult our support team for additional information and resources concerning Digital Signage installation, maintenance, and setup.
- Direct access the online Video Tutorials
Host the entire video tutorials content library on your own website, none branded. Visit on how to host the video tutorials
- Permission to use information from the MediaSignage.com website
Copy and paste information from the MediaSignage.com website to your own site and promote your company with proven content.
As a mediaCLOUD Enterprise user you pay a flat $99.00 dollars a month subscription fee. This gives you access to the complete product solution; everything we have to offer, and that's it. There are no other fees associated with the program. You get:
- All the software updates
- Access to all the features
- Technical support
- No setup fees
- No contract
- Month to month / cancel at any time
You get advanced, Enterprise level solution for one low cost.
HOW TO SIGN-UP
In this section we will be covering the Enterprise sign-up process.
To open an Enterprise account click on the [SIGN-UP] box below on the following webpage: Enterprise sign-up
Clicking on the [SIGN-UP] box will launch the SignageStudio Web version, and create your Enterprise account.
Note that if you are currently logged in as a standard end user, you must first click on File > Logout in the SignageStudio Web version, before you can re-launch the [SIGN-UP] Enterprise Studio from the link above.
|
|
|
|
|
|
From the EnterpriseStudio you can manage all your Businesses and all the Users that registered under your Enterprise account, you can see all Stations managed by each customer, and can set up your Logos and more.
We will cover the Enterprise level features in the following chapters.
Incoming Ads
INTRO TO INCOMING ADS
As a mediaCLOUD Enterprise user you get to take advantage of the Advertising Engine. It allows you to manage all aspects of the out-of-home (OOH) advertising business including:
- Inventory Control
- Scheduling
- Proof of Play
- Execution
- Cross Business Ads
- Much More
Regardless of media type (e.g. billboard, transit shelter, airport, mall, bus, and digital signage), the Ad engine delivers creative and flexible campaigns across multiple platforms and multiple markets using one centralized management tool. The MediaSignage Advertising platform is designed to ensure you maximize your Ad revenues by using smart digital signage at the lowest total cost of ownership.
The Advertising engine is all about providing advanced campaign management and scheduling that allows you to deliver the right ad at the right time to the right customer across thousands of screens.
With the mediaADNET Advertising platform you can target advertising based on sites, demographics, time of day and specific screens; all with the simplest user interface for both you (the network owner) and your advertisers.
Best of all, you can take advantage of a slimmed down, white labeled version of the SignageStudio and embed it directly onto your own web site to allow your Advertisers a portal for Ad management. You can also use the API we provide (Application Programming Interface), and create your own portal that caters to your own needs using other programming languages including PHP, ASP, Flash and others languages.
The Advertising Engine gives you a lot of different features including:
- Playback Analytics including Proof of Play
- Integrate existing campaign and timelines using the Ad Component
- Easily address thousands of Ads to different Stations across business using Ad Packages
- Set station with different hourly rate for Ads at any given hour per week
- Expose your Ad Network to the public mediaADNET
- Provide approval system, accept and suspend incoming Ads manually or automatically
- Dozens of customized reports / aggregated stats, exportable to CSV
- Assign Start and End dates for the Ad package
- Multi user Advertising privileges control
- Set geographical location for each Station using Live Maps
- Connect a private hosted mediaSERVER to the public mediaADNET
- Search Ad station in the Local Ad network or mediaADNET using keys, names and geo location
|
|
One of the great things about the Ad Engine is once that you start using it, you can expose your Screens through the mediaADNET; a public network of users and advertisers. You can bring in more advertisers and grow your business.
You also have the option to create your own local private Ad Network. So you don't have to join the mediaADNET; you can keep it all private.
If you purchase a mediaSERVER you can also establish a connection between your mediaSERVER and our mediaADNET.
ADVERTISING ENGINE AND NETWORK EXPLAINED
In this section, we'll use a factitious user named Joe. Joe is an accountant who is looking to expand his business and find more clients.
|
|
Joe gets coffee every morning at his local coffee shop and he sees Digital Signage with an Advertise here message, together with a URL address.
|
|
Joe goes back to the office and uses the advertised URL address so he can find more information about placing ads at the local coffee Shop.
We'll use this example to show you everything you need to know about the Ad Engine. From Joe's perspective, where Joe creates his own Ad package, and how he will upload his files as videos and images that he wants to use to run his ads. Joe's Ad submission will go to the Coffee Shop owner who manages the screen.
We will also cover what you need to know from the perspective of the Coffee Shop owner, approving Joe's Ad packages, setting up the different Ad rates and providing proof of Play to Joe.
INTRO TO INCOMING ADS
To access the Incoming Ads section of the SignageStudio, you must enable its functionality from the main top file menu of the SignageStudio.
|
|
After you enable the Incoming Ads section, you can access the area by clicking on the Incoming Ads tab located in the main Navigation menu.
|
|
You'll notice three subsections available under the Incoming ads section:
- Advertisers
- Rates
- Analytics
The Coffee Shop owner in our example needs to set up a Station (a PC connected to a screen) at his location. He will register as an Enterprise user on the mediaCLOUD and install the SignagePlayer Desktop version on a PC connected to a large 32" screen in his Coffee Shop.
The Coffee Shop owner will proceed by building his Campaigns and Timelines and configure the Advertising options for his Station.
First we will begin by enabling advertising capabilities at the Station level.
Under the Stations section of the SignageStudio we select a Station that we would like to run Ads on. The Advertising option is located in the Properties panel of a Station.
|
|
|
|
ADVERTISING PROPERTIES PANEL
The first option in the Advertising section is named Public. It allows a Station to be exposed to a private advertising network or through the public mediaADNET.
|
|
If the public option is set to none, you will not be able to run any of the advertising tools. However, selecting the Local network will expose the Screen to any business that's within your Enterprise account. Selecting the mediaADNET will expose your Screen to possible advertisers throughout the entire public mediaADNET.
If you select the mediaADNET, the Station will be exposed to possible advertisers from both your own local Ad network as well as the mediaADNET; which includes our mediaCLOUD servers and customers who purchase a dedicated mediaSERVER and connected it to the mediaCLOUD.
Next, you can add a Description so users who search for screens can read and get more information about your exposed Station; i.e.: type of business it's in and price information.
|
|
The Coffee Shop owner from our example can also add some searchable keys. You can add searchable keys in the designated field.
|
|
This way, individuals can possibly find your Screen when entering a keyword, for example: Coffee Shop.
The Coffee Shop owner needs to configure the Rate table which sets the price per hour of what he chargers to run advertisements on his Station. As you can see below, the Rate dropdown list is blank. We have to create the Rate table before we can apply it to the Station.
|
|
RATES
If you click on the Rates tab under the Incoming Ads section of the SignageStudio, you'll access the Rates tables where you can configure prices per hour for your Ad packages.
|
|
Rates allow you to set the price per hour / per any day of the week so you can charge your advertisers accordingly. Rate Tables are bound to specific Stations. Running a monthly proof of play report on a particular station will use its bound rating table to compute total charges.
The Rates section is broken down to:
- 1. Rates Main Panel
- 2. Rates Timetable
- 3. Rates Properties Panel
RATES PANEL
Located on the left side of the user interface, the main panel of the Rates section allows you to add or delete rate tables.
|
|
ADDING RATE TABLE
To create a new Rate table, click on the ADD button.
|
|
You can create an unlimited number of Rate tables. However a single Station can be bound to only one Rate table at a time.
|
|
A Rate table allows you to create four different levels or rates. So you can charge 4 different rates per hour per week.
RATES TABLE
The Rate table is located in the center or the Rate section of the SignageStudio. Here you set 4 different levels of prices for every hour of the week.
|
|
RATE PROPERTY PANEL
|
|
You can change the name of a Rate table at any time; select the Name field of the Properties panel to enter a new name.
|
|
HOURLY RATES
The Properties panel contains four different fields for the hourly rates that you can set; distinguished by four colors. You define how much to charge by entering the value in currency in the hourly rate fields.
|
|
The selected button is used so you can determine the currently selected rate.
|
|
The colored squares represent the 4 rates that you can set with the Rate table.
|
|
After you select a particular hourly rate, use your mouse to drag regions in the Rate Timetable to associate the respective hourly rate within a week's time.
CREATING AND APPLY RATE TABLE
In this section we'll be creating a new Rate table from scratch and applying it to a station.
Step 1:
Add a new Rate using the ADD button.
|
|
Step 2:
Select the newly created Rate and access its properties panel on the right. Change the name of the Rate in New Rate.
|
|
Step 3:
Use the Red color to define the rate for the weekend hours. If for example you know the weekend is the busiest time at your business, you can set higher rates for Sat and Sun.
Type the number20 in the red represents 20.00 dollars an hour.
|
|
Step 4:
Using our mouse, select the period of time between 8:00 and 24:00 for Saturday and Sunday.
|
|
From midnight until 8 AM, we leave the hourly rate at zero (noted with the grey color). This is because we don't want to charge our advertisers when the business is closed.
|
|
Step 5:
For the rest of the week we set an hourly rate of 10.00 dollars. Type the number 10 in the green hourly rate field. Select the Green color and use your mouse to drag and define the green area on the timetable.
|
|
Step 6:
For Friday we set 15.00 dollars per hour. Use your mouse to define blue instead of green for Fridays.
|
|
At this point we have created a Rate table. You can create as many Rate tables as you want and choose different hourly rates for different periods.
After the Rate table is created, access the Stations area of the SignageStudio and assign the Rate table to your Advertising Station.
Step 7:
In the Properties panel click on the Advertising tab and select the Rate from the dropdown list.
|
|
SET UP A LOCATION
To add a Location, click on the Location tab from the Stations Properties panel of the selected Station.
|
|
Enter a ZIP code or town in the Location field and save your configuration.
|
|
|
|
CREATE A CAMPAIGN FOR AD ENGINE
Next we create a new Campaign and a Timeline.
|
|
Next we add the Advertising Component to it to the empty channel. Access the Component panel and drag the Advertising Player Component to the Timeline.
|
|
This particular Channel will be the portal for the Advertising Engine; on this Timeline / channel, all the advertising resources will play. The Resources submitted by the Advertiser should match the screen division size of where the Advertising component was assigned, to prevent content skewing.Double click on the Advertisement component and access its Properties panel, the only option is the default resource.
|
|
This default resource is going to be a video file or an image that's going to run on this particular Screen Division IF no ad packages have been scheduled. Therefore, if you haven't sold any ads, or you haven't scheduled any ad packages, the default resource will play. We assign a PNG image as the default resource for our Advertising component.
|
|
To assign a particular resource as the default resource for the Advertising component, select it in the Resources panel, with your mouse drag it into the default resource field to bind it.
|
|
|
|
ADVERTISER SECTION OF INCOMING ADS
Joe, the accountant from our example, has seen the Coffee Shop rates and submitted an Ad package to the Coffee Shop owner. In the next chapter, we'll explain how to search for Screens and how to submit ad packages from the Advertisers side.
Note: Once an Ad package has been submitted, it may take a few minutes for it to synchronize among all the mediaCLOUD servers. You can speed up the process by selecting File > synchronize from the main menu to pull down the latest Ad engine data and onto the SignageStudio.
The Advertising section of the Incoming ads has six main areas:
1. User / Domain Directory2. Business / Package3. Ad Status4. Properties Panel5. Content Listing6. Content Preview
USER / DOMAIN DIRECTORY
After Joe submitted an Ad package, the Coffee Shop owner will be able to see the user who submitted the Ad package and the domain under which the user is registered.
The User / Domain directory is listed on the left side of the interface.
|
|
In our example, the user is test02 and the domain is signage . me. In this area of the user interface you see all users who submitted an Ad package and the domain they belong to.
Domains are used to identify private mediaSERVERs that extend onto the public mediaADNET; therefor they will have a different domain name.
BUSINESS / PACKAGE
The Business / Package area is located next to the main navigation menu.
It contains four different columns:
- Business
- Package
- Date Start
- Date End
|
|
The Business column contains fields showing the business under which the Advertiser submitted ads.
The Package column contains fields describing the name of the Ad Package as well as the Start and End dates; time set by the Advertiser as to when to start and end playback of the submitted Ad package.
We only have one Business and one Package available, but it could be any number of businesses and packages.
|
|
AD STATUS AREA
The status area of the ad packages submitted by advertisers is located next to the Business / Package area. It contains five columns:
- Status
- Station
- Week Days
- Hour_Start
- Hour_End
|
|
STATUS
The Status field is used to display the current status of the Ad package submitted. In the above example, the current status of the Ad package is pending.
|
|
The Status can be either:
- Pending
- Accepted
- Suspended
- Declined
STATION
The Station field displays the name of the Station to play the Ad package that was submitted.
|
|
WEEKDAYS
The Weekdays field refers to the days of the week chosen by the Advertiser to play the submitted Ad package.
|
|
In our example, Joe the accountant wants his Ad package to play every day of the week. Each day of the week has a check box. The first checkbox represents Sunday, the next one Monday, and so on. If the Advertiser wants his Ad package to playback only on certain days, only those specific days will be checked in the Weekdays field.
HOUR START
The Hour Start field is used to display the hour to start playback of the Ad package as set by the Advertiser.
|
|
The Advertiser can set the exact start time specified in hours and minutes. In our example, the starting time is just after midnight.
HOUR END
The Hour End field is used to display when to stop the playback of the Ad package as set by the Advertiser. In our example, the end playback time is just before midnight.
|
|
In the Properties panel you can apply:
- Ad-in Domain
- Ad-in Domain Business
- Ad-in Package
- Package Station
AD-IN DOMAIN PROPERTIES PANEL
To access the Properties panel of theAd-in Domain, you select the domain used by the Advertiser. The domain in our example is signage . me.
|
|
After you select the domain used by the Advertiser, you can access its properties panel.
|
|
The properties panel contains only one field. It can be used to set whether to accept manually or automatically future businesses registered under the selected Domain.
If you set this option to automatically, any package coming from the selected domain will be accepted without having to approve it.
If you set the option to manually, you must manually accept all the Ad packages submitted from the selected domain.
AD-IN DOMAIN BUSINESS PROPERTIES PANEL
To access the Properties panel of the Ad-in Domain Business, or the Username of the Advertiser, select the username used by the Advertiser. The username / Business in our example is Test02.
|
|
|
|
The properties panel contains only one field which can be used to set whether to manually or automatically accept future new packages registered under the selected business.
Notice if you set this option to automatically, any package coming from the selected Username or Business will be accepted automatically.
If you set the option to manually,future submissions must be accepted manually for ad packages coming from the selected Username or Business.
AD-IN PACKAGE PROPERTIES PANEL
To access the Properties panel of the Ad-in Package, select the Package submitted by the Advertiser. In our example, Joe the accountant submitted an Ad package to the Coffee Shop owner named Package 01.
|
|
After you select the Ad package, you access its Properties panel.
|
|
In the Properties panel you can set to manually or automatically accept different changes made to the selected package.
PACKAGE CONTENT MODIFIED
|
|
If you enable this option and choose automatically from the dropdown list the action will automatically be accepted by the system if:
- The Advertiser Modifies the Content of the Ad Package
- Items are Removed
- Items are Added
STATUS / STATION PROPERTIES PANEL
If you select the Status of the submitted package you access its properties panel.
|
|
In this area you can change the actual Status of the selected package:
- Pending
- Accepted
- Suspended
- Declined
SUSPEND MODIFIED PACKAGE / STATION
When enabled, anytime the Advertiser modifies the Ad package, the Status will automatically change to Suspended.
For our example, the Coffee Shop owner will add additional videos to the Ad package and the Status of the Ad package will change to suspended until approved by the Coffee shop owner.
|
|
Once the Status is changed from Pending to Accepted the Ad package will begin running on the Ad network. The Ad package will run within the schedule set for it.
CONTENT LISTING AREA
The Content Listing area contains the Items / Resources that are part of the Ad package:
- Content
- Duration
- Repetitions
- Percent
|
|
CONTENT
The Content column is a list with names of the Resources that are part of the Ad package. In our example, Joe the accountant submitted three files named Dream Vacation, Sunset and Have Fun Banner.
|
|
DURATION
In the Duration column you set the duration of each file within the Ad package that was submitted by the Advertiser. In our example, one file has duration of 31 seconds, the next 5 seconds and last with 5 seconds. The Advertiser has the ability to override content duration.
|
|
REPETITIONS
The Repetitions column shows how many times the selected Resource will run within a single hour. In our example, each file is set to have 12 repetitions; thus the system will try to run each file 12 times within an hour.
|
|
The Advertiser can set the repetitions value.
PERCENT
The Percent column shows the percentage of time filled within an hour by the selected Resource. If the Resource is longer and/or the number of Repetitions is higher, the playback percentage will also be higher.
|
|
The percentage can also be set by the Advertiser.
Note: If multiple Ad packages are submitted by Advertisers to a single Station, some of the ads may get pushed back, eventually all ads will receive playback time. Some content may receive higher impression rate as dictated by the values described above.
|
|
CONTENT PREVIEW AREA
Network owner can preview resources in the Content listing before deciding if to approve or deny it into their Ad network.
|
|
ANALYTICS
The Analytics of the Incoming Ads is a key feature as it allows you to provide proof of play to advertisers.
|
|
Use Search to look for Ad packages assigned to your Screens within a specified Year / month.
|
|
After you entered the date, click on the Go button to begin searching the database.
|
|
The system will find Ad packages that played during the specified month and provide full analytics including dates, times, ads, charts and more.The data is exportable to CSV so you can use it with Excel, Crystal Reports and other analytic tools.
|
|
As you can see in our example, the Ad package submitted by Joe, the accountant was found. Once selected, we can find details related to the Ad package.
|
|
The Analytics main area:
- 1. Grid
- 2. Charts
|
|
The GRID area contains columns with information related to the Advertisements played on Stations.
|
|
You can filter what information to display in the Grid area, select or deselect features under:
- 1. Baseline
- 2. Present
|
|
Under the Baseline, you can choose to display Analytics on an hourly, daily or both.
|
|
Using the Present, you can display analytics for Package, Content and Station currently in use.
|
|
Date: specified date the selected Ad package played.
|
|
Time: when the Ad packages played.
|
|
Package: name of the Packages that Played.
|
|
Station: Stations that played the Ad packages.
|
|
Content: name of each individual resource that played within the specified Ad package.
|
|
Count: number of counts for each Resource played.
|
|
Duration: length of each resource played per station as part of an Ad packages.
|
|
AVG SIZE (MP): average size in Megapixel as in total megapixels divided by total ads.
|
|
Hourly rate: the hourly rate applied to the selected Ad package as set by the Rate table.
|
|
Price: calculated price that Advertiser should pay as set by the Rate table.
|
|
At the bottom of the main Analytics area, you see a summary of the information.
|
|
- Total Counts for the Ad Packages
- Total Duration
- Average Hourly Rate
- Average Size
- Total Price
EXPORT ANALYTICS
The Export function is used retrieve analytics data and import into a CSV file. CSV is a Comma Separated Values format that can be opened natively with application such as Microsoft Excel and Crystal reports.
If an Advertiser requires proof of Play for a submitted Ad package, you can generate the required report from the proof of play raw CSV data.
|
|
Click on the Export button and you will be promoted to SAVE the data file. Name the file end save it to your Computer. After its saved, you can open it with Microsoft Excel.
|
|
CHARTS
Another section of the Analytics is Charts; a visual representation of the raw analytics data. The Charts data contains both Baseline and the Present fields. Charts can display Package, Content and Station information.
|
|
There are three sections to the analytics data:
- Counts
- Duration
- Price
|
|
|
|
For each of the three sections you can choose to display:
- Column
- Line
- Plot
- Area
- Bar
|
|
If the data is not visible on your screen, use the horizontal and vertical scroll bars to navigate through the Charts.
|
|
In this chapter we focused on the Coffee shop owner (Ad network operator). He determines the rates, default resource and Ad component channel assignment. It is also his job to accept or reject incoming Ad packages submitted by the Advertisers.
In the next chapter, we will cover the Outgoing ads used by the Advertiser (i.e.: Joe the accountant).
Outgoing Ads
INTRO TO OUTGOING ADS
In this chapter we will cover Outgoing ads. Outgoing Ads are a collection of advertisements (videos, images and animations) called Ad packages that are created by the advertisers. Advertisers are individuals and businesses who push their Ad packages to their own screens or public screens available through the mediaADNET.
The process includes:
- Build an Outgoing Ad Package
- Find available Screens (private or through the mediaADNET)
- Set the Start and End Date / Time for the Ad Package
- Configure the Ad Package with Advertisements / Resources
In the Setup incoming Ads chapter we introduced the Advertising engine; a set of tools used by a Digital Signage network operator to accept or deny incoming Ad packages. If accepted, the Ad package will run on the designated screen for the duration set on the Ad package. At the end of each month the Digital Signage network operator can provide a detailed proof of play report for the Advertisers.
In this chapter we will cover the Advertising Engine from the point of view of the Advertiser; building Outgoing Ads.
|
|
First, an Ad package needs to be created. An Ad package is made of resources including videos, images and animations.
|
|
Next, the Advertiser needs to find available Screens to play the Ads.
|
|
The Ad package will be set to play within certain times; when the advertisement package will start running and when it will end. He will also set a start and an end date to define Ad package playback date ranges.
|
|
Next, the Advertiser will submit the Ad package.
|
|
The Station owner will either accept or reject the incoming Ad package. Keep in mind that in a small Digital Signage network it may very well be that a Digital Signage Network operator will use both the Outgoing Ads (create Ad packages) as well as the Incoming Ads (approve Ad packages), and if that is the case it is possible to set an automated approval process.
|
|
If the Ad package is accepted by the Station owner, it will begin playback on the selected Screens.
If the Ad package is rejected, the creator will receive a notification through the SignageStudio.
|
|
Using our sample scenario from the Incoming Ads chapter, Joe the accountant was looking to advertise at the Coffee shop and it was up to the owner of the Digital Signage network to accept or reject the incoming ad package. Now, we will cover the Advertising engine from Joe's perspective. We'll explain how to prepare and submit an Ad package using the Outgoing Ads.
To use the Outgoing Package manager you must enable its functionality from the main file menu of the SignageStudio. Click on the File menu > Navigation button and enable the Outgoing Ads feature.
|
|
|
|
OUTGOING ADS USER INTERFACE
The Outgoing ads include:
- 1. Packages Panel
- 2. Toolbox Panel
- 3. Content Section
- 4. Group Section
- 5. Properties Panel
PACKAGES PANEL
The Packages panel is located by on the left side of the user interface, below the main Navigation menu. You'll use this area to create Ad packages or delete existing ones.
ADDING AD PACKAGE
To create a new Advertising package, you click on the Add button.
|
|
|
|
The newly created Package will have a default name.
DELETING AD PACKAGE
To delete an existing Ad package, select it and click on the DELETE button.
|
|
|
|
You have the option to choose YES and DELETE the selected Ad package or you can click on the NO button and CANCEL the operation.
AD PACKAGE TOOLBOX
The toolbox panel is located next to the main Navigation menu:
- 1. Resources Directory
- 2. Station Picker
RESOURCES DIRECTORY
In the Resources directory you'll upload all files included in your Ad packages. We've covered this in the chapter on Resources.
|
|
After you imported the selected Ad files you can include them in your Ad package.
|
|
STATION PICKER
The Station picker allows an advertiser to search for available Stations in the Ad network.
Access the Station Picker by clicking on the tab in the Toolbox panel. An advertiser can search a local / private network, which is often the case if the Digital Signage Network operator is also the one creating the Ad packages on behalf of his Advertising clients. An Advertiser can also search the public network; the mediaADNET.
Note that as an Enterprise user you have the ability to hide the entire mediaADNET from users; thus only exposing them to your own private screens.
|
|
Search properties:
- 1. Search Criteria Fields
- 2. List of Found Stations
- 3. Description of Found Stations
SEARCH CRITERIA FIELDS
Search options:
- 1. Name
- 2. Location
|
|
The Name allows the advertiser to search for available advertising Stations using:- 1. Business name
- 2. Station name
- 3. Station key
|
|
You can search for available advertising stations by entering a business name. A business name corresponds to the name picked by a user when he opened his account on the mediaCLOUD.
|
|
Click on the Search button to start searching for the Stations. The system will list all the Stations found.
|
|
SEARCH BY NAME
You can search for available advertising Stations by entering a Station name as defined by the Screen Owner.
|
|
Click on the Search button the start searching for the Stations. The system will list all the Stations found.
SEARCH BY STATION KEY
In the Incoming Ads chapter we explained that a station owner can set keywords, or searchable keys. The keys are used to increase the chances others will find the screen. When an Advertiser wants to find available Stations using searchable keys, he will enter relevant words that could match the keywords set by the Station owner.
|
|
|
|
LOCATION SEARCH CRITERIA
The second option used as search criteria is Location.
- 1. Location
- 2. Coordinates
- 3. Radius
|
|
The Location field can be used by typing a location or US ZIP code. To enter a Location, click on the square located to the right of the Location field.
|
|
|
|
Enter the address location or US ZIP code.
|
|
|
|
The system will search by location and if it finds a match, it will display it using the result map.
|
|
Click OK to accept or Back
RADIUS
Enter a radius to search for Stations within a kilometers range of the set location.
|
|
COORDINATES
The Coordinates field is used to display the GPS Latitude and Longitude of a selected Location.
|
|
Click on the Search button to begin the search.
|
|
FOUND STATIONS
If the system found Stations that match your search criteria, it will display the output in the result list.
|
|
- 1. Domain
- 2. Business
- 3. Station
- 4. Distance
|
|
In the Domain column, the system will display the name of the Domain under which the Station is registered.
In the Business field, the system will display the name of the Business related to the Station owner.
In the Station column, the system will display the name of the Station that was found using the search feature.
In the Distance column, the system will display the distance between the actual location of the Station and the Location you set in the search field.
Select any found Stations to view additional information under the Description field.
In the "Incoming Ads" chapter we explained that a Station owner can use the Description field to add comments about the Station like pricing and contact information.
|
|
CONTENT
When creating a new Ad package, the Content of the Ad package will initially be empty.
|
|
To add content (as in videos, images and animation resources), drag resources into the Content area.
|
|
|
|
- Resource (name of the resources)- Type (the file type)- Duration (length of resource)- Repetition (how many times to play Resource per hour)- Percentage (how much of an hour should the resource occupy)
An Advertiser can change the values for the Repetition and Percentage fields.
Note that if multiple Stations were added to a single Ad package, any change made to the content properties will affect all stations running the particular Ad package.
GROUPING
After you added the content of the Ad package, you can associate one or more Stations; essentially grouping them.
The Group section of the Outgoing Ads category is where you associate Stations that you want to run the Ad package on.
ADD STATION TO GROUP
After you found one or more Stations using the search feature, you can use your mouse to drag it/them into the Group section.
|
|
The Group section contains several columns:
- Domain (name of Domain used by the Station owner)
- Business (name of Business/user of the Station owner)
- Station (name of the Station)
- Weekdays (days in which the Ad package will play on)
- Hour Start (time when Ad package begin playing)
- Hour End (time when Ad package will stop playing)
- Status (current package status)
The Weekdays, the Start hour and the End hour parameters will be set by the Advertiser before submitting the ad package.
DELETING STATION
You can delete any Station added to the Group using the DELETE button.
|
|
To delete a Station from the Group, select it and click on the Delete button.
|
|
Choose YES to DELETE the Ad package Station or you can click on NO and CANCEL the operation.
Remember, you can add unlimited number of Stations to the Advertising Group; across campaigns and across businesses, making it easy to manage thousands of stations with a click of a button.
AD PROPERTIES PANEL
The properties panel area is located on the right side of the user interface. It can be used for various settings, depending on the selection you make within the sections.
AD OUT PACKAGE PROPERTIES PANEL
Select the Ad package added to access its properties panel.
|
|
|
|
To change the name of an Ad package, select it and then type the new name in the "name" field.
|
|
Set the date when the selected Ad package will start playing. Click on the calendar icon to choose a certain date.
|
|
Here you can set the date when the selected Ad package will end playing. Click on the calendar icon to choose a certain date.
|
|
CONTENT PROPERTIES PANEL
After you add a resource to the content section of the Outgoing Ads, you can access its properties panel by selecting it.
|
|
pic12590jpg
- Duration
- Repetitions
Increase or decrease the duration of a selected resource by entering the desired value in the Duration field. To accomplish this you can also use the up and down arrow keys.
|
|
For example, if you have an image with the duration set to 5 seconds, it will play for the specified length of time before moving to the next Ad resource.
REPETITION
The repetition field refers to the times the selected resource will attempt and run within a single hour. In the snapshot below, we have a repeat value set to 12 times within an hour. The value is only "best effort" setting as some stations may be overbooked with Advertisements and so total playback may vary.
|
|
The duration and repetitions values are related as the two will compute the total time requested by the Advertiser to playback the Ads Increase in duration and repetitions will also increase the suggested percentage per hour of possible Ad exposure.
|
|
The Advertiser is not guaranteed each Ad resource is going to playback for the full computed percentage. If an Advertiser sets an Ad resource for a playback 12 times an hour, it may or may not run at that repetition; as it depends on how many other Ad packages were submitted and accepted for a station.
A complex round robin algorithm us used to ensure best case scenario for overbooked Ad stations.
However, an Advertiser is able to push or give higher priority to specific resources. The higher the percentage per hour, the better chance a resource has for maximum impression count.
If an Advertiser is the only one advertising on a selected Station, he may not occupy 100% of the hour at the location. Therefore the SignagePlayer will use the Default resource as time filler (covered in the "Incoming Ads" chapter). If on the other hand Ad packages from other Advertisers were accepted and exceeded 100% of the hour; the Default Resource would never play.
GROUP PROPERTIES PANEL
After you drag a Station into the Group section of the Outgoing Ads, you can select it to access its Properties panel.
|
|
- Weekdays
- Hour start
- Hour end
Advertiser can set the days of the week when he wants the selected Ad package to play. Select or deselect any day of the week by clicking on the corresponding check box.
|
|
You can use the same ad package with multiple Stations and you can set different days.
|
|
The hour start field is used to set time to start playing the Ad package.
The hour end field is used to set time to stop playing the Ad package.
|
|
OUTGOING EXAMPLE - SUBMITTING AD PACKAGE
When Joe the accountant from our previous example builds his Ad package, it is going to be constructed from tree different ingredients:
- What?
- Where?
- When?
|
|
THE "WHAT"
The what will define the different files that he would like: videos, images, SWF animations and other type of resources. All resources are imported using the SignageStudio and added to the Ad package.
THE "WHERE"
The Where would be the Screens he would find using the Search feature. This is where Joe would decide to push his Ad packages to.
THE "WHEN"
The When would be the start and end dates when Joe would like to run his Ad package; setting start and end hours for day selected.
These three ingredients, What, Where and When, will construct the Advertising package by the Advertiser.
BUILDING AND SUBMITTING AD PACKAGE
Step 1 - Create the advertising files
Images, videos, SWF animations, any file that is supported by the system can be used within an ad package. You can create the ads yourself or use a professional design service.
Important!
It is best if all your ads have the same dimensions and the same aspect ratio. If your ad files have different sizes chances are they may get skewed when played on different Screens. This is because the Screen Division used by the Screen owner for the Ad engine has a certain size and ALL ad packages will play within that particular Screen Division.
Step 2 - Import the resources
After you created your Ads, import the files to the Resources directory. These files are your Advertisements.
|
|
Step 3 - Create a new Ad package
Access the Outgoing ads section of the SignageStudio and create a new Ad package using the ADD button.
|
|
Step 4 - Define the Start and End dates
After you created a new Ad package, you define the Start and End dates of that Ad package. You do this using the Properties panel of the Ad Out Package.
|
|
Here you can also change the name of the Ad package.
Step 5 - Add resources to the Ad package
After you created a new Ad package and defined the Start and End dates, you add the resources you imported earlier. Open the Toolbox / Resources panel in the Outgoing ads section, choose the files you want to use and drag them into the Content area.
|
|
Step 6 - Define settings for the ad content
After you added resources to the Ad package and into the content area, you can set settings for Duration and Repetitions of the Ads. Remember Ad packages are built using increments of one hour.
|
|
Step 7 - Search for available Screens
Next step involves using the Search feature to find available advertising Stations. From the Outgoing Ads section of the SignageStudio, open the Station picker.
|
|
Using different search criteria such as Location, Business name, Station name or searchable keywords, find desired screens.
Step 8 - Contact the Screen Owner
After you found a Screen, look at the description field and if contact information is available, contact the Screen owner to discuss any necessary details like prices, schedules, screen popularity and so on.
|
|
Step 9 - Ad Station to Outgoing Ads
Next, after you found a Station you are interested in and agreed to the terms set by the Station owner, you can add it to the Group area of the Outgoing ads. Just drag the Station from the Station picker area and into the Group area.
|
|
You can add multiple Stations if you like but keep in mind the same ad package will be played on all Stations.
Step 10 - Days and hours
After you added a new Station to the Ad package, you can select it and access its Properties panel.
|
|
In the Properties panel you can set the days when you want your ads to run. You can also set the start and end hours.
Next, save your configuration by choosing File -> Save from the file menu.
So we covered everything you need to know about Outgoing Ads; from the perspective of an Advertiser. When you completed all steps you may need to wait for the Screen owner to approve your Ad package. Once approved, it will begin playing at the selected locations on the set times.
Account Management
MANAGING MULTIPLE BUSINESSES
When you join the mediaCLOUD Enterprise edition you can manage unlimited number of sub-accounts (also known as businesses). Note that we use the term Business and Account interchangeably.
Multi Business Management allows you to manage multiple accounts from a single location accessed through the EnterpriseStudio.
New accounts can be added in one of several ways:
1 New account created directly from your own private labeled website
2 Customer downloads SignageStudio from a link you provide
3 You create an account on behalf of client
The accounts will appear as sub-accounts in the EnterpriseStudio and will allow for administrative access to the EnterpriseStudio admin.
PRIVATE LABEL BUSINESSES REGISTRATION
When a new visitor enters your web site he will have an option to create a new account on the mediaCLOUD. However, MediaSignage will be transparent to the web visitor as Enterprise users can white label both the SignageStudio and SignagePlayer. This process is accomplished using a URL embedded ERI (Enterprise Reseller Info) that is part of an HTML snippet. The snippet is used to private label the web site. We will cover White Labeling in another chapter.
MANUAL BUSINESSES REGISTRATION
You can register unlimited number of Businesses directly from the EnterpriseStudio. To register a new Business go to the Businesses section of the EnterpriseStudio.
|
|
After you select the Businesses tab, you gain access the module where you can manage multiple Businesses.
|
|
|
|
All Businesses registered under EnterpriseStudio are listed under the main Navigation Menu (on the left side of the user interface). The section contains two columns:
- 1. The Business ID
- 2. The Business name
|
|
You can click on the column description to list the content alphabetically.
|
|
Every Business registered under your account has a unique Business ID. This ID is used by the System to identify the account.
Every Business has a name which may be visible to other users in the network, for example if you use the Ad Engine.
ADDING NEW BUSINESS
Under the main navigation menu of the EnterpriseStudio there are two test Businesses created.
|
|
To add a new Business in the EnterpriseStudio, click on the Add button.
|
|
You can perform the following actions:
- 1. Add account from sample
- 2. Add abstract account
- 3. Add an existing account
|
|
ADDING ACCOUNT FROM SAMPLE
If you choose to add a new account from a sample:
|
|
Here you can create a new account directly from an existing sample or template. To create a new account, select a template and click on the Create account button.
|
|
|
|
Fill in the required fields, agree with the terms and conditions, and click on the Create New Account button. You may need to verify the account's email before you can proceed. When done, the new account will appear in the list of manageable businesses with a business ID and name.
|
|
ADD ABSTRACT ACCOUNT
An abstract account is a blank account, with no data in it.
|
|
Fill in the required fields including name and password. Keep in mind the name must be a unique value that has not been used previously by anyone in the mediaCLOUD. We will cover privileges and the access keys in another chapter.
ADDING EXISTING ACCOUNT
This option will allow you to re-associate an account thats currently not under your Enterprise account. To do this, you will need to know both the Username and the Password for the existing account.
Click on add an existing account option.
|
|
Enter the username and the password of the existing account and click the OK button. The account will be moved under the existing EnterpriseStudio and you'll be able to manage it.
DELETING A BUSINESS
To delete an existing business from your Enterprise account, first select it and then click on the DELETE button.
|
|
|
|
In this window you enter your Enterprise user credentials and click OK to DELETE the selected account
REFRESH
When new businesses or users have been added, they don't automatically appear in the list. You can click on the Refresh button to retrieve the latest info.
|
|
Many of the tools like adding new businesses, deleting businesses or using the refresh feature can also be accessed through the context menu.
Right click on an empty area of the Businesses panel, or directly on an existing business to access its context menu.
|
|
RENAME A BUSINESS
To rename a business, select the business name and click on the Rename button.
|
|
|
|
Enter the following fields:
- 1. Email
- 2. Password
- 3. New Business Name
|
|
USERS AND STATIONS
Every account can also have unlimited number of Stations and Users. Stations are the actual SignagePlayers installed in the field.Users are people that can have full or limited access to the SignageStudio through the associated sub-account.
|
|
We will cover multi-user management in another chapter.
User Management
INTRO TO USER MANAGEMENT
In this section we cover User Management; how to set-up multiple users under a mediaCLOUD Enterprise account.
In previous chapters we covered managing multiple businesses (also known as multi accounts) under a single Enterprise account. In this chapter we will cover adding multiple users to single account.
In order to manage users under an Enterprise account, you must first login to the EnterpriseStudio with Enterprise credentials. Continue to the Users section of the Studio that is below Businesses on the main Navigation menu. Note that we use the term Account and Businesses interchangeably.
|
|
The Users section has two main areas:
- 1. Users toolbar
- 2. Users listing area
With the toolbar you can:
- 1. Add new user
- 2. Change password
- 3. Launch Studio as selected User
- 4. Save
- 5. Delete user
|
|
ADDING USER
Any Business that registers under an Enterprise account can have multiple users associated with it.
When a new Account / Business is created, a single default user will also be defined.
|
|
Click the Add button
|
|
to add new users directly from the Users section. You can add an unlimited number of users per Business.
In order to add a new user, first select the Business that the new user will belong to, and then click on the Add button.
|
|
|
|
|
|
Enter a user and password and define the privilege and access keys. We will cover privilege and access keys in another Chapter.
|
|
CHANGE PASSWORD
Select a user listed under the Users section, click on the Change user password button.
|
|
|
|
|
|
Confirm the password for the selected user. You can enter a new password.
Click OK to change the password for the selected user or choose Cancel to abort the operation. If you click OK, you will be prompted with a message that confirms the success of the operation.
|
|
LAUNCH STUDIO AS USER
Another key feature is the ability to launch the SignageStudio from within the EnterpriseStudio, as if you are the selected user. This will allow administrating the SignageStudio with the same privileges and access control as the selected user.
Select a user and click on the Launch Studio button.
|
|
The system will launch the SignageStudio in a separate window.
|
|
|
|
The SignageStudio will have identical configurations including Campaigns, Timelines and Resources as if accessed directly through the SignageStudio standalone app.
Enterprise admins who are assigned all privileges and access keys have full administrative control over all areas of the SignageStudio.
You can open multiple SignageStudios, each corresponding to a different user.
SAVING
Unlike the SignageStudio where you have a File > Save option, the EnterpriseStudio has a special Save button:
|
|
DELETING USERS
To delete a user, select the user and click on the Delete button.
|
|
|
|
In this window enter your Enterprise credentials. Click OK to delete the account or Cancel the operation.
USERS LISTS
The user list displays:
- 1. The Business ID
- 2. The User
- 3. Privilege
- 4. Access Keys
|
|
The Business ID represents the unique identification number of the Business under which the user registered
Under the User column you will see all the names of all users. A username cannot be renamed.
PRIVILEGES / ACCESS KEYS
Display both the privileges and access keys for all users of the business selected. We cover privileges and access keys in another chapter.
MULTI USER SUPPORT
|
|
The Business ID is the same for both users, indication that both users are registered under the same Business. So both users can login individually and work at the same time at different locations.
|
|
First, we make a change to a Screen Division as if we are user Test 01. and save our work.
|
|
The system did not prompt us for any conflict as no other users touched this portion of the application while we were working on it.
Next we switch to the SignageStudio to user Test 02 and make a change to the same Screen Division.
|
|
Again we save, but now the system prompts us for conflict as the screen division was modified and saved while Test 02 user's SignageStudio was open. Now we need to resolve the conflict.
|
|
We can either take their changes or our changes. In order to accept changes made by other users, we click on All theirs button. The system will ignore our changes and overwrite with the changes made by the other user.
|
|
If we want to accept our changes, we click the All yours button.
|
|
SYNCHRONIZE
Next, we switch to the first user Test 01,, make another change to the Presentation and click File > Save.
Next, we switch back to user Test 02 and choose File > Synchronize from the file menu.
|
|
This will sync the SignageStudio of Test 02 to the latest changes saved to the server. This option is useful if you know others are working on your account and you wish to sync to the latest changes saved to the server.
RESOLVE CONFLICT
So far we've seen that we can resolve conflicts; accept our changes or their changes. However, the system can also provide more details as to what changed so we can make a more intelligent choice regarding which changes to accept.
In the Resolve conflicts window, click the resolve button.
|
|
This will display all the fields modified.
|
|
This option can assist you in making the best decision as to which changes to override with and save to the server. Information is color coded so you will have a clear understanding of the changes.
- Blue: no conflict exists
- White: items were not modified
- Red: conflict exists
Based on the color coded info, you can make a decision onto which changes to accept.
|
|
Multiuser support is flexible and allows for collaboration between colleagues, all working at the same time on the same account.
STATIONS
Under the Businesses tab, next to Users, you can select the Stations module.
|
|
Here you can view all Stations that belong to the selected Business:
- 1. Stations
- 2. More Statistics
Select a Business to view all the Stations associated with it.
|
|
Select a Station for additional info including Connections, Operating System, Business ID and more. Use the criteria to sort the list:
- Stations that are connected
- Business name
- Operating system
- AIR version
- App version
|
|
|
|
In the Business field you filter by name.
|
|
OS
In the OS field you can filter by Operating System.
|
|
In the AIR ver field you can type the number of the Adobe Integrated Runtime version to filter by it.
|
|
you can also check other statistics.
|
|
The statistics area display additional indicators as to the Stations and Business.
Online businesses are the total number of Businesses connected to the Enterprise account.
|
|
Total rows are the total items listed in the grid.
|
|
Total stations are the total remote Stations currently online and connected to the Enterprise account.
|
|
In the statistics area, you can also see the number of Stations that were online in the last 10 minutes, last hour, or the last 24 hours.
|
|
The Unique load and Unique saves references the total number of SignageStudio loaded and presentations saved for each unique user and IP address. Counters with high values indicate an active account.
The counters help provide analytics as to how many users are actively using a private labeled Enterprise account.
Privileges
INTRO TO PRIVILEGES
In this Chapter we cover Privileges. Privileges are used to show or hide specific sections of the SignageStudio to selected users.
To access the Privileges section of the EnterpriseStudio, select the Settings tab, from the main navigation menu.
|
|
Under the Settings tab:
- 1. Privileges
- 2. White-label
We cover White-Label in another Chapter.
Under Privileges you will see:
- 1. Privileges panel
- 2. Administration area
THE PRIVILEGES PANEL
The privileges panel is located on the left side of the user interface, under the main Navigation menu of the EnterpriseStudio.
|
|
By default a single privilege set exists, named Privileges.To rename it, double click on its name and change it to Admin rights.
|
|
To add a new Privilege group, click on the Add button
|
|
and give it a name.
|
|
The new privilege set is now listed under the Name column.
It will also be available under the Users module of the EnterpriseStudio. Under the Users module, you can select a user and apply a set of Privileges to it.
In our example, we have two sets of privileges: Admin rights and User rights.
|
|
SETTING DEFAULT PRIVILEGE
Any new user that registers under an Enterprise account will receive the default privilege group. In our example, the Admin rights privilege group is the default. The default privilege group is marked with a Key icon next to its name.
|
|
To allow new registered users limited access to the SignageStudio, create a limited privileged group and set it to be the default one.
|
|
|
|
|
|
DELETE PRIVILEGE GROUP
Select a privileged group and click on the Delete button.
|
|
Note that you cannot delete a default privilege group. If you select a default privilege group and click on the delete button
|
|
you will be prompted with a warning message.
|
|
In order to delete a Privilege group that is currently set as the default one, you have to remove its default assignment by assigning it to a different privilege group.
|
|
PRIVILEGES ADMINISTRATION
In the privileges administration module you create privilege groups and set what the users will have access to, for the underline group.
|
|
Set the access limit by removing specific categories.For example, if you don't want users to be able to access the Catalog feature, simply deselect the Catalog option.
|
|
After you select / deselect certain features, click on the Submit button to save your work.
|
|
After saving, click on the launch SignageStudio button
|
|
to test your work for the user that was assigned the newly created privilege group.
|
|
As you can see from the image above, the user assigned the Privilege group cannot see the Catalog module.
ADVANCED OPTIONS
With privileges you can also show or hide subsections of the SignageStudio. Each section of the SignageStudio has a button named Advanced associated with it.
|
|
For this example we will enable the Catalog module, but use the advanced section to restrict specific properties.
|
|
|
|
For every property you can enable or disable its permissions:
-1. Delete
-2. Add new
-3. Update
Disable the Delete option to prevent user access from deleting categories; thus deactivating the selected option.
|
|
Disable the Add new option to prevent user access to the Add category.
|
|
Disable the Update option to prevent user access from updating existing configuration (saving). Next we will cover which sections and subsections can be restricted with privileges.
SCREENS
|
|
RESOURCES
|
|
EDITORS
|
|
CATALOG
|
|
CAMPAIGNS
|
|
AD OUT
|
|
AD IN
|
|
MUSIC
|
|
STATIONS
|
|
CHANGELIST
|
|
GLOBAL SETTINGS
In addition to choosing individual categories and restricting access to certain sections or subsections of the SignageStudio, you can also use the Global settings access control. With Global settings you can enable or disable features like the ability to delete, add new items, or update changes to ALL modules available in the SignageStudio.
|
|
For example, if you disable the Delete option from the Global settings field, any user assigned to that Privilege group will not be able to delete anything from any section or subsection of the SignageStudio.
|
|
With the mediaCLOUD Enterprise edition you can set Privileges that allow you to hide or show certain areas of the SignageStudio, so you have detailed control on what each user can and cannot do within your Digital Signage network. Setup unlimited number of Privilege groups and use Default keys to easily manage new users.
Branding
BRANDING
In this chapter we cover Branding (also known as White Labeling or Private Label). This feature allows you to take the entire mediaCLOUD Enterprise platform and host it on your own website, simply by copying and pasting a snippet of HTML code that's embedded with your own ERI code.
The hosted solution will include your customized SignageStudio Logos, customized SignagePlayer splash screen, customized textual info, customized link backs and more; making MediaSignage transparent to your customers.
Branding is only available to subscribers of the mediaCLOUD Enterprise edition. So with White Labeling existing customers can login to their accounts through your web portal and new customers can open new accounts on your site as well.
The MediaSignage mediaCLOUD platform becomes your hosted software that is still streamed down from our mediaCLOUD servers, but with no reference to MediaSignage, thus providing an anonymous Digital Signage solution to your business.
At MediaSignage we go to great lengths to make sure we keep it all private. We use 3rd party domain names, hidden reverse name looks ups and encrypted ERIs to deliver transparency to your product.
WHITE LABEL SETUP
The first thing you do to create the White Label solution is to open a mediaCLOUD Enterprise account. Once you are logged in to the EnterpriseStudio, click on the Settings tab from the main Navigation menu.
|
|
Under the Settings tab:
- 1. Privileges
- 2 White-label
We covered Privileges in a previous chapter.Select the White-label to proceed.
Select the White-label checkbox to enable the feature.
|
|
Next you can change and set parameters including:
- 1. Logo
- 2. Splash Screen
- 3. Back Links
- 4. Menu
- 5. Theme
Access each category by clicking on the corresponding tab
|
|
So with White Labeling you can use your own Logo on both the login screen and inside the SignageStudio. Click on the Logo tab to access its setting.
|
|
You can set:
- Name
- Logo
- Logo tooltip
- Logo link
The Name field is used to display the name of your company in different areas of the application.
|
|
Users logged in under your Enterprise account will see your business name instead of MediaSignage Inc.
In order to use your own Logo, click on the browse button located next to the MediaSignage logo, search for a logo in your computer, and upload it.
|
|
The Logo has to be 175 x 100 pixels in size and it can be any format accepted by our platform including jpg, png and swf. The Logo will be displayed in the Help > About window, save dialog and login screen.
The logo tooltip field will be visible when a user hovers the mouse over the Logo.
|
|
You can use the logolink field to enter a linkable web address for the Logo.
|
|
Whenever you make a change, remember to click on the Save button in order to update to remote server with your changes.
|
|
SPLASH SCREEN
The Splash Screen allows you to display a custom swf file on your remote SignagePlayers whenever they are updated / restarted.
|
|
Click on the browse button to search for a swf file on your PC and save it onto the server.
|
|
As of current release, the Splash screen must be an Adobe Flash swf file.
In order to use a custom Splash Screen you need create one outside the SignageStudio. You can use different applications like Adobe Flash, Adobe Flex, Adobe illustrator and others.
We recommend you use a vector based swf so it scales proportionally to any screen size.
LINKS
With White Label you can also add your own SignageStudio links.
These include:
- Application links
- Twitter link
- Live Chat link
Select the Links tab.
|
|
|
|
The application links include Home page, Download page and the Contact page.
|
|
The home page is accessed when a user loges out of the SignageStudio and presented with a link to your to a website.
The Download page is accessed from the SignageStudio whenever a user clicks on the Player > Install SignagePlayer Desktop version link. So be sure you redirect it to your Install / Download page on your own web site.
|
|
The contact us page redirects users to your contact web page.
In the Links area of the White Label section you can also add your own Twitter link and choose to enable or disable the Twitter button.
|
|
If you choose to enable the Twitter button, users logging onto the SignageStudio will be able to see the Twitter link and follow you.
LIVE CHAT
Add custom Live Chat link to provide live support to your users.
|
|
If you choose to enable the Live Chat button, users logged in under your Enterprise account, will be able to click on the Live Chat link and redirect to your support page.
BANNER
|
|
MENU
Modify the Help Menu links.
|
|
Set both the name of the link and the link URL address.
|
|
|
|
THEME
Access the Theme by selecting the Theme tab. Can choose between two themes: White and Black
|
|
|
|
After choosing a theme, you will be prompted to restart the EnterpriseStudio for changes to take effect.
|
|
|
|
|
|
The color themes will apply to both the EnterpriseStudio and end user SignageStudio.
Next we explain how to setup a Web portal so users can both log-in to existing accounts, and open new accounts directly from your website.
WEB PORTAL
Select the file menu > Tools to access the White-Label HTML page.
|
|
Click the white-label page button.
|
|
Copy the HTML code and paste it into Notepad.
|
|
Save the document to the local PC. This HTML snippet will be part of your own website, so you will need to upload the HTML file to your personal hosted web server. You do not need any special web server capabilities such as scripting or secure SSL pages. Simply upload the HTML file as it to your hosted web server.
|
|
Open the HTML file using any web browser.
|
|
The page provides all the necessary links for your users.
|
|
|
|
This buttons are:
- Installing the SignageStudio Desktop version
- Installing the SignagePlayer Desktop version
- Launching the SignageStudio Web version
- Login to the SignageStudio Web version
All the graphics for the buttons and links can be modified. Look at the HTML source code to make changes.
HTML SNIPPET
The HTML snippet includes the ERI (Enterprise Reseller Identification) which identifies your account.
|
|
When you create a mediaCLOUD Enterprise account an ERI will be generated for you. When customers create an account on your site through the HTML snippet embedded with your ERI, they will be automatically associated as sub-accounts of your Enterprise account.
Look at source code of the HTML snippet to both modify image paths and to view your ERI.
|
|
With MediaSignage you can easily brand the entire mediaCLOUD Enterprise solution as your own.
Set your own application links, menu links, custom logos, and color themes; make MediaSignage transparent to your customers.
it's your solution, we just provide the tools.
Access Control Lists
INTRO TO ACL
In this Chapter we cover Access Control Lists (ACL).Access Control Lists use Keys to extend the functionality of Privileges.ACL allow finer control on access to specific items you create within the SignageStudio.
PRIVILEGES VS ACL
With Privileges, you have the ability to either show or hide complete sections of the SignageStudio. For example, show or hide the entire Screens module to to specific users.
Access Keys are used to manage specific items that you create such as Scenes or Campaigns, thus allowing finer control on which items to show / hide to specific users.
|
|
So with ACL you can set it up so a user is able to work only on a specific Scene and nothing else. To do this, you assign a specific Scene a key value and assign the user a matching key value.
|
|
DEFINING ACCESS KEYS
In this section we will demonstrate how to bind keys to resources.
Create a new Privilege Group and name it Scene Users.
|
|
Any user assigned to the Scene Users privilege group will be able to work on specific Scenes.
Remove all sections of the SignageStudio privileges except for Editors.
|
|
Next, access the Users module of the EnterpriseStudio and add user Test01 as a member of the Scene Users group.
|
|
Set Test01 with access key #2 by selecting the checkbox next to number 2, under the access keys list. Next click Save to submit your changes to the server.
|
|
Next assign the same access key to a selected resource in the SignageStudio.
Select user Test02 and give it all access keys.
|
|
Next launch the SignageStudio as Test02.
Open the Scene editor and create several Scenes.
|
|
To give Test01 access only to a specific scene (and not to any other scene), select the Config tab under the Scene properties.
|
|
Since we launched the SignageStudio as user Test02,, we are able to set any key value that Test02 possesses (in our example Test02 possesses all keys). Change the selected Scene key from the default 0 to 2 and save your work.
|
|
Go back to the EnterpriseStudio and launch a new instance of the SignageStudio as user Test01 (remember Test01 own only access key 2).
|
|
|
|
Test01 can work on this scene, he can make any changes he wants to it, but cannot view any other scenes, as he was only assigned access key value 2. User Test01 cannot view any other section of the SignageStudio due to his limited privileges set.
To continue with our example, close all instances of the SignageStudio and go back to the EnterpriseStudio.
Now, assign user Test01 both access keys 1 and 2.
|
|
Save the configuration and re-launch the SignageStudio as user Test01. The user can still access only one scene as no other scene was assigned access key 1. However, click on the config tab from the Properties panel of the scene, and you will see that now user Test01 can set access keys 1 OR 2.
|
|
In the previous example, Test01 only had access to key 2, but now he can also select from the drop down menu key 1. Therefore user Test01 can modify the permission to the scene.
Switch back to the users module of the EnterpriseStudio and assign a new user Test03, an access key 4. Change the privilege group to Campaigns and allow the user to view only the Campaigns section of the SignageStudio.
|
|
Next, we will launch the SignageStudio as user Test02, (that possesses all keys). Go to Campaigns and select Campaign 1.
|
|
In the Properties panel of the selected Campaign, set the access key to 4.
|
|
This means that only users with access key of 4 will be able to work on this specific Campaign. We will re-launch the SignageStudio as the user Test03 and select Campaigns.
|
|
Test03 can view only Campaign 1 as it was assigned access key 1. All other Campaigns are hidden to the user.
Access keys extend the power and flexibility of Privileges, allowing you to create specific show / hide rules for items created in the SignageStudio.
XML Component
INTRO TO THE XML COMPONENT
The XML component is an extremely versatile component that allows you toretrieve data over the web as long as the respective data is structured as avalid XML format. What's great about this component is that you can createyour own structure which can be any XML data source and be able to bind tospecific attributes and elements to retrieve the information snippet that youneed. If you want for example to build a dynamic food menu board and retrievethe food prices and images from a local POS (Point of Sale) system; the XMLcomponent can easily be configured to do just that. The XML component canalso connect to a database engine.
The XML component uses standard E4X Tags so it's easy to get specificinformation using elements and properties / attributes. The XML component canalso bind to a series of elements thus retuning a list; so you can flipthrough several items one after the other.
CREATING A NEW XML COMPONENT
In this section will demonstrate how to configure the XML component using theXML data structure below.
|
|
The Local Point of Sale can feed the information to XML component over an HTTPlink and this information includes the burger name, the price, and also aresource description set as an image.
|
|
We can use the above data structure to dynamically feed into our food menuboard.
To demo the setup we configured a simple four screen configuration along withsome images that were added to the timeline. The images are going totransition over a background image.
|
|
|
|
What we need to add to the presentation are the prices and the descriptions ofproducts, and so let's set it up.
First, we will navigate to the Scenes area of the Signage Studio.
|
|
Click on the + sign to add a new Scene.
|
|
Rename the Scene, we will call it "Item scene." Drag the XML Itemcomponent from the Components library and drop it into the Scene. We will addthree XML Items, one for the name of the product, the price of the product andone for the image of the product.
|
|
|
|
The Scene we are creating will represent a single product like a hamburger orcheeseburger for the food menu. The data will be present a single record inthe food menu board.
Next we can change the color of the Items and the font. Also we can position /align the three items in Scene.
|
|
Next, we need to map each XML Item to a proper attribute. In order tounderstand what attributes are, let's take a look at our xml structure.Looking at the XML structure, we can see that we have several properties foreach product.
|
|
The attributes are the size, the name, the oz., the price and the resource.The way we bind to the attributes is through the @ sign. Next, let's goahead and set up the attributes for the XML Items inside the Scene thatwe've created.
First, select one of the three XML Items and set the attribute @namefor the Field name, in the properties panel. Also select the second object andset it's attribute to @price and for the last object set theattribute to @resource
|
|
|
|
|
|
For the last item, also set the Field type to Resource so we candisplay an image.
|
|
Remember that you don't necessarily have to use the XML structure from ourexample, you can invent your own XML structure as long as it is a valid XMLdata structure.
To recap, so far we've created a scene that will hold a single Item, inother words a single product. Next, we need to create a scene that is going tohold all products; all the different items from our XML structure.
Click on the + sign and add a new Scene.
|
|
We will rename the Scene Food Menu Scene. You can also choose to modifythe size and other attributes of the Scene.
|
|
Next, we will look under Components for the XML Player Component and dragthree XML players into the Scene. Each player will be present one particularproduct, so we have a total of three products. Of course, if you want to havemore products, you can simply add additional XML Player Components.
|
|
Now that we have our three XML players that are going to display threeproducts in our wrapper Scene, (the Scene that is going to hold them), we needto associate each one of those XML players with a particular product.
We will point each XML player to the data source; the POS system that isserving the XML file.. To do this, type the URL address that contains the XMLfile into the Url field in the Properties panel of each XML player.
|
|
Next, we are going to set up each XML Player to show a unique product. Inorder to do this, for the first product we will build an E4X statement.
|
|
So in order to pull this information from the XML file, we need to create anE4X statement which is going to be the following:
|
|
Of course you can choose other attributes of the products.
Type the E4X statement into the Items path field of the Properties panel ofthe selected XML player.
|
|
Next, in order to display the Item we need to associate the proper Scene witheach XML Player. Drag the Item scene that we've created earlier, from theScenes, under the Toolbox (again, don't drag the original Scene but ratherDrag the one from under the Toolbox), and drop it into the Scene field of theProperties panel of the selected XML player.
|
|
Repeat this process for all three Products, so you can have all the relateddata pulled into the appropriate XML Players.
|
|
The next step is to add the Scene to the timeline. Navigate to the Timelinesarea of the SignageStudio then drag the Food Menu Scene we've createdearlier and drop it into the Timeline.
|
|
You will see a dialog box as soon as you drop the Scene into the Timeline.Choose Add a scene shortcut and click OK.
|
|
Next, click on the Play button and view the presentation containing theproducts linked to the external XML file.
|
|
|
|
The XML component really shines when you need to add or remove things. Forexample, right now we have three products in the Scene.
|
|
Let's say you want to add a fourth product to the Food Menu board. Thiswill be easy to do because we have the layout in place, so all we need to dois go to the Components, add another XML player to the Food Menu Scene,associate the item Scene, set the Url and the Item path for the respectiveproduct. This process will add another product just below the last one added.Our scene was setup with a Vertical layout and so no special alignment isnecessary when adding additional XML players to the wrapper scene.
|
|
Now, let's go ahead and add the ounce (OZ) next to the price of eachproduct. In order to do this, go back to the Item Scene, drag a new XML Itemand drop it into the Scene. Customize and position the item into the Scene andmake sure you add into the Field name the @OZ E4X statement. If you goback to the main Food Menu Scene, you will notice the new OZ data is nowadded.
|
|
Now you can really appreciate the flexibility of the XML Component as itallows you to grab data from external sources. Also, working with the XMLPlayer will save you time as any changes made to the Sub Scene (in our caseItems Scene) will simply propagates throughout all the products added to theMain scene (in our case Food Menu scene).
QR CODE COMPONENT
USING THE QR CODE COMPONENT
In this Chapter, we will be discussing the QR component, also known as the Quick Respond code. With the QR code, you can easily link the Digital Signage screen with your mobile devices. The way QR code works is: you can add a special QR code symbol to any area of the presentation and type in whatever information you want, for example, what you type in could be a phone number, an SMS number, or a URL. So on and so forth. When a person pulls up their mobile device, he or she simply scans the URL, scans the SMS, and scans the phone number using the special QR code, and then it will automatically open a browser.
|
|
Using the QR code component, presents an easy way to link your Digital Signage presentation with a handheld device simply by providing this special bar code.
The QR codes are vector based so you can make them very small, but you can also make them very large. This comes in handy, for instance, if your screen is placed somewhere far away, or people need to scan the bar code form across the room (it's going to be a bit farther), especially if the camera is a bit older. Therefore, you can scale the QR code to any size you like. And you can embed it just like any other component in Scenes, in any Timeline or Screen Division.
For this example, we've made a presentation and added into the Timeline a new Chanel within a small screen division. In this channel we are going to place our QR code.
|
|
To do this, we have to drag the QR code component into the Timeline.
|
|
|
|
If we double click on the QR code we can access the properties panel of the QR code. Then we can just type in our information under the QR tab. We will type a web address, but you can choose something different, like a phone number or an email address.
|
|
It's all very easy and it automatically creates the QR code for you.
If we review the presentation we can see the QR code in it.
|
|
The QR code is an incredibly efficient way to link your Digital Signage screen to your mobile customers.
FACEBOOK COMPONENT
INTRO TO THE FACEBOOK COMPONENT
In this Chapter, we are going to discuss the Facebook component. Using the Facebook component, you can configure a Facebook app and connect to your Facebook albums, events, and friends. You will be able to create a customized experience using the Scenes.
CONNECTING TO A FACEBOOK ALBUM
To start the process, the first thing you will need to do is navigate to the following web address: developers.facebook.com. You will need to do this after you've logged into your Facebook account in order to create a new app.
|
|
Next, click on APPS.
|
|
Now click on the Create new app button
|
|
In the App name field you can enter a new name for the app and click continue.
|
|
After you click on the Continue button, you will be able to see the App ID.
|
|
The App ID will be used to connect the SignageStudio and the SignagePlayer with your Facebook account. So go ahead and make a note of your app ID.
Next we will switch to the SignageStudio and let's configure our Facebook account.
Access the Scene editor and create a new Scene. Name the Scene FB Scene
|
|
From the Components panel, drag the Facebook item component into the new Scene.
|
|
From the Components panel, drag the Facebook item component into the Scene. If you look at the Properties of the Facebook item you will see that it has Friend information, Photo options for the Photo album as well as the Events.
|
|
We will start by setting up an album. First, select the Facebook Item from the Scene and choose from its Properties the Photo Big option. Then, click on the Pos/Size tab and set the Facebook item to occupy the entire Scene. This way, we will have an image that will be as large as the size of our Scene.
|
|
Next, switch back to the Timeline area of the Signage Studio and from the Components choose the Facebook Player.
|
|
Drag and drop the Facebook Player into the Timeline and double click it to load its Properties.
In the Properties panel of the Facebook Player, click on the Facebook tab. Here you will need to enter the App ID, the Email and the Password.
|
|
The last thing you will need to do is associate the Facebook Scene with the Facebook Player. In order to do this, we will drag the FB Scene we've just created and drop it into the Scene Field of the Properties panel of the Facebook Player component.
|
|
Next, you will be able to see in the Album field all your Facebook albums. Once you select an album, you will notice in the preview window how the images will dynamically load one after the other.
|
|
|
|
We can also set other properties like the interval to set how often we images will cycle.
|
|
To further customize the component go back to the Scene Editor, add a new Label and a thumbnail for the images inside the Album. Next, drag the Label Component and a new Facebook item component, position them inside the Scene. Set the Facebook item property asPhoto small.
|
|
|
|
Scenes are fully customizable using the Facebook component. Just to recap, make sure you create your App ID, paste it into the AppID field along with your Login Email and Password for your Facebook account.
CONNECTING TO FACEBOOK FRIENDS
Next, we will use the Facebook component to connect to our Friends list. Drag and drop three Facebook Items into a Scene. Then, we choose for each item different fields from the properties panel. The first item will show the Friend's name, the second one Friend's sex and the third Friend's picture.
|
|
|
|
|
|
After you customized your Scene, go back to the Timelines area and open up the Properties panel for the Facebook Player. This time, select as DataType Friends instead of Albums like we did in the previous example.
|
|
CONNECTING TO FACEBOOK EVENTS
Next let's setup Facebook Events. Login into your Facebook account and click on Events.
|
|
Here you can add as many Events as you like. We've already set-up to example events.
|
|
Go back to the SignageStudio and into the Scenes area, drag and drop into a Scene three Facebook items. Set the first Facebook property for Event's name.
|
|
For the second Facebook item set up the Event's location.
|
|
and the third one the Event's start date.
|
|
|
|
Switch back to the Timelines area and load the Properties for the Facebook Player components that was already added to the Timeline. The Scene is already associated with the Player so all we have to do is select in the Properties panel the Events Data type.
|
|
With the Facebook Component it's easy to integrate Facebook information right onto your Digital Signage Presentation.
FORM COMPONENT
INTRO TO THE FORM COMPONENT
In this Chapter, we are going to discuss the FORM component. The Form Component allows you to easily create a Kiosk submission form so your customers can enter their information in that Form and submit it to a backend webserver. When a client clicks on the Submit button this information will be passed to the webserver where it can store the data and return back a string to the form so you can redirect the customer to another Scene and display a custom message.
USING THE FORM COMPONENT
Let's precede and create our new form. First step is to navigate to the Scene editor and create a new Scene. We will rename the Scene Collection Scene. This scene will hold the collection so it will capture all the events for the form. Then we will add a second Scene and name it Form Scene. Finally, we will add one more scene and call it Success Scene. The Success Scene is going to be what the customer sees once he successfully submits the information to the server.
|
|
Now go to Components, drag the Collection component and drop it into the Scene.
|
|
Once you dropped the Collection component, increase it's size so that it will cover almost the entire Scene and then set the mode to Kiosk in the properties panel.
|
|
Next, we will need to associate the Scenes that we are going to use within this Collection. In order to do that, switch to the items in the Properties panel of the Collection component.
|
|
Next, switch over to the Scenes and make sure you use the Scenes under the Toolbox and not the main source Scenes.
|
|
Now drag the Form Scene and the Success Scene into the Items area.
|
|
So we are associating both scenes as members of the Collection and the Form Scene is the default Scene (the first one associated).
Next, we will switch back to the Form Scene in the main Scene area and edit it. Drag and drop the Form component into the Scene.
|
|
Under the Properties panel of the Form component, you will see the Items section. Open it and add four items by clicking on the + sign.
|
|
Now we will name each label.
|
|
Then we will specify the field names that are going to be passed back to our webserver.
|
|
This filter will be passed to our webserver so we can process the data.
Next, add the Submit button. In order to do that, go to Resources and then drag and drop a .png image into the Scene, this image will act as the Submit button.
|
|
|
|
After you've added the Submit button and positioned it inside the Scene, under it's properties panel set the name and check the interactive option so it will be a clickable object. We will set the name to Submit.
You can of course change the color of the fonts, the size, and customize the scene anyway you like.
|
|
|
|
Under the properties panel of the Form, under the Items tab, check the require checkbox for the User, the Company and the Phone. These fields will be required fields. Set the type for the email field as Email so that Text entry box will be checked for a valid email format. The other will be text.
|
|
You can tell that the required fields are marked with an * so that customers can identify the field must be entered.
|
|
Next we will set up the Form with a target URL to submit the information to. First we will select the Form with the mouse and under its Properties we will click on the Events tab and click on the + sign to add a new event.
|
|
Here we will need to associate the Submit button. First, use the mouse hold down and drag the target sign over the Submit button.
|
|
|
|
Next we will select Post .
|
|
And we will also paste in the URL where we will be sending the information to. Finally, we need to look for a success string. A success string is any particular string that we are going to look for to know that the information was successfully submitted. We will call it SUCCESS but this can be any string that you want as long as this string is available within the HTML page that will be generated once the page is submitted.
|
|
Keep in mind that this URL can be both the webserver as well as a standard HTML page as long as you supply all the required fields for the HTML. And we do support hidden field so if you supply additional field you use almost any pre-existing HTML form.
The last thing that we are going to do in the Form Scene is to associate the actual Form with a unique identifier so we can receive events from it.
Select the Form and click on the Definitions tab in the Properties panel. We will enter Submit Form into the name field. Keep in mind that this name will be the identifier to receive events when this form is inside the Collection. So let's go ahead and copy it.
|
|
Next, we will complete our Success Scene, which is what the customer will see once he submits information.
|
|
We will add a Label component and customize it so it is a simple Success message.
|
|
Now that we've completed our Success Scene and the Form Scene let's switch back to the Collection Scene.
|
|
We can now see the Form inside the Collection since this is the Default Scene, or page1.
|
|
Now create a new event to capture the Submit click. Go to Events, add a new event and paste in the Form Name that we've copied earlier and tell it to go to a specific page from the Next page dropdown, choose Selected page.
|
|
Again hold down the target and select the Success page.
|
|
This completes the association and completes the Form. Let's go ahead and test it.
Switch to the Timelines and from the Toolbox drag the Collection Scene and drop it into the Timeline.
|
|
Double click to load up the properties, type some text into the fields. If we leave the Phone field empty we will get an error message, since it is a required field.
|
|
Before we submit the information to the server, let's take a look at the back end webpage that get's generated from the URL we pasted in. This is nothing more than a standard HTML page that get's generated but we do have a Success string embedded in it.
|
|
The success string can be any string that we've embedded into the webpage and so once our form receives the Success string the form will know that everything was successfully processed by the server and it can go ahead and proceed to the next Success Scene. If the information that was submitted trough the Post doesn't meet the Service criteria you simply don't return a Success string and so the User will not get directed to the Success Scene.
Let's type the Phone number now and click on the Submit button.
|
|
And we are redirected to the Success Scene.
|
|
The Form component and its interactivity function is useful in getting information from customers thus creating a customized info collection portal.
TWITTER COMPONENT V2
INTRO TO THE TWITTER COMPONENT VERSION II
In this chapter we will be discussing the Twitter component. The Twittercomponent allows you to add Twitter messages including the image in the textof the person tweeting directly on your signage screen. This will allow you tokeep your screen updated with fresh content. We support the Twitter componentthrough scenes. We also support a refresh timer so you can set how often thenew tweets will be updated in the screen. And to set this up you will need aTwitter Developer or Application ID. And we will explain to you how to setthis up.
The Twitter component is part of the enterprise edition so you need to installit through the mediaSTORE. Log in to your ENTERPRISE ACCOUNT, switch to themediaSTORE, go to NOT INSTALLED, select TWITTER and click on INSTALL NOW.
|
|
Once you have installed it you will be able to use the component through theSignage Studio. If we log in to the signage studio and switch to COMPONENTS,we can see the TWITTER PLAYER.
|
|
Next we will switch over to the SCENE EDITOR and click on the + sign to add aNEW SCENE.
|
|
We will rename it as Twitter Scene.
|
|
Next, we will switch to COMPONENTS and we will select the TWITTER ITEM.
|
|
Make sure you don't select the TWITTER PLAYER by mistake, the TWITTERPLAYER will be added to the timeline. So, drag the TWITTER ITEM into theScene.
We will drag and drop two TWITTER ITEMS. We will set the first one on theupper left corner to a PROFILE IMAGE, and make that pretty small, and for thetext we will make it bigger.
|
|
|
|
|
|
Next we will go to CAMPAIGNS and add a new CAMPAIGN. So now we have a prettysimple CAMPAIGN set up with the screen divisions. For CHANNEL 0' wewill add the TWITTER PLAYER and double click it to load up its properties.
|
|
|
|
Next we will need to fill this form to make sure that our TWITTER PLAYER isworking properly. The first thing is going to ask us is the CONSUMER KEY andnext is the CONSUMER SECRET KEY.
|
|
You need to actually grab these from Twitter. You need to open a TwitterDeveloper Account which it's free to do and once you do that you get aCONSUMER KEY and CONSUMER SECRET which you will be able to copy and paste itover the form above. Now we will go to dev.twitter.com and we can open a freeaccount or sign in.
|
|
Once you are logged in, you will be able to create a new application. Once youcreate an application, you will have your application ID.
In our example, we logged in to our account and you can see that there is alittle icon on the upper right corner of the page and now we can go in MYAPPLICATIONS, since we already have an application that we have created.
|
|
Once we go to MY APPLICATIONS, you can see that we have an application whichis already set up. To set up an application you simply click on CREATE NEWAPPLICATION. And once you click on CREATE NEW APPLICATION, you will bepresented with this dialog which will basically give you your CONSUMER KEY andyour SECRET KEY.
|
|
|
|
Place the CONSUMER KEY and your SECRET KEY in the correct fields in theStudio.
|
|
Also you need to choose which screen name you want to follow on the screen. Wewill use the CNN scree name. But off course this could be any screen name youwant. Anything that interests you to put on the screen.
|
|
Next we will switch over to SCENES and select our TWITTER SCENE, drag and dropthe scene where it says Drop Scene Here.
|
|
At this point we have bound the TWITTER SCENE to our TWITTER PLAYER component.You can change the interval, you have an interval setting on the right. Youcan also set the slide show if you want to slide from one to the next and alsoyou have the option to remove the slide show and so you will basically bepresented to view just a single latest tweet.
|
|
To preview your work, simply click on the play button, and that will cyclethrough each tweet, in our case every 5 seconds.
|
|
COLLECTION COMPONENT
USING THE COLLECTION COMPONENT
In this Chapter, we will be talking about the Collection component. The collection component can be setup in two modes: Kiosk mode and Slideshow mode. In the Slideshow mode, you can simply drag and drop items and these items can be resources such as video files, images or swf animations, or they can also be scenes you've prebuilt. The Collection is going to cycle from one item to the next. You can setup the duration for all items, or you can set the duration for each item individually.
If you are not necessarily a fan of a visual timeline, you can use the collection simply by dragging and dropping items to it and the Collection will cycle through these items.
The second mode will be the Kiosk mode. With the Kiosk mode, you can actually set the Collection to accept touch, or mouse clicks, and with it you can direct each click to a particular scene or resource. Therefore, you can add interactivity to your presentation using the Collection.
The Collection will allow you to build a presentation and play it on mobile devices, or on tablets such as the iPad or an Android device. We will be adding a lot of functionality to the collection component in the upcoming releases.
USING THE SLIDESHOW MODE
Navigate to the Timeline in the Campaign's area, and under the Components, you will see the Collection component. Drag and drop the component into the Timeline, and double click on it to see its properties. The default duration is actually 10 seconds. We will change the default duration to 3 seconds.
|
|
|
|
Next, we will click on the Items tab, and drop a few Resources in the area from the Resources area.
|
|
|
|
Once we do this, we can see how the Collection cycles through the images. We can also set a specific duration for a particular image.
|
|
In our example, we've set the duration of 10 seconds for the wrap product, and this means the image of this product will remain visible for 10 seconds, and then the slide will continue, showing the other images.
The Collection, using the slideshow, is just a simple way to cycle through items. The great thing is: we can also mix some scenes between the items listed. Let's go ahead and add a scene now, next to our images in the Items area.
|
|
|
|
You will notice the slideshow plays the Scene just like the rest of the items listed.
USING THE KIOSK MODE
Next, we will discuss more about advanced functionality of the Collection; which is the Kiosk mode. With the Kiosk mode you can actually use your finger or mouse clicks to interact with the Collection, and have it switched to other Items or other Scenes.
First, navigate to the Scenes editor.
|
|
For a starter, we will create four Scenes. Our Collection will be location finder Kiosk.
|
|
In the Map Scene, we will be adding a Map image.
|
|
In the Library scene, we will add some more information using a Label and the Rich text component --just some basic information.
|
|
In the About Scene, we will also be adding some informational text.
|
|
Next, switch back to the Collection scene and add the Collection component to it.
|
|
With the Collection component selected, click on the Collection tab of its properties panel and select the Kiosk mode.
|
|
Under the Items tab, we will add the three scenes we've created.
|
|
As soon as we save the presentation, we can see the Collection showing the first Scene in the Items list.
|
|
Next, we will add some text above the map using the Label tool.
|
|
What we would like to setup now is: when a person touches the About the Library text above the map, it will actually show us the About Scene we've created. In order to do this, first we will make the Label interactive by going to the Definitions tab while selecting.
|
|
|
|
Next, we will switch back to the Collection, and access the Collection tab. We will rename each Scene / Page.
|
|
Now, what we need to do is associate a touch event with the About label. So we will switch to Events tab and click on the + sign to add a new event. Notice that we have a target sign.
|
|
|
|
Drag the target icon over the About label.
|
|
You will see that as soon as you let go of your mouse, this event will be associated with the label.
|
|
|
|
Next, we will define a command or action, this way we know what will happen once the user clicks on it. So select from the dropdown Selected page
|
|
Now, just like before, we are going to hold the mouse and drag the target icon. And as soon as we do this, you will see the Item tab open up, and we can select a Page or Scene. We will select the About Scene.
|
|
|
|
Now, to test out Collection, go to the Timeline and drop the Collection Scene onto the Timeline, double click on the top to see a preview and click on the text or the label. You will notice this will trigger the About scene to appear on view.
|
|
|
|
Next, we will setup the Map, when someone touches the Library on the map; he or she can see the operating hours. So we will switch to the map scene and drag a small image on the map from the Resources area. Also, we will make the image interactive and rename it.
|
|
|
|
Next, we will switch back to our collection Scene, and we will associate another event for the Collection that is for the Library button. But instead of using the Target icon, we will manually type the name of our image.
|
|
Then, set the selected page option and associate the Library Scene.
|
|
|
|
Now, as soon as we click on the Library button, we can access some information about the Library --like the Opening and Closing hours.
|
|
In our example we only used a selected page, but of course, you can also use the first page, or the other options.
|
|
If you want to find out the order of the pages, just switch to the Items area and see the order of the pages.
Another thing we should mention is: you can also create nested collections. So if we switch back to the library scene, we can drop another collection component into the collection scene and we can create a navigation system within this page. As a result, the system can really become navigable. Just remember, the simpler mode of the Collection in the Slideshow mode, and the Kiosk mode, the easier it will allow you to add interactivity to your presentation.
EMERGENCY / ALERTING COMPONENT
INTRO TO THE NOTIFICATION SYSTEM
In this Chapter, we will explain to you how to use the emergency features.Using the emergency features, you can trigger events outside the SignageStudio. For example, from a web interface you can have these eventspromulgate throughout your signage screen. For instance, universities wouldintegrate their existing emergency system with the digital signage. Let'ssay, for example, there's a fire, and all the screens or the specifiedscreens could actually go ahead and display a particular message. This wouldprove invaluable, for example, to evacuate the building with an arrowdesignating where to go to get to the exit signs. In this Chapter, we willexplain how to configure and trigger these types of events.
Before we begin, let us summarize quickly what we will discuss. We will startby first creating a simple user underneath an enterprise account. This userwill have the privileges to trigger only this one type of event.
Next, we will show you how to configure the campaign with events. You canselect particular timers for specific events. We will also touch onJavaScript and how you can configure a web interface using JavaScript orJQuery. You can actually execute these events from web interface. This iscool, because for example, if you want to trigger these events from mobiledevices, you can do it. You do not necessarily have to be in front of acomputer to be able to trigger this emergency and alert event. Also, throughthe help of JavaScript, you'll be able to send events to a particularscreen, you'll be able to multicast from multiple screens, or you'll beable to send events to all your screens.
In addition, we'll touch on the topic of web services, where you canactually trigger not only an event within our system, but you can actuallysend the commands to our remote system, on through to our web interface orthrough HTTP call. Moreover, to summarize the capabilities of the emergencyfeature, you can initiate on your tablet or mobile device, using very simpleJavaScript commands, you can issue an emergency alert, and this event willpropagate through the internet. It will go to the selected screens and showthe selected time you configured. Now, if you have a private server, this isall accomplished within your infrastructure as well.
|
|
In addition, you can also call a web service. For example, if you have anexisting alerting system, this web service can notify the alerting system.Then the alerting system can turn on the siren or whatever that particularalerting system uses. Too, because we support programmatic triggering, youdon't necessarily have to trigger your software through a mobile device,you can actually have your existing alerting system do the triggering everytime a change occurs with the appropriate message.
|
|
Here we logged into an enterprise account. You can see we have an accountcalled "demo business". It has a single user called "demobus".This user has all the privileges like an admin account, and it can do anythingwithin the system.
|
|
|
|
However, we're also going to want to setup an account with very limitedprivileges, an account that actually only has one set of privileges, whichwill be to send stations commands. Before we do this, let's switch to"Privileges" then go to "Campaigns" and then make sure ourdefault privileges are also setup with campaign events.
|
|
To review, "demobus" has the privileges which can do everythingincluding the event system. Next we'll setup an account for a limiteduser. We are going to click on the plus sign, we'll call this user"alert", and we'll give it a password and click on "OK".
|
|
You can see this by default. This user has all the privileges. This isn'tactually what you want.
|
|
Therefore, we'll go back to "Privileges". We are going to setup newprivileges. We're going to call this "limited".In this case, we'reactually going to remove all the check-boxes. We do this, becausethisparticular user (or any user for that matter), that has limited privilegeswill not be able to do anything in this system.
|
|
|
|
However,if we go under "Stations", under "Advance..." we'regoing to give the limited privilege and set the ability to send commands. Keepin mind, this is the only thing the limited privilege set can do.
|
|
Next, switch back to our users and now switch our "alert" user to havelimited privileges and save.
|
|
The reason we want to have a user with such limited privileges is because inour particular case, in our demo, we're going to create a JavaScript appwhich is going to reside on the web, and anybody can view the user and seethe password. Of course, in an alerting system, this particular web page willbe within a web site that nobody can access.You can protect the page with auser and password, for example, and you can run this HTML page on your localdesktop, or you can run it on a private server. Therefore, we don'tnecessarily have to create a limited user, but in our case this is anotherlayer of security to create a user with very limited privileges. Again, we dothis, because all this user needs to do is send limited commands. However,it's up to you how you want to set it up. If you have a private serverwithin your local infrastructure, you don't necessarily need to follow thesame pattern. Therefore, this completes the user configuration. Now let uslaunch the studio as the admin, as a person with full privileges.
|
|
Next, we will create a new Campaign.This is our "Demo Campaign".
|
|
Here we only have a regular standard campaign (nothing special about it).
|
|
However, we're going to add two more timelines. Our second timeline,we'll call "Earthquake" and we'll do a full screen.The thirdtimeline, we'll call it "Fire" and do a full screen.
|
|
Consequently, we have our regular standard timeline that's going toplayback when everything is good and everything is calm. But in case of anemergency, we'll be able to switch into an "Earthquake" or into a"Fire" timeline.
Our first timeline has a very simple presentation with a food menu board andsome RSS.
|
|
Our second timeline actually has an emergency text and this will be our"Earthquake".
|
|
And then we have our "Fire" timeline which is a full screen message withan arrow.
|
|
Next, we'll select the "Demo Campaign" by clicking on it to uploadits properties and then we'll click on the Event's tab.
|
|
Remember, we've enabled the events module through privileges.This is whywe see this tab in our example. Click on the plus (+) sign to add a new event.
|
|
Here we will create the first event.You can give it any name. We will callthis the "fire" event, then select a timeline.In this case, we'regoing to select a particular timeline, our "Fire" timeline triggered bythis event.
|
|
We will add another event called "earthquake" and select the"Earthquake" timeline.
|
|
In addition, for the resume, we're going to setup a "Manuallyresume", meaning this time it will continue indefinitely until we resumeback to our normal playback.
|
|
With this configuration the timelines will stay like this forever until weswitch back to our normal "Timeline 1". Next, we're going to add onemore event and this will be our "normal" event;since it's going to goback to normal playback whenever we trigger this event. We will also select"Resume presentation" under Command. This will force your presentationback to your normal sequencer.
|
|
Speaking of sequencer, now that we have setup our three events, let's go toour "Sequences" and make sure you take out the "Earthquake" andthe "Fire" timelines. Since under normal playback, you actually do notwant to play these timeline. You want to play these timelines in case of anevent or an emergency.
|
|
As a side note, you should know the names of the events could really be anystring. For our purposes, we simply picked "fire" and"earthquake" which were identical to our timelines.But as you can seefor "normal", I picked a different string which does not really match"Timeline 1".
|
|
To clarify, these events can be anything you want.We will show you later howto associate these strings with an actual trigger of the event. Next,we'll add one more event. For our last event, what we would like to do incase of a fire, and only in case of a fire, is to call the fire department.Therfore, under the "Select Command" we choose "Post url" and thenwe can paste here whatever we like.
|
|
To continue, we will paste a url(in this case we just put"mydomain.com/?call911"). Of course, you'll have to go and developyour own script which does whatever you want. If you have an existingalerting system, it can receive API calls.You can use your web servers toconnect through the API of the alert system and turn on sirens and whateveryour alerting system supports. Nevertheless, by using event system, in case ofa fire, you are going to trigger two events, these two events right here, the"fire" and the "fire".
|
|
As a result, it's going to change the timeline into "Fire" and atthe same time our "Post url" calls 911 or whatever it is you choose todo. And you can keep on adding as many events as you want. When you trigger aparticular string, all of the matched events will execute.
We've done everything we needed. As for the studio configuration as youcan see, our player is running.
|
|
Next, let's go and use the JavaScript or the browser side to actuallycontrol the presentation or control the events using JavaScript. In ourexample, we will open our editor. Right here at the editor you can see we havesome JavaScript, really simple, nothing fancy.
|
|
For that reason, we can basically see we have three buttons right here,button 1, and 2 and three. Button 1 is "fire", button 2 is"earthquake", button 3 is our "resume".
|
|
You can download the source code from our website through this:"http://www.signage.me/alertsample.js". The most important part of thepage is the include script. This is actually the source code of thelibrary.You just need to make sure to include the library so you can actuallytake advantage of the remote commands or the remote events.
|
|
Now that we have defined our three buttons, we have three functions and eachfunction will simply send a command.You can see right here that we have aserver address.
|
|
In addition, if you're not using your private server, you are using ourcloud, you will just put "galaxy.signage.me", which is our cloudsolution (regardless whether it is enterprise or free). Then you'llactually use the username. Remember we created a very limited user withusername of "alert" and we gave it a password of "123123", andthis user only has send command privileges. Therefore, you'll simply putthe username and the password, and you'll actually need to put last --theevent.
|
|
To proceed, the first button will be the "fire" then the"earthquake" which is, again, just a string we picked in thestudio.The "normal" will go back to normal playback.
|
|
One more thing you must pay attention to is the fourth argument, which in ourcase is "-1" (negative one).
|
|
Negative one (-1) means broadcast or in words, send this command, send thisevent "fire" to every single station, to every single screen in mynetwork. Now, this is not necessarily a bad thing, because if you have setup acampaign, and that campaign is not listening for events or even if it islistening for events, but it's not listening for specifically a string orthe "fire" event, nothing is going to happen. Therefore, this particularstation, running that specific campaign, is not going to get affected.
Consequently, -1 is not necessarily a bad thing, it doesn't mean you'reactually going to destroy a whole network if you're sending a broadcast.Inmost cases, you're only going to set specific stations with an event systemand the -1 will affect only those stations which are running specificcampaigns that we have configured with events, that are listening to the"fire" string. However, sometimes you may actually like to targetspecific stations. In our example, if we go back to the "Campaign",you'll notice we put an arrow right under the "FIRE" sign, meaning,people are going to walk to a specific direction, for the EXIT.
|
|
Obviously, if you have many screens configured and scattered around yourbuilding, you'll have arrows in different directions and may give messages,maybe in some arrows you'd like them to take the stairs and in some areasyou'd like them to take the fire escape. Then perhaps, you'll need toconfigure each station a little differently. What you can do is targetspecific stations. Instead of putting -1, you could actually put a stationID. You can get the Station ID by going to the "Stations" area in theSignage Studio.
|
|
The station ID is a unique identifier of that particular screen or thatparticular station that is running right now. Therefore, the ID for thisparticular station is "43" and so we will target station "43" forthe "fire".
|
|
In case of a fire, we're not going to target the entire network; we areonly going to target station "43". What you can do for example, is copyand paste this line and target specific machines. You can see in case of afire, I would like to go and target a specific machine string, particularcomputers, or signage players.
|
|
But if there is, for example, an earthquake, let's say we want to targetall the players, you can go -1 (which is everyone).
|
|
At this point, we're looking at the player.You can see our player'sworking fine and everything is working normally.
|
|
At this instant, we'll bring over the player, the HTML page. This couldbe inside a mobile device or an iPad or anywhere you want; could be withinthe intranet or internet, it's completely up to you.
|
|
We will click on the "Fire" button and you'll notice as soon as Iclicked on "Fire", the presentation changed into "Fire".This willcontinue indefinitely, because that's the way we set it up in the Signagestudio.
|
|
Now, if we switch back to "Resume", again we see normal playback, but ifwe switch into "Earthquake", the presentation changes.
|
|
We sincerely hope we don't have fire and earthquake at the same time, butif we do, we are prepared; go back to "Resume". Thus you can see thefeature is very simple to use. It gives you a nice way to switch betweendifferent timelines.
As a quick last note, if you do not want to run this to JavaScript and youactually want to run this through a backend like PHP or C Sharp, that issimple.Look at our source code and you can simply convert the ".js" to".php", to backend. It's uncomplicated and more secure.You candefinitely do it. Remember, when we configured this, anytime we have switchedinto fire by pressing the "Fire" button we would post a url to thesecond event, therefor the pull to your url is working as well.
REMOTETOUCH COMPONENT
THE REMOTE TOUCH WITH MOBILE COMPONENT
In this Chapter, we will discuss remote touch. Remote touch is actually an incredible feature, because it allows you to connect a digital signage with your audience's mobile devices. For instance, if a customer walks into a store, he or she can pull out their mobile device, like an iPhone or an android or even an iPad, and as long as the device is online, he or she can take their device, point it at the screen, and scan a QR code. As soon as he or she scans a QR code, the phone or whatever device he or she is holding can bind to that screen, and he or she can start managing that screen.
In other words, he or she can select which product to see, he or she can flip through items, and he or she can essentially change the presentation through their handheld device.
Another great feature of remote touch is the ability for you to create completely customizable HTML and JavaScript pages. The HTML and JavaScript pages will load on your customer's handheld devices. For example, if you want to create a JavaScript slider, if you want to create drop-down menus, or whatever kind of navigation system you want to create you can do so on your customer's handheld devices. That is to say, this would be the page, which opens when they scan the QR. These pages are created via HTML, which are very simple to create. You don't have to be a programmer to create simple HTML pages, you don't need any JavaScript if you don't want to, and you can simply take this HTML page, upload it to a web hosting company like "Go Daddy" and simply link to it. This allows you to create a fully customizable experience for your audience.
By the end of this Chapter, you will be able to deploy Digital Signage in your business and better yet, you will be able to have your customer's interact with your signage through their mobile devices. Let us begin.
The first thing we need to do is log into your enterprise account. This feature is the part of the enterprise edition, and we need to enable the feature for our customers. What we need to do is go to mediaSTORE" and make sure that the QR code is part of the installed components.
|
|
Next, we switch back to users. We want to create a user that has no permissions and no privileges except a single permission or a simple privilege, which is to actually send a command. This is for security reasons. If, for example, somebody finds a user name or a password of that particular user, he or she would not be able to do anything since we will use that particular user as the account that is actually going to send a JavaScript command. For now, just know that the first thing we need to do is setup a limited user that has no special privileges except to send commands. We will call it demo_send" since this user will be able to send commands. We'll give it a simple password 123123" and click on OK.
|
|
Then we will switch to Privileges, add a new set of privileges, and call this limited", while making sure we take all the privileges off; therefore, limited will not be able to do anything.
|
|
The only single feature or privilege we are going to enable limited is the ability to send commands, under Stations.
|
|
This is the only single privilege limited can do. After we save the work, we will switch to privilege, which is our default "privilege" set, and we will make sure we enable the event system. Under Campaigns, make sure you bold the event's system.
|
|
Remember, this setting is NOT for the limited privileges. This is for the full privilege set.
To recap, for our default privilege system with full control, we have enabled the event system, and we created the limited privilege set, which has no special privilege within the system (other than to send commands).
Next, we'll switch back to users, select our demo_send" user that is not going to have much control or much power, and we are going to make sure to give it the limited privilege set.Therefore, this particular user can only do whatever we allow him to do, which is to send commands. Click on save to complete the action.
|
|
By now, we are finished with the enterprise studio. We can sign-in to the SignageStudio. Here is the SignageSstudio. We are going to login with the standard user that has all the privileges.
|
|
We have a campaign called "Campaign", and we will use this campaign to create our configuration for our remote touch.
|
|
The first thing we need do is decide which content or which timelines we want to expose to our audience. To accomplish this, we will create several timelines and we will allow our visitors the freedom to select these timelines through product selection using a JavaScript slider. We will call the first timeline "RC helis" and just do a full screen. We will add another one called "RC boats", and just a full screen. We will add another one called "model trains", and the last one we call, "RC planes".
|
|
Therefore, we have a default timeline, which is going to play on a regular basis. Yet, when a person scans a QR code, he or she will be able to select particular timelines through a JavaScript slide. In addition, as soon as the person scans the QR, we also present to him or her the welcome screen. Hence, we will setup a timeline for that too, and we will call it "Welcome".
|
|
To recap, we have the general presentation "Timeline" that is going to run on regular basis. Then we have four timelines in which our visitor is going to be able to select which is going to be "RC helis", "RC boats", "trains" and "plains". As soon as he or she scans the QR, before he or she even makes a selection sequence and make sure that we remove all the timelines from the regular playback. We do this because, on regular playback, we don't want any of these timelines to play. We simply want the regular timeline to play, but none of the RC or the welcome timelines.
|
|
This is fairly straightforward. We are going to be playing timeline one repeatedly in a continuous mode until a selection is made through QR. In our demo, this will be the default timeline. It is going to play if nothing is selected through QR.
|
|
Then we will add full screen on "RC boats", only an image on the "model trains", again just a full screen image and the welcome timeline.
|
|
|
|
|
|
Therefore, the welcome timeline is the timeline that is going to play as soon as a customer scans a QR. Next, to configure the collection for the "RC helis", we first double click the collection, go to the properties and select Kiosk not Slideshow.
|
|
Next, we go to items and we start dragging and dropping all the images that we want to become part of the collection. We want a total of four images.
|
|
Next, we will switch to events under the collection, and we will add two events. You can name these events anything you want, but you need to remember the name, because you actually have to reference these names later when we build the HTML page. We will add the first event, "next", and the second one "previous". As a result, this collection is going to be listening to the string event "next" and it is going to be listening to the "previous" event. If it receives the "next" event, it's going to move to the next item in collection, which is off course, the next image. In addition, we are going to set to the previous as well. Therefore, it is going to flip through different products and images that we have under item's tab.
|
|
Now that our collection is setup for our "RC helis" timeline, let's go and setup the same collection for "RC cars". Again, set it to Kiosk; look for some cars images, and add the two events, "next" and "previous". Therefore, the collections, "RC cars" and "RC helis" collections are listening for the same string events, "next" and "previous". The commands they are going to execute upon this event, again, they are going to be in next and previous. This will be a good time to save our work, click on file, and save.
Now, let us go ahead and switch to our main timeline. You will notice if we select the screen division configuration, we did not do anything on the channel zero.
|
|
Moving along, if we click on PLAY, you will notice everything is setup and we have an image and some RSS. Notice we have no content on the right channel, on the blue channel.
|
|
We did this on purpose, because we wanted to show you how to configure the QR. Next, switch to components, select the QR component, then drag and drop it to channel zero.
|
|
You will double click the QR code component to load its properties. Notice we are presented with few options. You can, of course, type a text. This will be standard vanilla QR --nothing special about it. It's going to display anything on the screen we put in here.
|
|
However, we can choose a couple more options. We have the ability to go from the url. This is actually a powerful concept.
|
|
|
|
However, this is not what we are going to do. We are going to use the remote touch option.
|
|
Notice when we switch to Remote Touch by default we are already getting a url that is going to be used. This is a demo url we provide for you. It is actually a nice update you can use for just a demo to enable you to learn about the system and gives you an opportunity to play around with it. Then once you are done playing with the system, you actually want to deploy it.
At this point, you go and provide your own url and build your own HTML page. We will show you how to do this in a second. For now, we are going to leave everything as a default.
Next, we need to provide the user name and password. This will be the limited user name and the limited password we created earlier. Remember earlier we created a user named called demo_send", we are now going to put demo_send" username and the password 123123" we created earlier during the beginning of this Chapter.
|
|
Remember, this is the user that cannot do much except send commands. Now to finalize our work, we have to actually configure the campaign itself to support the QR event. Therefore, we will switch to our campaign, we will select our campaign, which is just called "campaign", select the events tab in the Properties panel and we will go and add events right here using the plus (+)sign just like before.
|
|
You can name these events anything you want, but remember, you must know the event's names. You need to remember the event names, because you will need to reference these strings later in the JavaScript and in the HTML file. Let's add four events; event for timeline one, event for timeline two, for timeline three, and for timeline four.
|
|
Next, we need to choose what is going to happen once this event is triggered. For event 1, what we will do is select timeline and we will select the "RC helis". For timeline 2, we will select our "boats", and for timeline 3, we will select our "trains". Finally, for timeline 4 we will select our cars.
|
|
Of course, this is completely up to you. You can configure this any way you like. Now we will add another event. We will name this "event welcome", and this will trigger as soon as somebody scans the QR. We will set this as our welcome timeline.
|
|
Now, we will add one last event and call it "exitButton" event. That will give the customer the option to exit the presentation if he like. And if he does exit we are not going to select the timeline but it will resume the normal presentation which in our case is going to be the timeline highlighted below.
|
|
We have set up everything we needed, and everything is ready to go. We have six events, we have four events for actual specific timeline selection, we have the event for the welcome, which is going to trigger as soon as somebody scans the QR code on the screen, and we have an event for the exit if the customer decides he or she wants to exit. Therefore, normal presentation is going to resume in that case. Before we test it, we want to cover one more thing, and that is the last option.
|
|
As you can see, the option is by default set to auto and resume. This means if a customer selects, for example, the "RC helis", this timeline is set to a one-minute event, which means the timeline is going to play for one minute. Once it's over it is going to go back to the regular sequence, which is just a single timeline --our default timeline. You also have the option to set the manual resume. This would come into play if you have additional buttons the customer can navigate.
|
|
For example, if you have a menu or some kind of navigation system, the manual resume is used to navigate from one page to the next page. Nevertheless, by default, if you set the auto resume it is automatically going to play the one timeline "RC helis" for one minute. Then when that is over it is going to go back to the regular timeline. This gives other customers an opportunity to control the screen. Next, we have the presentation running; you can see the important part of it, which is the QR code.
|
|
Now, to move on with our demo, we are going to take a cell phone and scan the QR code. As soon as we automatically scan the QR with the phone, we receive the welcome screen.
|
|
For our demo, we will use a browser window. You see this exact thing on a mobile phone, the same you see on an iPhone, and the exact thing you will see on an android.
|
|
What you see in the image above is a mobile device. We can make some selection and you can slide through products. If we take the mouse, or the finger, obviously, if this was a phone and we select a particular product, then look what happens.
|
|
It switched to the helicopter timeline on the media player's screen. We can go and select a different product, which is going to be the boats. Again with your finger on the phone, select it and it switches over to the next timeline.
|
|
To proceed, you can see our timelines switching is working beautifully. You will also notice right on the banner that we have the previous and the next buttons.
|
|
That is where the collection comes into play. Therefore, we will first select the helicopters and then click on next. You can see now that we can actually flip through the collection of the actual product.
|
|
|
|
Again, we are accomplishing this from a cellphone. This is powerful. Customers can do the same thing. If we switch over to boats and click on next, nothing will happen, because we did not setup a collection for the boats. We only setup a collection on the "helis" and on the "RC cars". Remember, once you switch to a product you have to select it with your finger and then use the collection, next and previous buttons. Additionally, we added the exit button.
|
|
Keep in mind; we made an event for that as well. Therefore, as soon as we click on that exit button, we get, thank you for using remote touch. You will notice the presentation goes back to default timeline. We then click on OK, and then we are redirected to the homepage. All this can easily be figured in JavaScript. We will show you this further progression in this Chapter.
|
|
|
|
Note that every time the timeline loads, even if you stop the player and restart it, what happens is QR regenerates. It has unique identifiers for both the screen running, and a unique identifier making sure this QR was never previously generated. This allows your customers to take control of the screen and make sure no one else can take control of the screen at the same time. For example, if you go ahead and scan the QR you would receive dedicated control over the screen and no other customer in the store would be able to get access to the same screen at the same time. No other customer would interfere with your work. This is an intelligent, completely transparent system. You do not need to configure any of it. It comes embedded inside the QR itself. In addition, if you have multiple screens in your store, the QR is smart enough to embed the screen ID. Again, you can have multiple QR's completely transparent. Consider the advantages; you have nothing you must configure. Yet customers can control screen A while other customers can control screen B using the same QR, the same timeline.
Thus far, we showed you how to configure the enterprise studio, adding the QR component, and demonstrated to you how to configure the limited account. We also showed you how to setup signage studio with both the remote touch and the collection, and we showed you the presentation and how it actually works as it is controlling from different mobile devices. However, there is still one missing part and that is the most exciting part, which is the front user interface, the user that interacts with JavaScript or the HTML. Consequently, next we will show you the last part of this Chapter. With these tools, you will be able to simply follow same steps and deploy remote touch in your business. Now we are looking at the file that actually loaded on the client's site or the mobile device. This is the file the customer is able to slide through when he or she is sliding through different images of the helicopters and the boats.
|
|
In our demo, the source code is hosted on our server. However, it doesn't have to be because, remember, if we go back to the signage studio you see you can use different addresses.
|
|
You can use our source code for demo purposes, to play around with it, and to experience the system for yourself. Once you are ready to deploy --use this copy of the file and create your own code. We will explain to you how to do this too, and you can host it on Go Daddy and grab it from there and then. Your customer's can have completely different JavaScript and HTML file. They can have a different navigation system, different menu system, they can order food, and they can do everything and anything you want through the mobile device. You can simply create it through the HTML or JavaScript. Let us talk about our demo file and see how it is constructed.
The first portion of the file is mostly CSS and that is just presentational and layout. Therefore, you really do not need to worry about it too much, nothing that you need to concern yourself with, because you created your own file. Consequently, this is simply all layouts.
|
|
One important file is Jquery.You need to make sure you have JQuery 1.4 or newer version loaded. You can grab JQuery from everywhere online and you can also point to Google's repository using


